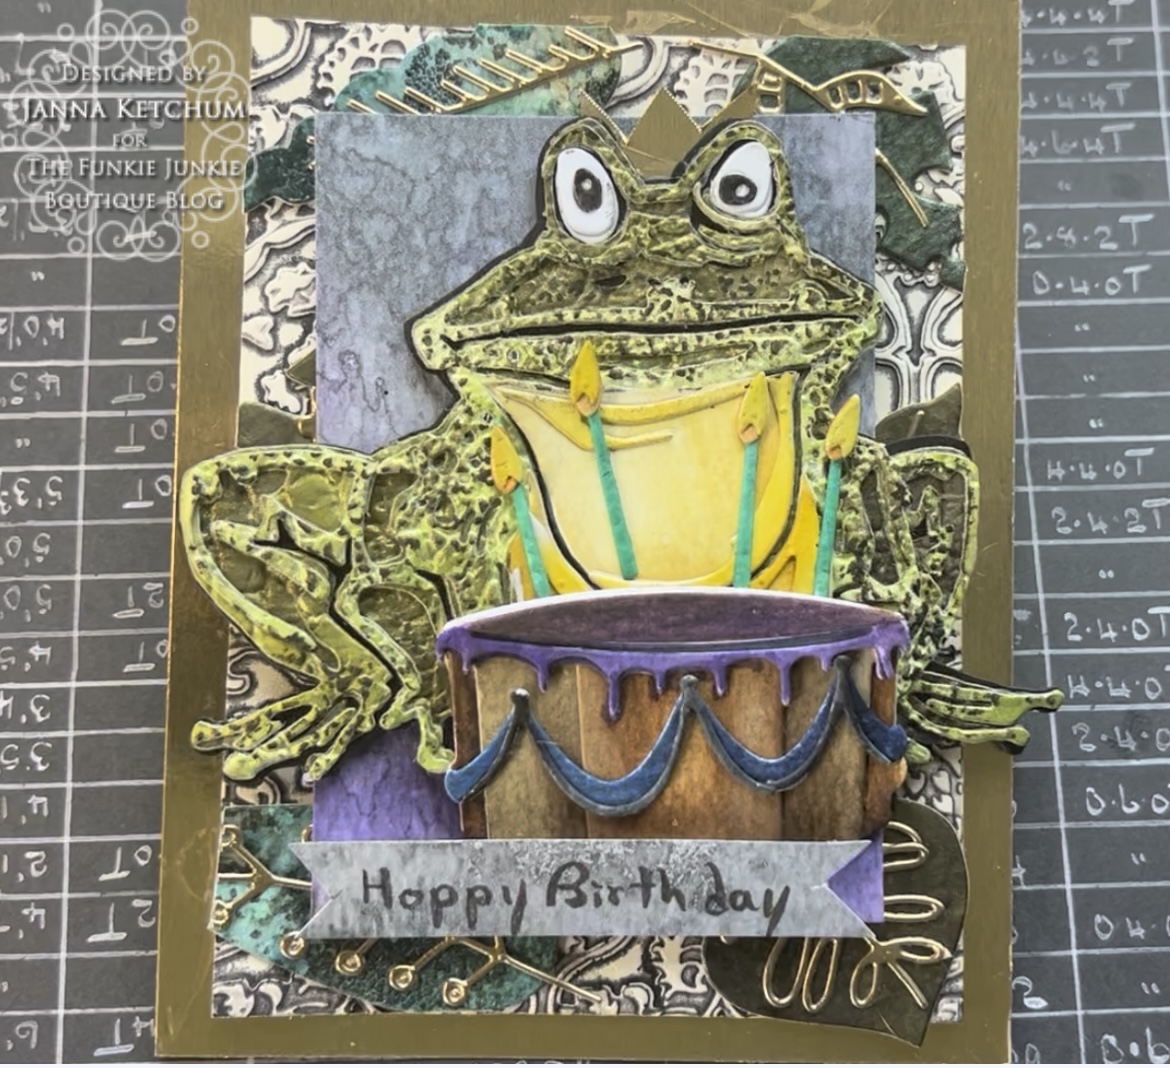
This week at TFJB Inspiration Ave blog we are creating to the theme of Cut it Out! featuring Tim Holtz Sizzix release. For this card I want to feature the new Tim Holtz embossing 3D folder reptile and die set layered dots. I’m going to be pairing these two new Sizzix products with a couple of old favourites, Myron, and Colorize Celebrate.
For process video click here.
Supplies used: Distress Mica Spray Stains Decayed, Wicked Elixir, Bally Branch, and Specimen, Distress ink Fossilized Amber, Distress Crayon Walnut Stain, Sizzix 3D embossing folder Reptile, Embossing Folder Tapestry, Myron, Colorize Die Set, and Celebrate Colorize Die Set, Distress Seasonal Halloween Crayons 2023, Distress Watercolor Paper, Metallic Kraft Stock, Mixed Media Cardstock
This week over at the craft, Connor is very exciting. I finally have got my hands on the new seasonal Tim Holtz Distress Crayons and Mica Spray Stains. I absolutely love these new colours and these are going to be a fantastic collection to the seasonal colors.
So before we dive right into our card making project, I just wanted to take a moment and swatch out the brand new crayons. Check out the colours down below. They are so vibrant and beautiful and they look amazing on light or dark cardstock.
To start our card, we are going to be focussing on creating our centerpiece, which in this case is going to feature Myron from the Tim Holtz Sizzix colorize die set. For the foundation, I am going to be using Distress Watercolor Cardstock, and then altering it with some of the new seasonal colors.
Myron is put together in multiple layers of colour so I wanted to start with some foundations of green. First foundational level I’m going to be using Specimen along with Holly Branch for the first layer. For the next layer I used Wicked Elixir and Holly Branch and for the last layer, I used Holly Branch on its own. Then, for one of the background layers on the card, I use a combination of Ominous Twilight and Phantom Mist. These backgrounds were spritzed first with water then Distress Sprays were layered on top and dried with the Ranger heat tool.
Next, I ran the green layers through the new embossing folder, Reptile, to add some texture.
For the rest of the pieces that go to Myron, I die cut them on some more Watercolour Cardstock, and then coloured the pieces with some Distress Reinkers and a fine detailer water brush. The colours that I used included Fossilized Amber, Mustard Seed, and Black Soot.
After all the parts and pieces were colored, and have been assembled some together. To make assembly easy all of the Watercolour Cardstock pieces had been coded with double-sided, sticky tape I find this is the easiest way to assemble large die cut ensembles. With all the pieces assembled I then wanted to draw attention to the fantastic texture of the reptile folder that I used on many of the pieces. To do this, I added a bit of Distress Walnut Stain Crayon over the top. As an added bonus to the Myron die cut, I also hand cut a small golden crown for him.
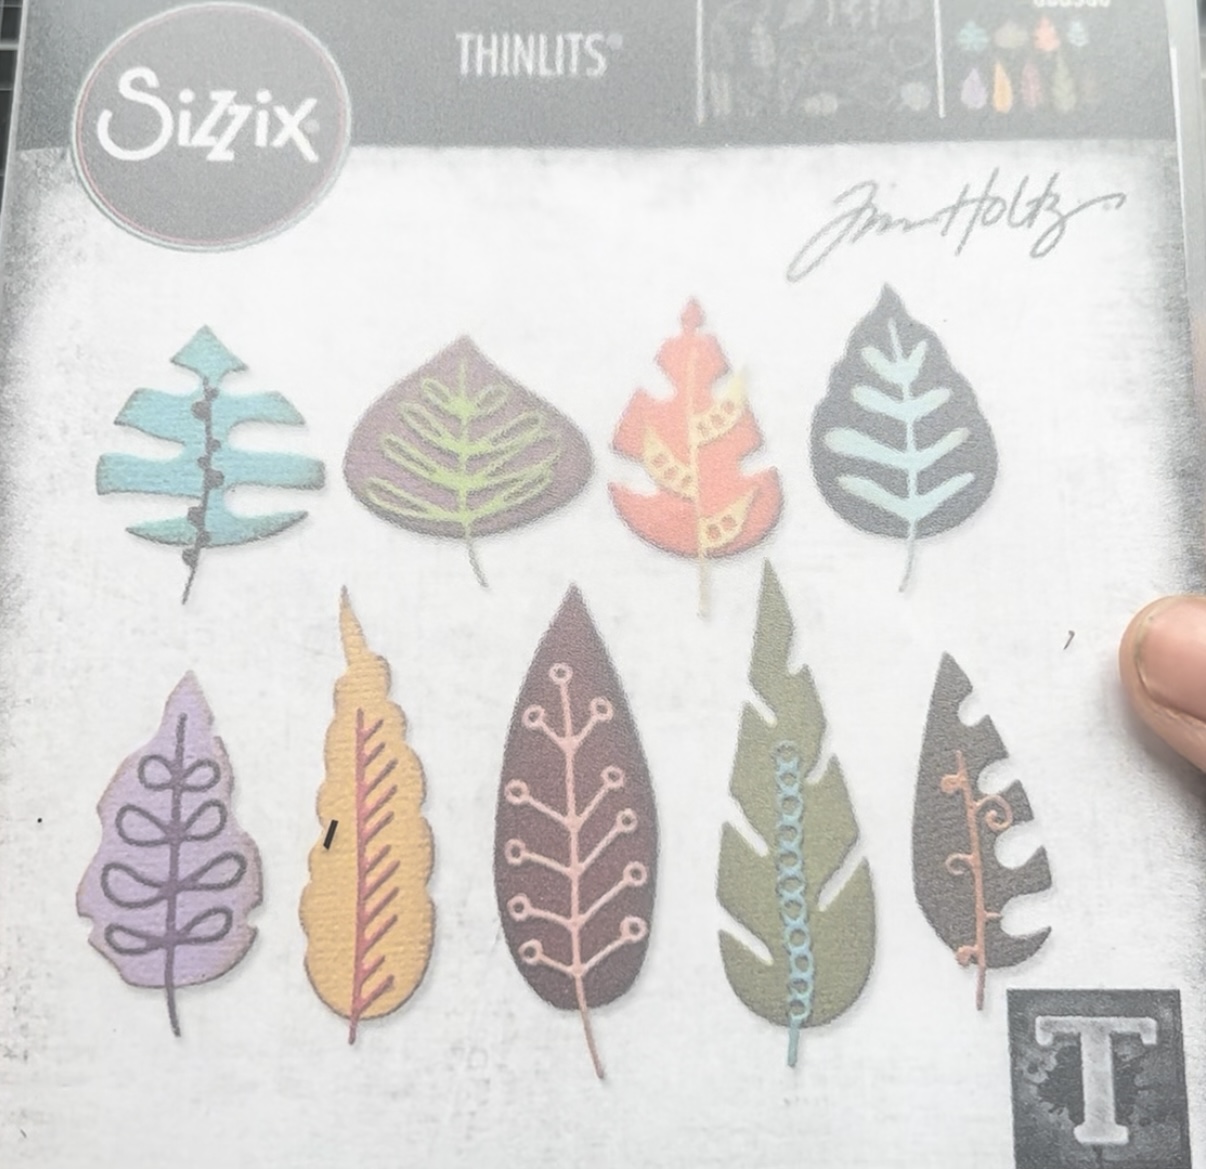
With our focal point complete it is time to start creating some little embellishments. Here we’re going to start creating with the new Sizzix Tim Holtz die set Artsy Leaves.
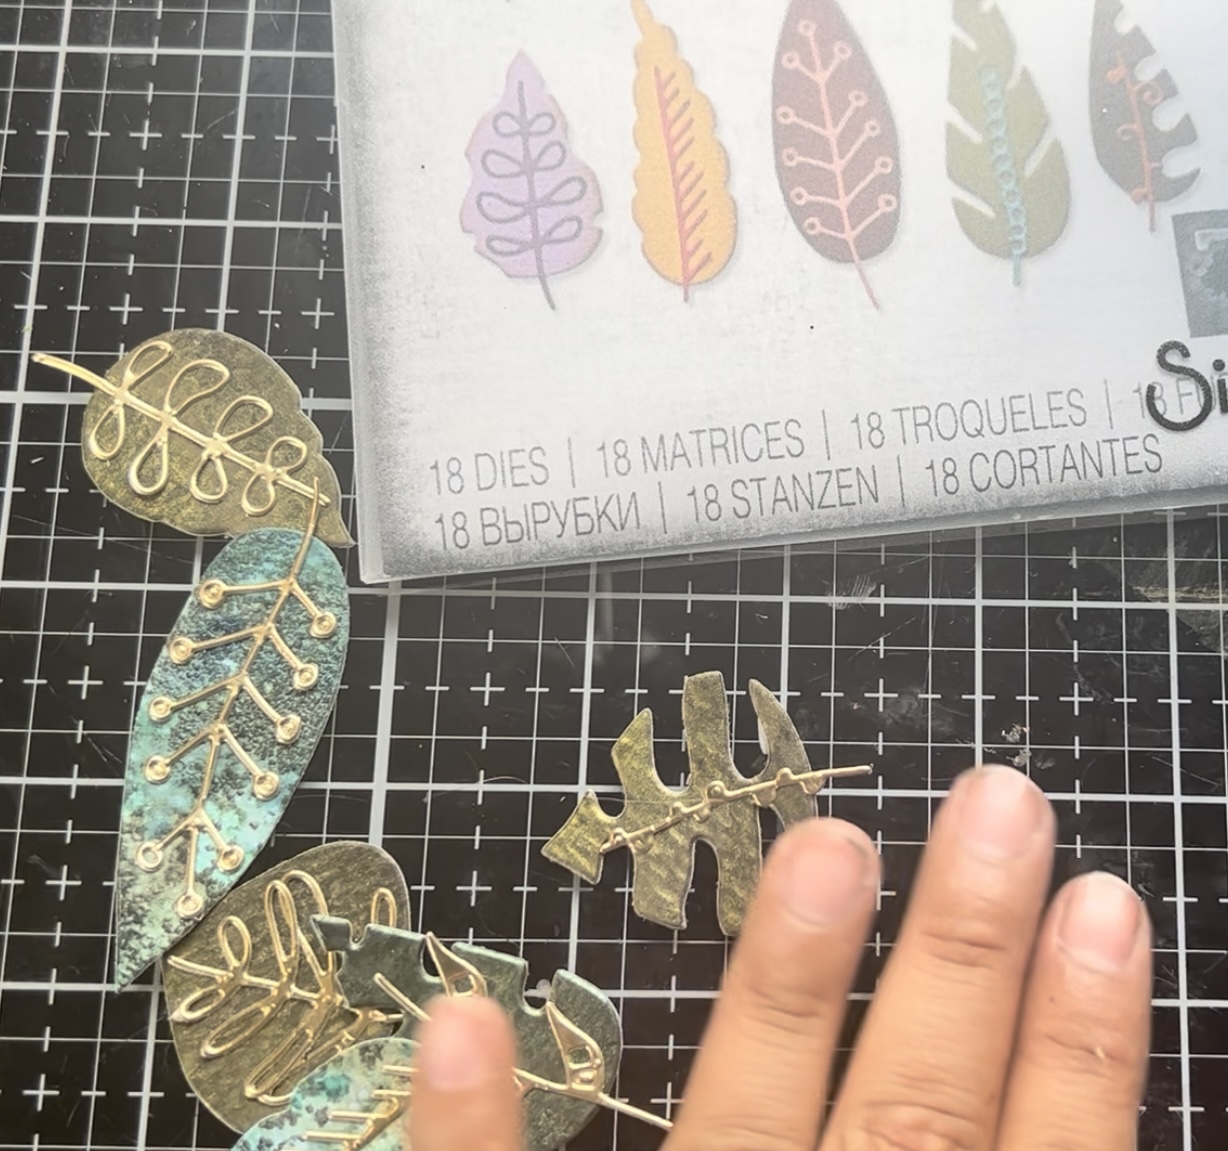
For our tea leaves, I cut up a bunch of scraps from my scrap bin. Then for the fine details on the leaves I die cut the pieces out of some metallic gold kraft stock.
Next, we are going to layer up the background and foundation of our card. On the base layer, we have some metallic gold kraft stock cut at 4 1/2 x 4 1/4“ for the next layer we have a background of embossed Tapestry that was cut at 5“ x 3 3/4“. For the final layer, I cut down the paper approximately at 3” x 4 1/2”.
In between the embossed layer, and the sprayed layer, I added in the die cut leaves for some additional visual interest. I also popped up two of the layers with some small foam squares.
Now we get to add Myron into the equation. He was also popped up on some thicker from squares to add some dimension to this card.
Since I’m turning this into a birthday card, I decided to pull in some die cuts from the Sizzix colorize die set Celebrate. From this particular die said I’m going to be featuring the large birthday cake. I painted all of the pieces for the birthday cake on some of the Watercolour Cardstock and use the Distress Chipped Sapphire, Villainous Potion, Walnut Stain, Vintage Photo, Seedless Preserves, Mustard Seed and Carved Pumpkin.


No comments:
Post a Comment