Friday, April 27, 2012

FRIDAY FOCUS - Silk ribbon

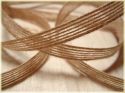
Hi, it's Sue here to show you the gorgeous silk ribbons that are available in the Funkie Junkie Boutique. I fell in love with this ribbon some time ago and it took me ages before I could bring myself to cut it, it's that beautiful ! It really adds that extra special touch to your projects.
 The above photo shows just some of the colours that are available. What I'm going to share with you today is how you can use the ribbon in different ways to embellish your projects. I know that alot of people have trouble with making bows for their projects so I'm going to show you 2 very simple ways of making them.
First of all make two loops with the ribbon and hold one loop in each hand as shown above. Then tie a knot with the loops.
Once the knot has been tied put your index finger and middle finger through the loops and then you can tighten up the centre knot with your other hand and make sure you're happy with the size of the loops.
When you've decided that you're happy with the size and the tightness of the knot, remove your fingers and just arrange the loops. You're then ready to add the bow to your project !

The second method of making a bow is also good if you want to add different threads or buttons or charms.
This time you're going to make 2 loops but you're going to cross the ribbon over itself as shown above. Then you need to make sure you have your length of twine or string, or whatever you're going to use to tie your bow together, to hand.
 For my thread I used some of the Natural Jute Twine and I separated the strands and just used one. You then need to gather the centre of your bow and hold it in one hand, with the other hand you need to put the twine around the centre and tie a knot so it holds the bow together.
Before you finish tying your thread into a bow or a knot this is when you can add a further embellishment of a button or a charm or whatever else you have in your stash.

This ribbon is also gorgeous when it's been stamped on, but make sure you use an ink such as Archival so that it doesn't smudge and is permanent.
 The stamp that I've used is the gorgeous lace stamp from the Wendy Vecchi set called Sentimental Art and I've stamped it using Coffee Archival ink.
The ink sinks into the ribbon and you end up with the pattern on both sides, which is perfect for using for your bows.

Here are one or two projects that I've used this gorgeous ribbon on:

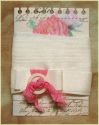
For this last example I made a rose bud for the centre by folding the ribbon in half and holding it together with double sided tape. I then rolled the ribbon for form the bud and I hand stitched a running stitch around the edge of another piece of ribbon and gathered it to make the collar.
Make sure you take a visit to the Boutique and check out these beautiful ribbons and don't forget that as it's the featured product for Focus Friday there will be 15% off too, not just the silk ribbon but all the ribbon in the Funkie Junkie Boutique!  What could be better !



Wednesday, April 25, 2012

RePurpose To UpCycle

Week II - The Funkies
April 25th post update:  We are back today with Part II of our "RePurpose To UpCycle" challenge here at Frilly and Funkie.   Last week the Frillies showed you what they created, so now it's the Funkies' turn! You can still make either type, frilly or funkie, and link up this week before the challenge ends on May 1st.  There will be  two winners - one random pick will receive a $15 gift certificate to the Funkie Junkie Boutique, and one favorite pick of the design team will receive a winner's badge to display on their blog. We have a terrific line up and I hope you will take time to stop by each Design Team Member's personal blogs and leave them some love.

Anita Houston - The Artful Maven Haven

Terry - Terry's Work In Progress

Marjie Kemper - She Who Stamps and Scraps

Linda Coughlin - The Funkie Junkie


Week 1 - The Frillies
Hello Frilly and Funkie crafters! I am Anita Houston, and your hostess for this next fortnightly challenge.  The challenge, should you choose to accept, is "RePurpose to UpCycle". We all live on Mother Earth and have to do our part to keep her healthy, not just on Earth Day but always. As paper crafters it's very important not to waste much. For this challenge, use at least two repurposed items to create an upcycled paper project, and don't forget to list what they are. Extra kudos to you if you can depict Mother Earth in some way as well.

This week the Frillies will show you what they have created, and next week the Funkies will show theirs. You can make either type and link up this week or next, the choice is yours.  Whatever your vintage style - frilly, funkie or somewhere in between, feel free to link up your project any time during the two weeks the challenge runs. This challenge theme runs through Tuesday, May 1st.  We will have two winners - one random pick will receive a $15 gift certificate to the Funkie Junkie Boutique.  And one favorite pick of the design team will receive a winner's badge to display on their blog.
 
 Sue Carrington - Stamping Sue Style 

Linda Coughlin - The Funkie Junkie

Monday, April 23, 2012

I'll Take Your Word For It Winner


Hello Frilly and Funkie friends!  So glad you stopped by this morning to see who our winners are for the recently closed I'll Take Your Word For It challenge.  Thanks so much to all of you who played along with our challenge.  We are thrilled to have you with us!  The team has voted and our Funkie Favorite is Rosemary D. from Hey there...rosigrl! with this sweetly shabby make:

CONGRATULTIONS Rosemary!  We would love to have you display the Funkie Favorite winner's badge on your blog.  Please email Linda at thefunkiejunkie@gmail.com to get your badge code.  

And there is another winner too!  Random Org has selected #19 LeAnne as the winner of the $15 gift certificate for the Funkie Junkie Boutique!  LeAnn, please email me at thefunkiejunkie@gmail.com to pick up your coupon code for shopping with me.  
Congrautlations to both winners! And a huge thank you to everyone who played along with us in our challenge, and also to those who visited us and left encouraging comments abut our blog and our wonderful design team!  We are so grateful for the support we have received from the vintage paper crafting community!

Sunday, April 22, 2012

Sunday Share

That you so much to all of the five players who linked up to last week's Sunday Share! I LOVE seeing how you all are using items you have purchased from The Funkie Junkie Boutique.
This week, Random Org has chosen entry #1 - Iley Burkett. Congratualtions Iley and thank you so much for sharing your beautiful creation with us. You win a 25% discount coupon for The Funkie Junkie Boutique. I know you will be happy to shop with me again - this time at 25% off my already low prices! Please email me at thefunkiejunkie@gmail.com for your discount code.
What is Sunday Share all about? Since this blog is sponsored by The Funkie Junkie Boutique, we want to have a place where our customers can share what they have made with items from the boutique. It's a linky party and you can share any creation here that has not been shared on this blog. It does not need to be a new project but you cannot share the same thing here more than once. If you need some guidance in knowing how to share your work here, read this post and let us know if you need further assistance.

Each Sunday Share will run from 5:00 a.m. ET until midnight on Saturday night. We will do a random drawing of all the entires that week and the winner will receive a coupon to shop with a 25% discount at the shop. This is our little way of rewarding those who shop at The Funkie Junkie Boutique. So sorry that I was running late posting this week. We will go from Sunday evening through Saturday as usual.

Have you made a purchase at the Funkie Junkie Boutique? If so, what are you waiting for? Join the fun here at Sunday Share and link up your artwork featuring products from The Funkie Junkie Boutique. Can't wait to see what will be shared here this week!

Saturday, April 21, 2012

Masterboard StepXStep

Happy Saturday Frillies and Funkies!!! Anita Houston here, to bring you a StepxStep for making an Alcohol Inked Masterboard. Making one helps you complete many projects easily and quickly.
First, I gathered my Alcohol Ink, shook up the Mixatives very well (you should hear the little ball), and decaped all of them. I added new felt to the applicator tool and had a fresh 8.5 x 11 sheet of Glossy Cardstock ready to go. I added 2 drops each of Pitch Black and Espresso Alcohol Inks, pressing in as I squeezed the ink out for about 2 seconds each.
I dabbed quick little marks first, then did X like moves, and then dabbed again until no more ink was showing up on the cardstock.
I liberally applied Alcohol Blending Solution to the cardstock. You can see what happens where I applied it. It bleaches out and removes some of the other ink. It has a blueish tint where the black used to be. It looks ugly now, but just wait.
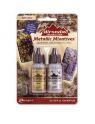
I applied more Pitch Black and Espresso until I like the looks of it. Then I removed the old felt and added a new one. I applied Silver and Gold Mixatives in dots randomly over the cardstock.  Once I loved the look, I applied a little heat with a heat gun to set things in. I call this my granite look. I just love the look, and you can use any colors to achieve this.
I stamped a flourish image in Sepia Archival Ink. You must use a permanent ink on Glossy Cardstock or it will rub off.
Last, I stamped the butterfly images using Jet Black Archival.
Here is a close up of the Masterboard all ready to go.  The possibilities are endless.
I trimmed the Masterboard into 12 different sized rectangles. There is no waste.
Here are the 12 projects I made using this one 8.5 x 11 Masterboard.  It took me 2.5 hours to complete all of them. I usually spend that on one project, not 12. I wish the pictures did these justice. The cut pieces of Masterboard are so shiny and striking.
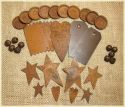
7 ATC's (cut 2.25 x 3.25 and then mounted on Kraft) I love the Rusted Metal Bottlecaps and the Jute Ribbon from the Funkie Junkie Boutique! Mounds of charm here!!!
3 Small Tags (cut 3 x 1.75 and mounted) I colored the seam binding and scrunched it up to make the blue (bleached effect) really pop here. I did not add sentiments yet on these or the card below, because I am not sure what they will be used for (most likely thank you's), but they are ready to go!
1 Large Card (cut 4 x 4 and mounted) The Rusted Metal Hearts really bring out the gold and brown colors from the Masterboard. This card is gorgeous!
1 Large Tag (3 pieces cut 1 x 1 and mounted) I mounted the inchies on Glassine and Metal Foil tape to bring out the metallics in the Masterboard. The seam binding was colored and scrunched as well to match the flower. This is a thank you that I am sending a friend!
And there you have it! So simple and fast! Talk about variation on a theme!
You can pick up Alcohol Inks at fabulous prices through the Funkie Junkie Boutique. New Alcohol Inks as well as other products are added everyday. There are now nearly 400 products in the boutique, including over 220 Tim Holtz/Ranger products at really terrific savings!  And right now through the end of April, for orders of $75 or more Linda will split the shipping 50/50 with you, including international shipping. That's a heck of a deal!

Supplies: