Saturday, December 15, 2012

Saturday Step X Step - Embossed Flowers


Marjie Kemper here, with a Step X Step using the Tattered Florals die, layers of ink, stencils, and embossing powder.  In the picture below, I'ved used Texture Fades to dry emboss all three flowers:


They look interesting, but check out how much better they are after I heat emboss them, too.


Just press the entire piece into a Versamark pad.


Then cover the flowers with clear embossing powder and heat with a heat tool.


Once they were all done, I realized they were too similar and I needed some contrast.  So I cut a plain black flower and dry embossed it, and then cut another shape entirely and just heat embossed it (so it's totally smooth, almost glassy, with no added texture):


I used small chipboard pieces to pop up the top two layers


I ended up going with 3 of the 5 flowers, and saved the others for another project. Here's my finished card, which I shared on my blog the other day.


Thanks for visiting!  Please join in our current challenge if you haven't already.  It's open through Tuesday, December 25th. We wish you all the happiest of holidays.


Saturday, December 8, 2012

Saturday StepXStep - Frosty Canvas

Happy Saturday to all of you!  For my Saturday StepXStep, I decided to tackle a canvas, which will be a Christmas gift.  I don't do very many mixed media or canvas projects, because I am not really sure what I am doing and have not had the luxury of classes.  This was quite fun to make, so if you are like me and let limitations hold you back, don't!  Go for it!  I really loved this and do so see myself doing many more!  Here is what I did and I hope you will go gather up different mediums and just have a good old fashioned play!


My canvas is  5" x 7" in which I covered with white gesso, applied some white tissue wrap and then torn some off.  Next I applied a coat of Mod Podge to the canvas and more torn white tissue and some fine netting.  Let this dry and applied another coat of white gesso.

Once dried I gave a spray of Dylusions, London Blue and pounced with a wet baby wipe and also edged with the now blue baby wipe.  Let this dry, I then spackled on a couple of snow flakes using Dylusions stencil, lifted the stencil off and then spread a thin layer here and there.  Added some Tea Stain and Pearl Fragments.  Once dried, I covered with Mod Podge and added different glitters, including some glass glitter.  Used one of Tim's music stamps and embossing in gold, here and there.  Pretty much that was the background.  What took the longest with the background was waiting in between for the layers to dry and I really got pretty excited about adding bits and pieces more!


Just kept adding glitter, etc!


The Snowman was cut from grunge paper and chipboard.  I cut an extra hat and nose, his scarf and hatband were cut from the dry baby wipe.  I gave a quick outline as to where the hat and nose would be placed, as to keep the texture paste off, for a smooth fit.  Once I applied my texture paste and it dried, I coated it with white gesso and while wet applied some glitter.  From there I applied Mod Podge and more glitter, until I was happy!  Any clear drying medium can be used.  Between the layers of gesso, Mod Podge, tissue, etc., you can have some messy edges and that is where Tim's little awesome hammer comes into play.  I like smooth edges. 


I use waxed paper to lightly press in glitter


For the finishing, I used some Chit Chat words and edged them with Bronze Distress Metallic Stain and backed them with black.  The hat and nose were first colored with Distress Markers and then covered with Stickles.  I pounced a couple of holes to wire in my gold pipe cleaner and some gold tinsel and lights.

Thank you so much for stopping by today.  I know that we are all so busy this time of year and that makes your visit even more special!

Friday, December 7, 2012

Friday Focus: Distress Markers

Please note:  The Funkie Junkie Boutique is temporarily closed for moving, and will not reopen until around January 20th, so the Friday Focus products will not be offered at 15% off until then. Sorry for the inconvenience.

Yay...it's Friday! Anita Houston here, and it's my turn to host the Friday Focus. I want to show you one of my favorite techniques using Distress Markers, which happens to be stamping with them onto Specialty Stamping Paper. They are a match made for the creative good I tell ya!
Have pieces of Ranger's Specialty Stamping Paper cut and ready, as well as stamps ready to go. I'm using images from Tim's Mini Holiday series. Using Distress Markers, color directly onto the leaping deer rubber stamp.
Give your colored in stamp a good huff of breath.
Here comes the cool part. Stamp your image onto the Specialty Stamping Paper. Give your stamp another huff of breath, and stamp the image again onto another piece of the paper. You can even repeat again...that is how color rich these markers are. Even a light mist of water will make even the faintest hint of color on the stamp come alive and make for a wonderful watercolor effect. Cool huh?
Always use a light blast from a heat tool after stamping onto Specialty Stamping Paper to set the color.
Repeat the coloring, huffing, and stamping again using the sprig and acorn image. Keep stamping it around the main sprig until all color is gone.
Repeat again using the mini tree image.
More coloring, huffing, and stamping using the large tree image.
Using Jet Black Archival, stamp the leaping deer onto a piece of Idea-ology Masking Sheet. Dry and cut it out.
Using a scrap sheet of paper, freehand cut a wave pattern to mimic a hill.
Apply the mask onto the stamped leaping deer and then apply the hilly scrap paper on top of the deer.
Color in the mini tree cluster image using the Distress Markers, huff on it, and stamp it onto the scene right where the scrap paper meets the Specialty Stamping Paper. Stamp it several times after huffing along the scene. Remove the paper and mask and dry.
Here is the coolest part. Apply the scrap back onto the scene where it matches up, and begin coloring in the sky portion with Distress Ink right over the Distress Marker images. The Distress Markers resist the Distress Ink.WOW!  I used Salty Ocean and Tumbled Glass for a graduated look to the sky.
Using the Black Soot Marker, trace around the leaping deer image to make it really pop. Stamp a sentiment onto the top portion of the scene using Jet Black Archival. Ink the edges of the paper using Vintage Photo Distress Ink except the edge with the white portion.
Adhere the paper scene onto a Kraft card. Ink the edges of the card as well with the vintage photo.
Use Stickles to highlight parts of the scene for that special Christmas sparkle.
Supplies:

Wednesday, December 5, 2012

A Light In The Darkness

Welcome back again to the second of our Light in the Darkness challenge.  It's time to see how our Funkie team has interpreted this challenge theme.


Marjie Kemper - She Who Stamps & Scraps

Anita Houston - The Artful Maven Haven

Linda Coughlin - The Funkie Junkie


**********Week #1 Post***********
Rebecca Deeprose of Paper Primrose, here to bring you the new fortnightly challenge which is "A Light in the Darkness".  Create with 'light' in mind.  Think candles, bulbs, lanterns, menorahs, and all things that brighten this time of year, using whatever type of project you'd like. We can't wait to see what you enlighten us with.  Today the Frilly Team is providing you with these beautiful pieces of inspiration!
Sue Carrington - Stamping Sue Style


Rebecca Deeprose- Paper Primrose


Monday, December 3, 2012

Chipboard & Metal Winners

Hello Frilly and Funkie friends!  We are back today to announce the winners of our last challenge - Chipboard and Metal.  Wow, there were some fantastic entries - really sensational work that was shared here!  Thank you to each and every one of you who played along with Marjie's fun challenge.  The design team have voted and we have selected Hettie from Hettiecraft, entry #14, with her fabulous embossed metal wreath as our Funkie Favorite for this challenge.  Wow, what an amazing project!  Congratulations Hettie!  Please email me at thefunkiejunkie@gmail.com for the code to your winner's badge.

We also have a $25 gift certificate winner to shop at The Funkie Junkie Boutique, selected by Random.org.  The gift certificate this time goes out to Silvia, entry #10.  
Congratulations Silvia!  Unfortunately the boutique is temporarily closed so you will have to wait to spend your gift certificate until I reopen in January.  Please email me at thefunkiejunkie@gmail.com to get your gift certificate code.

Thanks so much to all our visitors and players.  Hope to see you playing along with the current challenge A Light in the Darkness.  It is open through December 11th.


Sunday, December 2, 2012

Sunday Share

Good Sunday afternoon friends of Frilly and Funkie.  It's time to close out one Sunday Share and kick off a new two weeks of sharing artwork made with items from The Funkie Junkie Boutique.  Up for grabs is a 25% discount coupon to shop at The Funkie Junkie - that's 25% off on your entire purchase, anything you care to buy.  And even better, when I reopen from my temporary moving close, I will kick off the reopening with another 10% sale.  You simply cannot do better than that.  All my name brand items such as Ranger (Tim Holtz, Dianne Reaveley, Wendy Vecchi, etc,) and Melissa Frances are always sold at 20% below MSRP so combined with the 25% coupon and the 10% off sale you are actually able to buy at my wholesale cost!  Definitely worth playing Sunday Share, right?
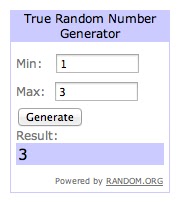
Not too many players this fortnight which gave the players great odds at winning.  Random.org has chosen entry #3 - Nicola from Paper Profusion as our 25% off coupon winner this time.  Nicola submitted this wonderful Christmas card made in part with glassine bags from The Funkie Junkie Boutique.  I absolutely adore that vintage Santa ornament!
Congratulations Nicola!  Please email me at thefunkiejunkie@gmail.com to obtain your coupon code.   And thank you so much to everyone who shared with us this fortnight on Sunday Share.

Have you shopped at The Funkie Junkie Boutique? All you have to do to enter is link up any creation you have made using products from my boutique here at Sunday Share. The only requirements are:

1) you must use something you purchased from The Funkie Junkie Boutique (the new one or Zibbet or Etsy)
2) you haven't shared it already here at Sunday Share
3) you have to mention the product in your post as well as my boutique and provide a link to my boutique

That's it - easy peasy and a fun way for you to showcase your work over here at Frilly and Funkie! So what are you waiting for? Link your work up below. If you need some guidance in knowing how to share your work here, read this post and let us know if you need further assistance.

Sunday Share is currently running for two weeks, every other Sunday from 5:00 a.m. ET until midnight on Saturday night. We will do a random drawing of all the entires that week and the winner will receive a coupon to shop with a 25% discount at the shop. This is our little way of rewarding those who shop at The Funkie Junkie Boutique. What are you waiting for. I know lots of you have already purchased items from The Funkie Junkie Boutique. Link them up here - it's a great opportunity to share your work with us and you just might shop next time for 25% off.

Saturday, December 1, 2012

Saturday Step x Step-Gift Card Holder


I have created a gift card holder using the Tim Holtz Pocket Envelope and the Festive Greenery Decorative Strip die.  At the moment the Funkie Junkie Boutique is closed and will reopen January 20, 2013.  Linda is moving and it is quite the undertaking.  I have used burlap string and the tiny clothespin from the Funkie Junkie Boutique.  There are not many steps in making these cute gift card envelopes.  You can see the open cut out before gluing it together.  I used scor-tape to adhere and then added my embellishments, it was super easy to make and will be great for gift card giving this Christmas.  Hope you have a wonderful weekend...enjoy!