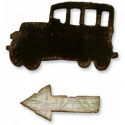
First I want to give a quick share with you about how I make foam stamps from die cuts. I use a thin fun foam and adhere that to thin cling mounting foam and then die cut. These are easy to store and they cut like butter! When I am done with them, I wet a paper towel and press the foam into the towel to remove whatever ink I use and then press into a dry paper towel.
The tag background was first inked up with Distress Inks and then I stamped some background images with Distress Inks. I used my foam cut movers and shapers stamp for the Color Wash, by picking up the color with a paint brush and applying this to the foam. Make sure the foam is pretty saturated and then move the brush in a circular fashion on the foam. Stamp on the tag, giving even pressure. Next I took the new woodgrain stamp of Tim's and stamp that over the entire tag, heat set, then stamped the sentiment in Archival, clear embossed! I really did like how this worked with homemade foam stamps.
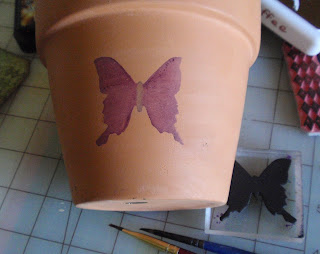
The clay pot is a work in progress, but I wanted to give you other options for using Color Wash. Again I used a foam stamp and painted on the color, then applied the stamp to the clay. Clay is very absorbent, but when this is finished, I will give this a quick spray with Matt Sealer and then use a waterproof varnish!
 |
| On fabric that will remain unwashed |
Since I was experimenting on fabric, I used an old denim blouse, inked up the butterfly using a small paint brush to control color, stamped it unto the pocket, let it dry and then heat set with an iron. The directions do say to wait 72 hours before washing, but after heat setting the fabric item is to be rinsed in cold water to remove excess die and then dried with an iron or clothes dryer. I tried to find info on using color wash on fabric, but did not find anything, so my attempt at this is limited. I did find that different fabric will hold onto the color better.
 |
| Toddlers Granimal Before Rinse |
 |
| Adult Hanes Before Rinse |
The two T-shirts I stamped, one held the die much better. I would suggest using a very tight weave cotton or stamp on a cotton fabric that you will use on a project that won't require washing! I cut on one pocket from the blouse to use on an upcoming project. Here are some before and after pictures to give you an idea. I would say that the Hane's (adult) won over the Granimals (kid) shirt, so keep in mind that 100% cotton is different from brand to brand.
 |
| After the Rinse |









Thanks for this really informative and imaginative tut. Never used these before but methinks it would be a good idea to try. Hugs, Buttons x
ReplyDeleteThanks for this wonderful demonstration of ways to use the Color Wash sprays. I never thought of using them to ink up stamps. Great projects, Terry, and a really wonderful Friday Focus!
ReplyDeleteWhat a great idea to use the sprays in such a controlled way on the stamps.... totally fabulous! Love the way you can curve your custom foam stamp to the pot, as well. Awesome tute, Terry!
ReplyDeleteThis is a terrific tutorial! I particularly love how you have suggested mounting the foam onto the cling mount! Great way to get more from your dies and avoid having to buy Alterations and the matching stamps!
ReplyDeleteLucy x
Terry...this is a fab tutorial! I never have thought to stamp with the washes...fabulous ideas and fabric takes it so wonderfully with a sealer. Love how you used multiple colors on one image...awesome!
ReplyDeleteI would never have thought to use my color wash that way. Sprays are still a challenge for me, but I can see myself using them this way. Thanks for all the great info!
ReplyDeleteLove the idea of using the sprays to stamp with...haven't tried that one...yet. I've been looking for info on the heat setting, but not many results. Thanks so much for sharing this!
ReplyDelete