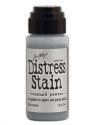
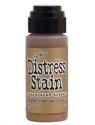
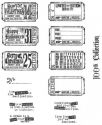
Greetings on this wonderful Friday! Today the focus product will be "Distress Metallic Stains" and if you have not picked up these shimmery goodies, you really will want to! I absolutely love each color and sure hope that Tim will be adding more colors to the collection! The Metallic Stains are perfect for holiday crafting and just about anything! Here is what I worked on for this Friday Focus using Distress Metallic Stains!

First a #10 Tag was sprayed with Goosebumps, but you can use clear embossing ink and powder with any stamp you desire. Once dried, I gave the tag a light misting of water and then ran Brushed Pewter and Tarnished Brass Metallic Stains directly over the tag and blended the colors using a damp paintbrush. A great feature with the Metallic Stains is that they can be blended with water. I let this dry and then did a second layer of color. Once I was pleased, I used a music line stamp and inked it with Vintage Photo and stamped here and there on the tag. It is very faint and that is what I wanted.
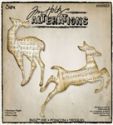
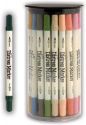
The deer was cut from a recycled cereal box and card stock, glued together. The deer was then stamped using a snowflake inked up with Metallic Stains. Very subtle and shimmer effect. Colored the hoofs with a Distress Marker, Walnut Stain. The antlers were cut from the movers and shapers branch and trimmed to size, inked with Tarnished Brass. This was glued between the cereal box/card stock deer.
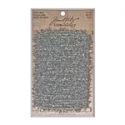
The larger Silver snowflake was cut from grunge paper, covered with Rock Candy Crackle and once dried, covered with Brushed Pewter. The little Brass snowflake, was cut from shrink plastic, colored with Brass and shrunk using the heat tool, clear embossed.
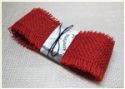
The ribbon was completed inked with Pewter and once dried, blotted into a puddle of Brass.
The ticket was stamped using Archival Sepia and the Merry Christmas was part of another ticket, that I colored using the Distress Markers, Peeled Paint and Barn Door and then stamped above the line. The Music Sheet, 25, snowflakes were all stamped on newsprint using Archival Sepia and then torn by hand and shaded. All stamps are Tim's!!
Here are a couple of other projects using the Distress Metallic Stains.
http://frillyandfunkie.blogspot.com/search/label/Metallic%20Stains
http://terry2dogs.blogspot.com/2012/10/rusty-shades-of-autumn.html
Thank you for stopping by today and I hope you have a wonderful weekend and get inky with Distress Metallic Stains! Great fun!


Beautiful tag, I really love those metallics!
ReplyDeleteHi
ReplyDeleteWhat lovely tags the Christmas one is wonderful. I can't wait to get my hands on the metallic stains.
Ria
Lovely tags! Love the various uses of the metallic stains.
ReplyDeleteHow beautiful! Love that gorgeous snowflake and how you did the reindeer. Those tiny pops of red are terrific!
ReplyDeleteWonderful! I only have the bronze so far and I love it!
ReplyDeleteWell done on the tags. Love the C one...the little splashes of metallic and red look great!
xx
I have the stains and appreciate what you are doing with them! Thanks Terry!
ReplyDeleteFabulous tutorial Terry, I can't wait to get my hands on my Metallic Stains. Sue C x
ReplyDeleteGreat tags and tutorial. Have just ordered those stains.
ReplyDeleteYvonne
Thanks for sharing Terry. Love this technique x Annie x
ReplyDeleteHello Terry
ReplyDeleteYou have made some great Tags, and a great tutorial as well.
Smiles:)
Sue
Wonderful tips and techniques for the stains, thank you Terry! The goosebump texture is amazing ... another one for the wishlist!
ReplyDeleteAlison x
I love your tag Terry!!! The Metallics really transform the background, and the deer is perfect here! Love the red trim as well...striking!!!
ReplyDelete