
Marjie Kemper here, happy to be hosting this week's Step X Step. This technique comes straight from Tim Holtz's book, The Compendium of Curiosities Vol 2. If you don't have that book, you really do need it... I promise. It has tons of great tips and techniques, and I refer to it often.
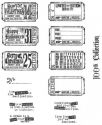
I used the Faux Embossed Metal technique on this project, which is the November page for my 2012 Kathryn Wheel calendar:

I intended to use this technique just for the accent piece that shows the month, but it is quite bold and didn't look good against any of my attempts. So I decided to do the entire page with this technique.
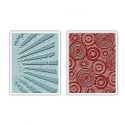
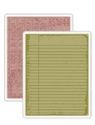
I started by cutting a piece of black card stock from the Sizzix Ornamental die, then embossed it with the Collage Texture Fade. I used a shim when cutting, like I demonstrated on this project last month.

I love the rich texture the Texture Fade provides:

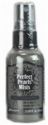
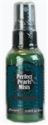
I pulled some of my favorite Perfect Pearls Mists and spritzed liberally before heat setting them:

The shine is really rich in person. I cut two pieces of black card stock in half lengthwise and used the same technique on them with the Retro Circles Texture Fade (you must move the folder once and emboss it a second time to accommodate the length of the length of the paper).

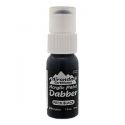
I attached all the cardstock to the calendar page with Tim's Tiny Attacher, and added some grunge letters painted with Ranger's Silver paint dabber.

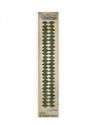
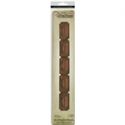
I needed something to pop that accent piece off the page. I cut the Harlequin border out of a rich silvery paper and then traced around my Ornamental die to mat it on more of the same. Cut out my tickets with the Sizzix ticket strip die and stamped Tim's blank 'admit one' image on top.

There you have it. Remember our new challenge started on Wednesday. We hope you'll join in!
 |  |  |  |  |
 |  |  |  |  |
 |  |

Looks fantastic Marjie.
ReplyDeleteSmiles:)
Sue
Lots of texture Marjie and I love the embossing folder used. The harlequin certainly makes it pop. Hugs Annie x
ReplyDeleteHi Marjie, so much texture, so much gorgeous colour! Love that Harlequin border and the silver lettering really stands proud. Love it! A x
ReplyDeleteThis is totally COOL, Marjie. Love the coloration with the Perfect Pearls mists - just gorgeous! And your harlequin border is the perfect finisher - it looks terrific. This is a wonderful StepXStep and we really appreciate the extra effort you went through to produce it given your present circumstances as a result of Hurricane Sandy!
ReplyDeleteHugs and all the best,
Linda
Hi Marjie~ I'm going to play with this technique and use it in a frilly version! Thanks for the inspiration!! Sure do hope you have electricity and heat. Hugs, Rebecca
ReplyDeleteFabulous - I love the faux metal Perfect Pearls game... and to see a whole page of it is glorious! Great step by step, thanks so much, Marjie!
ReplyDeleteAlison x
Fabulous! I love the texture and shine....it has been so much fun watching this calendar from month to month!
ReplyDeleteBeautiful pages, Marjie! Love that metallic shimmer! You did an awesome job on this technique. Very creative!
ReplyDeleteGorgeous! Thanks for the inspiration!
ReplyDeleteBeautiufl Marlie.
ReplyDeleteLove the way you worked with the metal.
Thanks for sharing this with us.
Greetings Janny
Wonderful!!
ReplyDeleteGorgeous and thanks for showing us how you made the background.
ReplyDeletex
You make that dark cardstock fantastic with the embossing and shimmer!!
ReplyDelete