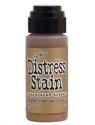
Happy Frilly and Funkie Friday! Don't you just love that it's nearly the weekend? Buttons here to suggest a few ideas for using Metallic Distress Stains (well they're not just for Christmas you know!) As they are the subject of this week's Friday Focus there will be 15% off them at
The Funkie Junkie Boutique - this means they are at a bargain price so make sure you grab some quickly whilst they are still in stock.
Now you know me, never content unless I'm trying out a new technique. Anna-Karin at Layers of Ink recently posted a Dry Embossed Wax Resist tutorial which was awesome. It showed how to use embossing folders and a white wax crayon with inks. That got me thinking "what if I use coloured wax crayons" (don't you still seem to have a stock of these tucked away somewhere even when the kids grow out of them?)
It also occurred to me that you don't need to be limited to using ink mists over them either; as Distress Stains/Metallic Distress Stains are water-based they will work just as well. After a bit of
play work I created a few samples using different coloured crayons and Metallic Stains. Darker coloured crayons are definitely more effective and you can mix your Stains by spritzing them with a little water and blending them over the wax. And for those who don't like sparkle fear not - these leave a beautiful sheen to surfaces. I went on to use a couple of other testers as backgrounds, but you could easily cut them into various shapes too.
My team mate Trace was definitely in the forefront of my mind as I created this piece, as she has a passion for hearts. Having embossed white card I ran blue and brown crayons over the raised areas.
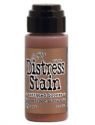
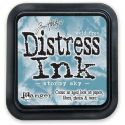
Don't worry about being accurate as it actually looks better when some of the wax is applied to the unraised areas too. Then a sweep of Brushed Pewter over the top and some Stormy Sky Distress Ink around the edges finished the background.
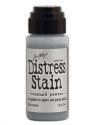
The heart was made from grunge paper and chipboard layers, both covered in a blend of Brushed Pewter and Antiqued Bronze Metallic Stain and then rubbed over with Vintage Photo Distress Ink. I love that you can also use these Stains over things like torn book pages because their semi-opaque quality means you can still see some of the text through the colour.
The current
Frilly and Funkie Challenge - 'William Morris Style' was in my mind with this one. The lacy background used a mix of red, green and brown wax crayons over the raised areas followed by Tarnished Brass Metallic Distress Stain over the top. Once dry you can strengthen the colours by reapplying the wax crayon over the Stain.
I added a digital image postcard, some stamped ivy leaves and a butterfly made with metal flakes to keep it relatively simple and uncluttered (well for me anyway!)
So I hope that has given you a few more ideas for using your Distress Metallic Stains. Don't forget to check out the extra discounted price for these at
The Funkie Junkie Boutique, and whilst you are there see what else is on offer. I've listed the items used in my pieces below too. And enjoy your weekend! Hugs, Jenny xx


Buttons sounds like such a wonderful technique, must have a play...two wonderful cards ...but I am drawn to the heartone....funny that !! Hugs trace x
ReplyDeleteI will let you know when I have played, x
Great background and wonderful card. Love what you've done with these stains.
ReplyDeleteWOW!! these are great love, love, love the technique.
ReplyDeleteI like them both and do you know this is maybe one I could master.
Well maybe not but I might juat have a go.
Hugs
Patricia xx
STUNNING Jenny, what a great technique and you describe it so well, will give this a try for sure, the effect is amazing and I have to say I ADORE your card samples!!!
ReplyDeleteWonderful samples, Jenny.
ReplyDeleteDefinitely one to play with.
Rosie x
Hi Jenny, your cards are both very beautiful and very elegant, the first one reminds me of Trace and the second is so very you. A great technique that I will definitely try out. Hugs, Anne x
ReplyDeleteGreat technique - love the red, green and brass one. Off to search out some wax crayons!!
ReplyDeleteAmAzing technique... Love both your cards.. I will certainly give this a try... Now where did my Grandson put those crayons!!! Hugs May x x x
ReplyDeleteWhat a sensational tut, Jenny. You always share the coolest techniques. I LOVE this one and will certainly be trying it. Your samples are terrific - I too really love that red and green one. Thanks for a fab Saturday StepXStep!
ReplyDeleteHugs,
Linda
This is awesome, love the crayon techniques
ReplyDeleteFabulous tutorial Jenny ! Love the colours you've used and the red with the green is almost regal ! That's another technique I need to try ! Sue C x
ReplyDeleteFabulous tutorial, taking the wax crayon technique to the max! The embossed surfaces look so cool, and your sample cards are just gorgeous... great inspiration as always, Jenny, thank you.
ReplyDeleteAlison x
thank you for sharing this technique and inspiration I love the look of the background and two lovely cards
ReplyDeleteRia
Very inventive Jenny, thanks for sharing your great ideas and beautiful inspirational pieces.
ReplyDeletex0x
This is awesome! Will have to try this, such an elegant look!
ReplyDeleteThanks so much for sharing all your inventiveness Jenny! It really would be fun to start with crayons all over again (see one's inner child is never far away!) Most importantly, your two cards today are wonderful. Nicola x
ReplyDeleteAbsolutely fab Jenny. Loving the texture you have created.
ReplyDeleteThanks for a fab tutorial
Hugs
Annie x
W-o-w Jenny - more beautiful cards!!!
ReplyDeleteI absolutely l-o-v-e your work and look forward to seeing the next project!
Thanks for sharing!!
Lorraine - Ontario, Canada
;o)
Love this beautiful technique!
ReplyDeletePam
scrap-n-sewgranny.blogspot.com
Wonderful creations Jenny. Great looking textures too. Thank-you for sharing your knowledge with us. Enjoy your Week-End. Hugs Rita xx
ReplyDelete