
Now, I'll admit that in the beginning I was stumped. I expected there to be a repeat pattern on the die that would make it quick and easy to cut the die with two different colors of paper and then exchange the bricks or stones from one color die cut to the other. But guess what??!! There are no repeat shapes in the stones or bricks in either of these dies! At least, none that I could find! So I decided that the best way to use these dies is to keep the entire strip intact and alter it as one piece.
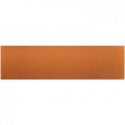
In order to keep the die cut intact you need to stabilize it so that the stones or bricks don't fall out while you're distressing and/or coloring it. I created my samples using two different colors of Tim's Distress Core-dinations paper, Pumice Stone and Antique Linen. After running the die and paper through my Big Shot I very carefully trimmed the scraps from each side of the die cuts. When doing this you should handle them gently so that the bricks/stones don't start to pop out.

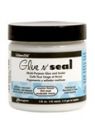
Next, carefully coat the back of the die cuts with a glue stick. Glue each strip down to a large piece of paper. I used a large piece of ledger paper but a 12x12 piece of scrapbook paper will work fine. Use a brayer to ensure that the pieces are securely glued down. Let the glue dry.


Once dry you can sand the pieces, if desired.


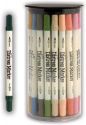
Now you're ready to add color! I used Distress markers to color to my pieces. On the cobblestone die cuts I added Ranger Glossy Accents to the stones for dimension. Once you've finished coloring the die cuts you can cut them out of the backing sheet using scissors. Below are the finished pieces and I love how they turned out!

Below are close-up photos of each piece and specific details on the colors I used.

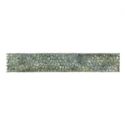
Mossy Cobblestones: I colored the mortar between the stones using the Pumice Stone distress marker direct-to-paper. Then I used the detail water brush to pick up Forest Moss distress marker from my craft sheet to add color to each stone. Once dry I applied the glossy accents to just the stones.


Brown Cobblestones: I used the detail water brush to pick up Walnut Stain distress marker from my craft sheet to add color to each stone. See how the sanding causes the ink to be darker in areas! Then I applied glossy accents to just the stones.

It's as easy as that! It didn't take very long to make these and it would be really simple to create different variations of the dies and have them on hand for adding to a tag or other piece of art.
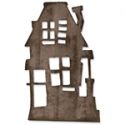
I wanted to use these as more than a wall or walkway so I added a stone front to the Tim Holtz Sizzix Alterations Rickety House die. Below are the steps. I learned something along the way...you may want to wait and add the glossy accents to the die cut as a last step. You'll see why as you read through these steps!

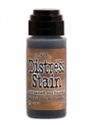
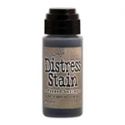
First, I wanted a darker background on the cobblestones so I covered the die cut with Distress Stain in Brushed Corduroy.

Wipe the piece down with a paper towel to remove the excess stain from the glossy stones. Let dry.

Die cut the Rickety House from a piece of brown Core-dinations paper. Set the die cut aside. Use the outside piece to trace the outline of the house onto another piece of Core-dinations. I used a white pencil. It doesn't matter what you trace with since you'll be covering it up with the cobblestones.

Cut the cobblestones apart and glue it down in sections over the tracing you made. I did it this way so that I wouldn't waste any of the cobblestone piece. You certainly can cut it in four even pieces and paste it down to create a rectangle but I wanted to use the piece as efficiently as possible. Line the piece up to your die cut and run it through your machine.

As you can see, the stones coated with the glossy accents are rigid and might pull away from the backing paper when you die cut it. So, you can either just glue them back on, as I did, or you might want to wait and add the glossy accents AFTER you've decided how to use the die cut strips. If you do that you have to remember that the distress stain that I added in the first step will change the color of the stones and not resist as it did on my piece.

Here's the house after I glued the pieces back into place.

I wanted to create extra dimension so I decided to cut away certain pieces of the house so that I could replace them using the original house die cut from the brown Core-dinations paper.

Here's the final piece. I sanded the original die cut before gluing the cobblestone front to it. I added a black chimney. Pretty cool!
I'm saving the piece above for another project. Here's a tag I made where I used the mossy cobblestone die cut to create a stone front on Tim's Sizzix Alterations Arftul Dwelings die using the same steps detailed above. Notice the steps beneath the door? Those were cut from pieces leftover after die-cutting the Rickety House cobblestone front! Also, I backed the little windows with a piece of mirror covered with the frosted film. It looks just like glass!

And here's a pop-up card that I created using the mossy brick wall strip. The base card and pop-up is the Sizzix Pop 'N Cuts Card with Circle Label die by Karen Burniston. The die on the front is Karen's Fancy Frame die. I attached the mossy brick wall to the circle pop-up label inside.


Thanks so much for making it through this long post! I hope you enjoyed this Saturday StepXStep. Why not use your brick wall and cobblestone dies to make something and share it with us on the Sunday Share post?! We'd love to see what you create!
The following items that I used on my project can be found at The Funkie Junkie Boutique! The boutique offers it's merchandise at up to a 20% discount from the typical retail price! That's a great deal and you should check it out!!
 |  |  |  | |
 |  |  |  |  |
 |  |  |  |  |
 |  |  |  | |
 |  |  |  |

A really great step X step, likethe different looks you have achieved and how you have used in projects too..great house tag. Hugs trace x
ReplyDeleteNow that is one brilliant step by step Donna. Such clever ideas (and thanks for including the afterthoughts as those will help to stop us doing the same things/help us to focus on the order of doing each of these steps. I'm in love with your rickety house - awesome! Can't wait to see what you have in mind with it. Hugs, Jenny x
ReplyDeletethat's a FAB tutorial!! thanks lainey x
ReplyDeleteWow! I don't have either of those strip dies but now I want them both! Your solution for keeping the pieces intact is brilliant and I LOVE all your different looks. The moss might be my favorite although I am coveting that rickety house, too - amazing!
ReplyDeleteYour work with these dies is totally amazing, Donna. They have been gathering dust on my shelf for ages and now I'm inspired to get them out and have some fun with them! Your samples totally ROCK! Thanks so much for such a fab Saturday StepXStep!
ReplyDeleteHugs,
Linda
Great tutorial
ReplyDeleteThanks a lot.
Greetings Janny
Absolutely brilliant work but way too much hassle for the results, I'm afraid. Such a shame it isn't easier. Thanks for the wonderful tutorial x
ReplyDeleteSuch a good step by step Donna, thank you. Ideal material for the dolls house museum and butterfly is raring to go!
ReplyDeleteBrilliantly timed, Donna - as my mother said above (Cestina), I got these just before we left ready to do some dollshouse duty, and this is full of great tips and ideas - thank you so much!
ReplyDeleteAlison x
Very cool technique and awesomely done tutorial! TFS!
ReplyDeleteThank-you so much Donna for such a fantastic tutorial. You've included so much really valuable detail. Your end results are painstakingly FABULOUS! Nicola x
ReplyDeleteFab Step x Step Donna ! I really wasn't sure about these dies but you've made me think twice now ! Sue C x
ReplyDeleteI love this technique with the die cuts! I want to try it with other things too. What a great idea and your samples really rock.
ReplyDeleteI'm so pleased you did this tutorial Donna. I've been waiting for this since you first used the dies back in February. Thanks so much.
ReplyDeleteFab tutorial Donna!! Love the wonderful range of effects and super commentary!!! Hugs, Rebecca
ReplyDeleteSo awesome to see your steps....thank you! Love these!
ReplyDelete