

I started by cutting up those scraps and an abandoned tag, keeping the colours to pinks, greens and whites. There were paper offcuts, painted card, clear embossed paper and card that had inks and stamping all over. Whilst I used a die you could just as easily cut them into squares or rectangles.

The pieces were then reassembled and glued down in a random pattern onto a square of card.

A thin coat of Picket Fence Distress Paint, dried, then very light misted with coordinating ink sprays created a more uniform look. As the paint and inks dried I wiped over the surface gently with a cloth to ensure the embossing and some of the deeper colours still showed through.

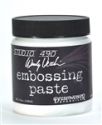
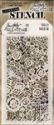
White embossing paste was applied to the dry surface through a stencil, covering the whole card.

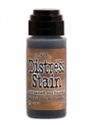
It is important to let the paste dry naturally as it gives it time to soak up some of the ink from the papers below. To give a more aged appearance Brushed Corduroy Distress Stain was dabbed on the edges. If you want to add tiny drips of other inks you can do at this stage (I added a little more of the green).

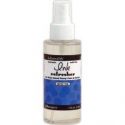
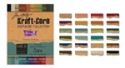
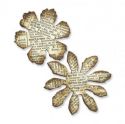
While this is drying I created some 'suede' flowers. The kraft side of some Kraft-Core card was spritzed liberally with Ink Refresher and worked into the card with my fingers until it became soft and pliable.

As the Kraft-Core dried I scrunched it up to form wrinkles so that the colour side could be sanded lightly. The same techniques were used on plain parcel paper (you get plenty of this when ordering from The Funkie Junkie Boutique). Flowers were die cut from the Kraft-Core and parcel paper and layered together.

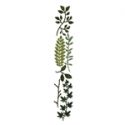
An important tip from Tim Holtz here - after die cutting delicate shapes like leaves from Kraft-Core card sand them before you remove them from the card to prevent accidentally tearing the shapes.

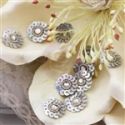
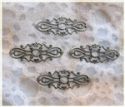
With all the elements coming together it was time to start putting the card together. I used the offcuts from the Kraft-Core and parcel paper to add a base strip for the flowers, hand sewing through some of this. A strip of die cut lace border was stained and a metal embellishment was cut in half before being glued into place. I used some silver Prima flower centres for the suede flowers, adding Spun Sugar Distress Paint and drops of Gold Mixative Alcohol Ink to them.

And here are some close ups of the finished card. I tucked a little stained seam binding in between the flowers to add to the vintage look. The texture and colour from the scraps really gives the stencilled background an added depth and dimension.


I hope this inspires you to reach for those scraps and stencils to create your own new backgrounds. And you still have time to enter our current challenge, 'Stencils and texure' as it runs through to March 11th.
Have a great weekend and get time to be creative.
Jenny xxx
 |  |  |  |  |
 |  |  |  |  |
 |  |  |  |  |
 |  |  |

Another great card Jenny and clever way to use up the scraps! Love the shabby flowers too , another great make ! X hugs x trace x
ReplyDeleteLovely use of scraps and loved the textures on the back ground.
ReplyDeleteBeautiful background and flowers, love your creative ideas Jenny xx
ReplyDeleteBeautiful card Jenny, love the quilted background. Sue x
ReplyDeleteWowwww Jenny, what is this wonderful, I love your creations. Just my style! 'm waiting for the new products from Tim, can not wait. ;-)
ReplyDeleteGreetings and have a nice weekend,
Ellen
This is such a fantastic way to use up scraps of paper Jenny. I really, really love the new Tim lace stencil, what a beautiful background it creates. Your flowers are absolutely divine and the resulting card is so beautiful. Thanks for the tip about sanding too, will remember that one! Anne xx
ReplyDeleteA really beautiful card. You want to reach out and touch those flowers. The stenciling with the paste looks gorgeous, too.
ReplyDeleteThis is such an innovative and GORGEOUS way to use scraps. I just kept saying, "Oh, wow! Oh, wow!" as I watched each step of this lovely piece come together. I am sooooooo impressed. Thank you so much!
ReplyDeletea gorgeous card jennie and a great step by step of the process, loads of really tempting things to try ! I love how you created the background with pieces then spray and then paste, , really lovely xx
ReplyDeleteI absolutely adore this Jenny in every way. Thanks for the step by step and tip for sanding back.
ReplyDeleteFabulous Project, Julie x
This a gorgeous card. I love the scrap background and the flowers. Thanks for the tutorial. It's always interesting to see how a piece comes together.
ReplyDeleteNow that I see that background, I am so glad I bought that doily stencil! Jenny, this is such a springtime beauty in every detail. Love those flowers! Hugs!
ReplyDeleteWow! Oh! Wow! Another stunning "work of art"
ReplyDeleteI just love everything you have done on this.
Tried to get a few ingredients at SECC today not much luck though.
Love those fantastic flowers ..... I just LOVE it all
Have a great weekend
Hugs
Patricia xxx
Fantastic make Jenny. The soft romantic colours really speak to me and those textures in the background - so lush! xx
ReplyDeleteSuch a fabulous way to use scraps Jenny - the background is just amazing with all that texture. And the flowers ..... just gorgeous. A fabulous card x
ReplyDeleteYou've done it again, Jenny!! I am awed at how you took your pretty bits and pieces and created something too magnificent for words. The techniques you've demonstrated create layers after gorgeous layer of texture and interest. I throw away so many scraps after every project, and now I am resolved to stop wasting them. Thank you so much for sharing your process!!
ReplyDeleteThis is a wonderful card-thank you for the step by step -inspiring!!
ReplyDeleteXxRuth
Stunning Jenny! Fab step x step and love the colour palette. Chris xxx
ReplyDeleteBeautiful card Jenny, thanks for walking us through the process. I love those flowers and the great background textures. Thanks too, for the tip about sanding before removing to protect delicate die cuts. Now why didn't I think of that?
ReplyDeleteAlexandra xx
Love the doily texture layered over those pretty quilt patterns - such a gorgeous effect - and the flowers are stunning. Delicious!
ReplyDeleteAlison x
Thank you for the instructions for this outstanding card. You have inspired me to try it. I am not sure I can use up my scraps in a lifetime, but I can make a dent!
ReplyDeletethanks for this great tutorial lovely result
ReplyDeletebibiana
What a super make, Jenny. The stenciling over top of the quilted pattern is really fantastic and I love that you cut apart the filigree metal. Thanks so much for sharing this lovely way to use up our scraps!
ReplyDeleteHugs,
Linda
Gorgeous, Jenny! Love the flowers, and the texture! Hugs, Sandra
ReplyDeleteTotally stunning Jenny. Love the die.....great appearance.
ReplyDeleteGreat step by step TFS Annie x