


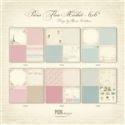
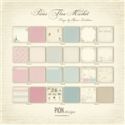
The first card is made with Pion Design's Paris Flea Market collection (one of my favorites). Their delicate, double sided papers and images add a romantic touch to everything you create! These are a lighter weight papers that layer wonderfully. I mount them on light weight chipboard or heavy weight cardstock for added sturdiness.

After lightly distressing the edges of the paper, I layered and stitched everything together. I used this gorgeous image from the paper collection as the focal point, popping it up with foam tape.

There area a total of four layers on the front of this card, plus the florals. Prima pearls were added to both sides of the card at the top and bottom. .


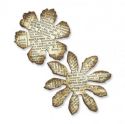
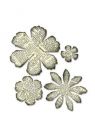
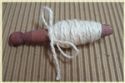
The large blooming rose was created using Tim Holtz Tattered Florals dies. I'll add the link for the tutorial for these roses at the bottom of this post. My usual bow wasn't working out with this card, so I added a soft twine fringe instead.
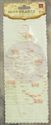
Below is a view of the layers from the top of the card.


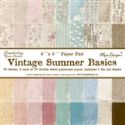
The second card is crafted from Maja Design's Vintage Summer Basics collection. Maja's double sided papers are shabby, feminine perfection! This particular collection is one of my go-to paper pads. I've been playing with these papers in my craft room the last couple of weeks, making roses in different styles.
For this card I started by distressing, layering and stitching my papers. Since my first card was blue, I wanted this one to be pink.

Maja Design manufactures a heavier weight paper, making them quite sturdy. It gives great contour and dimension when distressing and creating flowers. This blooming rose was created using the same technique as the first card. I had the same issue with my bow on this card. It just didn't seem to fit properly, so I decided on this twine fringe to soften things up.


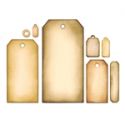
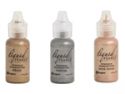
The tags were created using images from the paper collection. They are distressed and popped up with foam tape. You may have noticed I squished a couple of my liquid pearl drops. Let me be a cautionary tale ~ never handle your card before you are absolutely certain they are set.

The tutorial for the blooming rose can be found here: Blooming Rose Tutorial
To make the roses as large as the ones on these cards, just add extra layers of petals.
Thank you so much for joining me today! It's been a pleasure sharing these beautiful papers with you. While you're here you should stop by and check out our latest challenge. There is still plenty of time to play along with us! Don't forget to head on over to the The Funkie Junkie Boutique to stock up during this fabulous sale. That's where I'm headed. You may want to get there before I do...
Hugs,

 |  |  |  |  |
 |  |  |  |  |
 |  |  |  |  |
 |  |  |  |  |
 |  |  |  |  |

Beautiful work Nancy, thank you for the Tutorial too.
ReplyDeleteTake Care
Elaine H X
Gorgeous cards, Nancy! Love those papers and the floral sprays. Thanks for sharing the tutorial.
ReplyDeleteAbsolutely beautiful, Nancy!
ReplyDeleteOh My Gosh, Nancy! These are incredible! You really bring out the best in these gorgeous papers. I'm loving the pearl flourishes behind the shabby chic roses!
ReplyDeleteExquisite as always, Nancy. Two lovely pieces of eye candy to drool over!
ReplyDeleteHugs,
Linda
These are so pretty! Thanks for the tutorial. I love the colors and papers
ReplyDeleteSuch beautiful cards Nancy filled with adorable vintage elegance.
ReplyDeleteJulie x
Gorgeous cards! Nancy that showcase the papers beautifully . x
ReplyDeleteSuch Shabby Lovliness..................
ReplyDelete