
Take a piece of patterned paper with pale/neutral tones (this piece is from Dapper) and cover it in a thick and uneven layer of Crazing Distress Collage Medium. Allow this to dry thoroughly and develop those beautiful cracks.

Seal those cracks with a thin layer of Vintage Distress Collage Medium; this stops the Crazing layer from peeling off when you add inks and stops the blending solution from soaking straight through the paper. You can dry this layer with your heat tool if impatience kicks in!

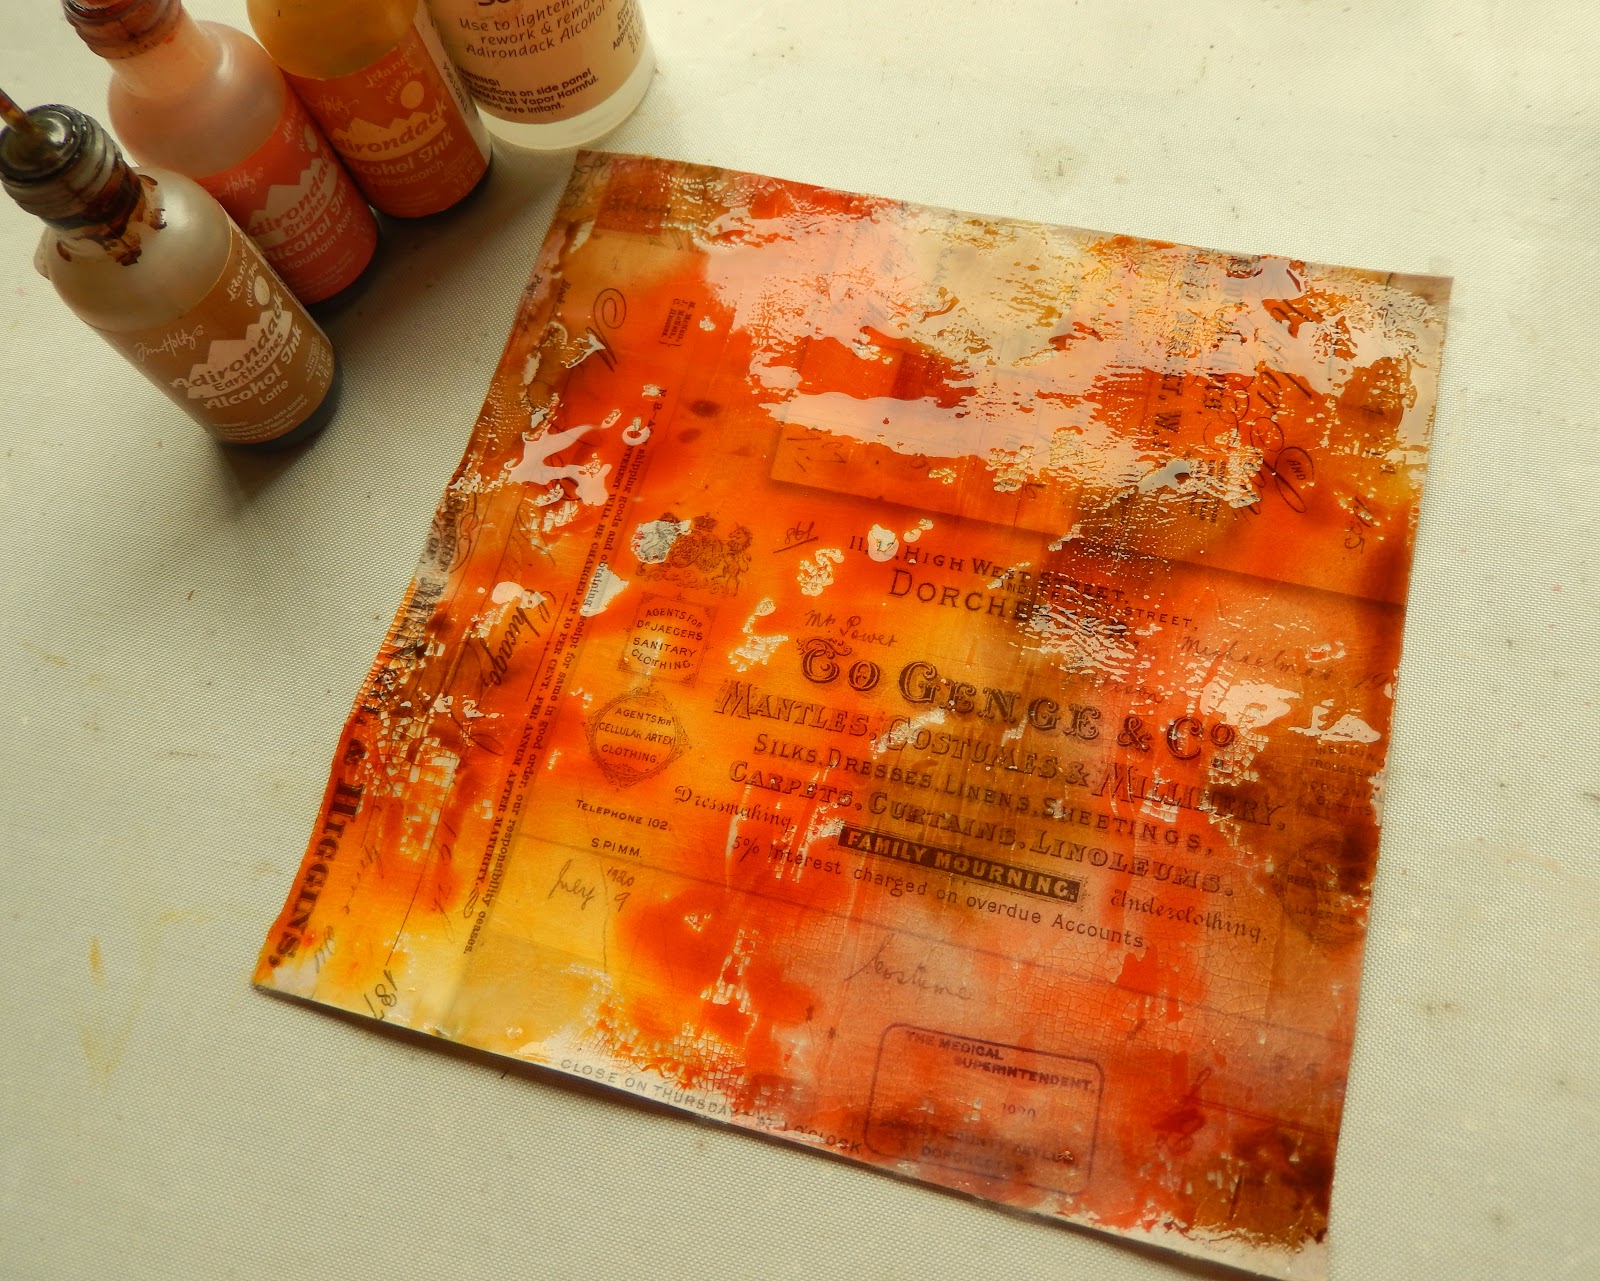
Apply lots of Alcohol Ink Blending Solution to the surface before adding drops of Fall colour alcohol inks (I used Rose Mountain, Latte and Butterscotch but many others will work too). Tip your paper at different angles to encourage the inks to blend (you can also use a paint brush to do this) then dry with a heat tool.
Apply Distress Grit Paste through the Blossom Layering Stencil and allow to dry. Again, you can't use the heat tool for this layer to achieve the best effect as the Grit Paste isn't heat stable. It also gives the paste the opportunity to absorb a little of the ink colour.

When dry apply a generous amount of Antique Linen Distress Crayon (from Set #3) over the whole surface, blending with your finger to work it into the cracks and over the Grit Paste. It gives reveals the crazing and gives the strong colours a softer look, more like those Fall leaves when a light frost covers them.

Blend a smaller amount of Dried Marigold Distress Crayon (from the new pastels Set #5) into the middle two thirds of the flowers and leaves with your finger. The more Distress Crayon you layer up the less you need as it blends more easily. By using your finger rather than a wet wipe the colour hits the top layer of the Grit Paste and leaves a little of the whiter colour underneath.

Next add an even smaller amount of Rusty Hinge Distress Crayon (from Set #2) into the centre of the Dried Marigold areas and blend again with your finger. Each layer is adding more definition to your blossoms.

Add some Frayed Burlap Distress Crayon (again from the new pastels Set #5) onto the edges of some of the leaves and stems to create shadows, blending with your finger as before.

Finally add the tiniest amount of Candied Apple Distress Crayon (from the new Set #4) into the centre of the flowers and blend again. Next to nothing of this is needed to add that final pop of colour to your blossoms.

Stamp one of the Patchwork Pieces stitched lines along the bottom of the line of blossoms using either Black Soot or Jet Black Archival Ink.

Add a few Remnant Rubs (these are from the Botanicals set) using the Remnant Rub Tool. I apply a small amount of Matte Distress Collage Medium over the Remnant Rubs (using a paint brush so as not to disturb the Distress Crayon layers underneath) to secure them in place.

With the base of the card done a focal point is needed. Cut a watering can from thick card or chipboard and cover with a blended layer of Brushed Corduroy and Rusty Hinge Distress Paints. Allow them to dry and 'muddle' together.

At this point I realised a touch of Distress Grit Paste would add more texture and age, so I applied some with my finger onto a few areas. I suggest you do this before adding your paint as otherwise you'll need to add more paint over it!

Now add a generous layer of Picket Fence Distress Paint and immediately add droplets of water on top with your Distress Water Bottle. Dry with your heat tool to the point where the water droplets remain and the rest of the paint is dry. Blot with dry tissue or kitchen towel to remove a little of the wet paint/water and reveal some of the colour underneath.

Finally lightly dab Black Soot Distress Paint onto the Distress Grit Paste areas to add more age and dirt before drying.

Mount your watering can over the Remnant Rub leaves and add some black die cut Wildflower pieces with Big Chat words (or whatever words you prefer) then mount your completed design onto a card blank. And there you have it, an Fall Blossom garden card. Try using the same techniques on a larger card or canvas so you can extend the design even more (yep, there's one in progress in my craft room) and most of all have fun with those Distress Collage Mediums and Crayons!

(click on the image for a closer look)
Thank you for joining me today for this tutorial. I hope you feel inspired to play with these new products if you've not done so already. And if you now need them in your life there's no better place to shop than The Funkie Junkie Boutique!
Have a great weekend and whatever you're up to, take care of yourselves.
Jenny xxx
What a glorious background you created Jenny and the final piece is fabulous...a real work of art. I love it. Thanks for sharing the alcohol ink ideas...I must try it. Hugs from the beach on Rhodes;-) xx
ReplyDeleteThank you Jane! x
DeleteWhat a glorious background you created Jenny and the final piece is fabulous...a real work of art. I love it. Thanks for sharing the alcohol ink ideas...I must try it. Hugs from the beach on Rhodes;-) xx
ReplyDeleteGorgeous work Jenny.... The alcohol inks look fab on the sealed surface! So many products I haven't yet got! Xxx
ReplyDeleteThank you Nikki! x
DeleteStunning Jenny! I just love the background with the alcohol inks and then the paste flowers ........... oh so beautifully coloured with the Distress Crayons. I now need all of these products ......... A great tutorial - thank you! Jennie x
ReplyDeleteThank you Jennie! x
DeleteFantastic Tutorial and beautiful! Love the layers of the various mediums and then re-applying colors to get the wow moments!
ReplyDeleteThank you Suzanne! x
DeleteWhat a wonderful tutorial! I love all the texture you created here! The flowers have incredible depth thanks to your expert coloring.
ReplyDeleteThank you Kathy! x
DeleteWow! This is gorgeous. Wonderful tutorial! :)
ReplyDeleteThank you Katy! x
DeleteWONDERFULLY fall and FABULOUS Jenny. Xj.
ReplyDeleteThank you Joi! x
DeleteI love your card Jenny! The background is stunning and you really brought the blossoms to life with the crayons! It's sooo pretty!
ReplyDeleteThank you Zoe! x
DeleteI love it! You have inspired me to try this technique for sure, thank you!
ReplyDeleteThank you Susan! x
DeleteYou really are the queen of experiments Jenny, I love, love this fabulous technique - the end result is superb!! xx
ReplyDeleteThank you Anne! x
DeleteHow very pretty! Love the vivid fall background!
ReplyDeleteThank you Barb! x
DeleteHow very pretty! Love the vivid fall background!
ReplyDeleteThose blossoms look just stunning, Jenny - what a great tutorial, full of tips and techniques. Thank you.
ReplyDeleteAlison x
Thank you Alison! x
DeleteOh Jenny....I LOVE, lOvE, LoVe this tutorial...FABULOUS!!!!
ReplyDeleteThank you Mylissa! x
DeleteFabulous techniques Jenny with super rsults, - love this beautiful card!
ReplyDeleteThank you Astrid! x
DeleteGorgeous background and beautiful flowers. The watering can looks ancient! (In a good way)
ReplyDeleteThank you Marci! x
DeleteWow - what a fantastic piece and a fantastic tutorial. It is always like having a master class when you do one of these and I love learning from you.
ReplyDeleteHugs!
Cec
Thank you Cec! x
DeleteLoved your tutorial and the outcome is so pretty! I've got so many of your products used on the background, so I've got to give this a try! Great finish on the watering can--don't have these products, but I loved seeing how you made this look so worn and vintage. Hugs!
ReplyDeleteThank you Sara! x
DeleteStunning and love the tutorial.
ReplyDeleteHugs
Linda xxx
Thank you Linda! x
DeleteCan't wait to try this one!!! Great!
ReplyDeleteThank you Mimi! x
DeleteCan't wait to try this one!!! Great!
ReplyDelete