Saturday Showcase - Adding Colour to Tim Holtz Ideaology Botanical Collage Paper
Hi everyone and welcome! It's Jenny Marples here with a new tutorial for you as part of the Frilly and Funkie Saturday Showcase series - this is where we shine a spotlight on a particular product or range stocked by The Funkie Junkie Boutique.
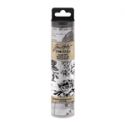
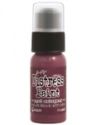
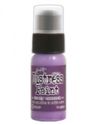
Today I have a new video tutorial to share with you sharing tips and techniques for using Distress Paints to colour the new Tim Holtz Ideaology Botanical Collage Paper.
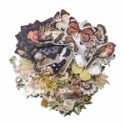
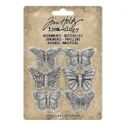
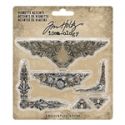
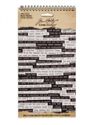
Once you've painted your Collage Paper it's ready for applying to a multitude of surfaces including Tim's Paper Stash, Baseboards, Frames, Vignette Boxes, Ephemera and so much more. For today's card I tore out a few of the images to layer over a patchwork of patterned paper from the Etcetera Paper Stash collection. The butterfly in the centre of the card came from Tim Holtz Botanical Layers pack with one of the new Ideaology Adornments, Butterflies added over the top. The sentiment came from the Small Talk Stickers pack and the decorative metal corners from the Vignette Accents set.
(click on image for a closer look)
Having seen how easy it is to colour Tim Holtz Botanical Collage Paper I hope you feel inspired to give it a go and cover your projects with beautiful flowers. There are links below to the products used to create the card and if you have any questions please let me know in the comments box.
Thank you for joining me for today's Saturday Showcase. Another member of the team will be back next Saturday to share a new tutorial. In the meantime a quick reminder that there's still time to enter the current Frilly and Funkie challenge 'Dare to Resist'.


Beautiful Jenny and fabulous video. The colours really pop. Tracy x
ReplyDeleteThank you so much Tracy! So glad you enjoyed the video too xx
DeleteSuch a brilliant tutorial, Jenny! I feel like I learned so much just watching you paint. Thank you so much! xoxoxo
ReplyDeleteThank you so much Kathy! So glad you enjoyed the video too xx
DeleteYour Art is inspiring as always. Thank you for your instruction. ~ Gracie Wieber
ReplyDeleteThank you so much Gracie! So glad you enjoyed the video too xx
DeleteGreat video Jenny and I just love your fabulous card xx
ReplyDeleteTFS and hugs
Annie x
Thank you so much Annie! So glad you enjoyed the video too xx
DeleteGreat tutorial and a wonderful card.
ReplyDeleteThank you so much Cec! So glad you enjoyed the video too xx
DeleteFantastic video Jenny! Love that you are making videos!!! I can't wait to get this paper!
ReplyDeleteThank you so much Juli! So glad you enjoyed the video too xx
DeleteYour card is beautiful Jenny and I really enjoyed your video tutorial... xx
ReplyDeleteThank you so much Anne! So glad you enjoyed the video too xx
DeleteGreat look for colored tissue images! Thanks for the video!
ReplyDeleteThank you so much Lagene! So glad you enjoyed the video xx
DeleteWhat a great result! Such a stunning make! Hugs, Autumn
ReplyDeleteWow, Jenny! What a beautiful result! Thank you for your informative video! It's so fun to see you create! Hugs!
ReplyDeleteThank you for the hints and the tips on the video. Beautiful!
ReplyDeleteJenny this is gorgeous! I can’t belive I haven’t known about this before. Thank you so much for sharing!! 💜
ReplyDelete