
I began this whole creative process by making a swatch card of the Emerald Creek embossing powders currently in my possession and quickly realised that the mix of greens, browns, golds, rusts and black coppers were very reminiscent of the beach. This fits rather well with the current Frilly and Funkie challenge which has a travel theme (details HERE). Some are original Emerald Creek ones and some are Seth's delicious Baked Texture powders and they work together effortlessly. I thought back to trips to the seaside where souvenir stores would sell weathered wooden nick-nacks covered in semi-precious stones, multi-coloured sands and other beachcomber things. And so I set about making a 'semi-precious' trinket box to show off the beauty of these gorgeous embossing powders (click on each image for a closer look);

The 'How To' Tutorial
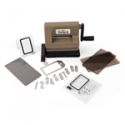
Now I bet that looks super complicated right? But actually it's just a pile of heat embossed die cuts arranged on a weather worn look trinket box. I used Eileen Hull's Trinket Box by Sizzix but you could do this on anything from a wooden spoon to a card or even a piece of driftwood! Let's show you how.
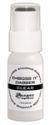
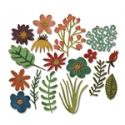
I used the dies from Tim Holtz 'Funky Floral' sets #1 and #3 and ran each one through my Sizzix Sidekick for speed. I also recommend using Ranger's Emboss It Dabber to deliver lots of embossing ink and Ranger's Heat Tool (initially from a distance) because it is less forceful and allows the larger granules to melt into the smaller ones rather than move around.

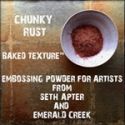
For the largest flower use kraft card and apply two layers of Chunky Rust Baked Texture Embossing Powder. Having embossed the first layer use the dabber over the flower again and just apply a second layer of powder. The 'floss' element to this powder give the flower a beautiful fluffy textured finish.

The centre of the flower is also cut from kraft card and embossed with Emerald Creek's Oil Rubbed Bronze Embossing Powder. Only one coat is needed and once set it can be glued onto the centre of the flower.

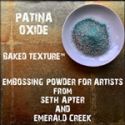
Cut the long leaf stems from white card (though this powder is opaque when melted so you could use kraft card if preferred). Emboss with Seth Apter's Patina Oxide Baked Texture Embossing Powder.

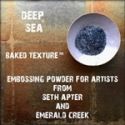
The grass fronds definitely need cutting from white card because one coat of Seth Apter's Deep Sea Baked Texture Embossing Powder is semi-translucent and you get a gorgeous mottled deep green effect when melted.

One of my all time favourite powders, Emerald Creek's Fractured Ice Embossing Powder works amazingly over dark coloured inks, but for these branches apply onto white card to get that pale turquoise mottled effect.

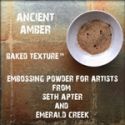
Seth Apter's Ancient Amber Baked Texture Embossing Powder is also a semi-translucent powder and over kraft card produces a beautiful golden shimmer with just one coat.

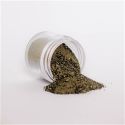
Emerald Creek's Charred Gold Embossing Powder is another of my all time favourites. This is also an opaque powder and has multiple colours included (in fact it has a look of rough sand when in it's un-melted state) so cut the seed head flower from either white or kraft card and emboss with one coat of powder.

The final flower head can be cut from kraft or white card (I went with kraft) and is covered with Emerald Creek's Burnt Copper Leaves Embossing Powder which has a delicious mix of copper and gold tones.

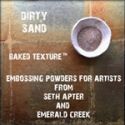
Finally cover the base of your chosen project, be it box lid, card, spoon or driftwood etc with a coat of Matte Distress Collage Medium and sprinkle with Seth Apter's Dirty Sand Baked Texture Embossing Powder. It will stick firm in place without the need for heat setting so you can achieve that matte multi-toned look of real sand.
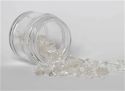
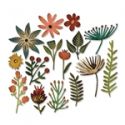
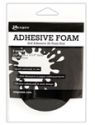
To finish layer up the various embossed flowers and foliage. I began with the largest flowers mounted on black foam tape and added in the other elements underneath overlapping them as I went. I also added Emerald Creek Quartz Gemstones into the centre of the large flowers.
The Close Ups
I took a bunch of close ups to let you see in more detail the beauty of these gorgeous embossing powders. Remember you can click on each one for a closer look;


I'm sure you'll agree these Emerald Creek and Seth Apter Embossing Powders create wonderful effects in both their heated and un-heated states. Check out the full range available at The Funkie Junkie Boutique HERE. And I've added a full list of ingredients for this project below.
Thanks for joining me here today. Have a great weekend and remember to get creative!
Jenny xxx
 |  |  |  |  |
 |  |  |  |  |
 |  |  |  |  |
 |  |

Wow, Jenny! Amazing results with those powders and a lovely finished trinket box! I especially love the effect you achieved with the rust! You are a master of flower arranging! Hugs!
ReplyDeleteAn interesting and useful product I wasn't familiar with. Your project is nice and the tutorial helpful. Thank you!
ReplyDeleteWow this is awesome, Good to know Ranger has an embossing dauber, very convenient!
ReplyDeleteI fell in love with embossing powder early on in my crafting journey. I have to say, these EC powders are so much fun to use. I love all the wonderful textures you've created here by using them in so many ways. Such a great inspiration, Jenny! Thanks for sharing!
ReplyDeleteLook at all that beautiful texture! Wonderful spotlight on the Embossing powders and a gorgeous box!
ReplyDeleteI haven’t tried these powders yet but continue to be charmed by their oddness and versatility. I thought the rusty flower was rough suede at first. You’ve done a masterful job, as usual, combining the textures and layers, Jenny. This reminds me very much of the little souvenir boxes we’d buy as children near my grandparents’ house in Florida. Thanks for sharing with such a clear tutorial...
ReplyDelete