
Hello dear friends! It's Maggi here and I'm excited to share my very first Saturday Showcase on the Frilly and Funkie Blog. Today I want to show you some of my favorite coloring techniques. We'll use Distress Oxide Inks, Emerald Creek embossing powders, and mists. And in that process we're going to make a really pretty Etcetera tag that makes a great display piece.

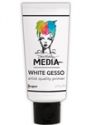
1. Let's get started by first painting a medium sized Etcetera tag with white gesso. These tags are a great size at 6 1/2" x 12" and take mixed media so well because they are a sturdy thickboard. You could also use the oxides directly on the board but I wanted a white layer underneath the oxides to keep the color light. Putting the oxides straight on the board would result in a different look.

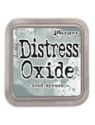
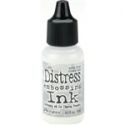
2. After the gesso dries, color the tag with distress oxides. I chose several colors to work with, and just randomly dabbed on color, then I spritzed lightly with water and let the colors muddle a bit, dried with my heat tool, repeating this process until I was satisfied with the result.

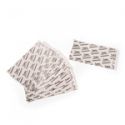
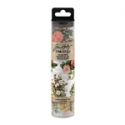
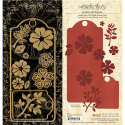
3. Now let's give the background some contrast and interest by adding some Botanical Collage Paper. Tear off a piece of collage paper and tear along the sides for a nice look. Adhere the torn paper to the tag with matte medium or collage glue. Be sure to paint all over the tag and the paper as this will also seal the ink. The matte medium may cause the ink to bleed a little but I was ok with that. The colors just blended a little more.
Tip: It's really easy to tear paper if you paint a thin line of water along where you want to tear. Let the water soak in and just tear. The paper tears right where you want it, and you get a great torn edge look.

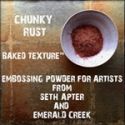
4. Time to dig out the embossing powders. First let's color a chipboard sentiment. I used Emerald Creek's new Baked Texture embossing powder from Seth Apter's "altered page". These powders are fabulous, they add so much texture and deep color. I used Chunky Rust on the sentiment and I love how it looks!

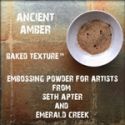
5. Next I want to create a die-cut layer using collage paper and card stock. First, adhere some collage paper to plain card stock. I use Xyron's Creative Station to apply my adhesive but any sort of adhesive sheets works well. Now your paper is ready to run through your die-cut machine. I used a die from Cheery Lynn Designs to cut my design. Now comes the fun part! Dab some embossing ink randomly on the edges of the die-cut, sprinkle on some embossing powder and heat. I used another Baked Texture embossing powder, Ancient Amber. It is such a rich amber color with darker flecks throughout. See how the embossing powder edge creates a frame? Love how that looks!!

6. Before adhering the sentiment, we need to tone down the bright white of the collage paper. Some Distress in in Antique Linen should do the trick. Now adhere the sentiment to the die-cut piece. Looks good I think with the textured letters and gilded frame look!

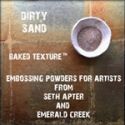
7. Let's try out another technique for coloring chipboard. Squeeze a little embossing ink onto your craft mat, and, with a thin paint brush, paint the area you want to emboss. In my case I want to use Emerald Creek's Baked Texture Dirty Sand to color the trellis. The first photo shows how I've painted just the trellis and covered with embossing powder. The center photo shows the Dirty Sand after heating. Next, I painted embossing powder on the leaves and heat set. I love the detail of the two colors of embossing powder.

8. Let's assemble this piece now. Glue the chipboard trellis in the upper left corner and use cardboard or dimensional foam tape to pop up the die-cut and position as show in the photo.

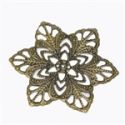
9. Of course what we need now is flowers! But first let's make another fun embellishment. Embossing powder does wonderful things for metal. Just dab or paint on some embossing ink, sprinkle with embossing powder and heat. The effect is so striking and varies considerably depending on the type of powder you use. I again used Dirty Sand on these pieces and look what a textured finish these pieces now have. Try some metallic embossing powder too, that looks really WOW!

Don't they look pretty tucked in with the flowers?

Just to show you how embossing powder can change the look of your metal pieces, I had to sneak in this little photo from another project of flowers embossed with gold embossing enamel, pretty cool right?

10. Ok, let's get back on task. 😃 Die-cut some greenery to go with the flowers. I've used a leaves dies from the new Graphic 45 Staples Large Tag and Flowers Die. Now that's one of my favorite new tools! Love these leaf clusters with the pretty embossed details. Now to give your leaves some real pizazz, lightly mist and dry with a heat tool. The mist adds subtle shades of color and drying with the heat tool causes the paper to curl a bit so that the leaves do not have a flat appearance. No mist, no problem! Lightly ink the leave with one or several colors. I often combine ink and mist.


Close up of all the pretty blooms at the top.

Now it's time for you to dig out your mists, inks and embossing powders and get to creating! Be sure to visit The Funkie Junkie Boutique where you can find many of the products I've used today.
I hope you'll stop by every weekend for our Saturday Showcase. The Frilly and Funkie team always has a fun project/technique to share with you. Plus we have fun challenges kicking off on every other Wednesday. I hope you'll craft something and join in our challenges.
Thanks so much for joining me!
Maggi xxx
Products from The Funkie Junkie Boutique
 |  |  |  |  |  |
 |  |  |  |  |  |
 |  |  |  |  |  |
 |  |  |  |  |

Oh WOW Maggi! There's so much to see on this beautiful tag and I'm so pleased we get to see a really clear guide to making it to see how all the elements come together. So many useful tips and ideas! Thank you for sharing xx
ReplyDeleteWow, Maggi! This is beautiful! I love the way you've used the collage papers to add contrast to your lovely inked background. Great tips, great tutorial and a great post! Thank you so much!
ReplyDeleteSo many wonderful element, Maggie!!! Love your inspiration and am going to try some! Love the mixtures of patterns and all the heat embossing!
ReplyDeleteMaggi, I'm so sorry to be late; I've been out of town and playing catch up! Wow! Fabulous tutorial using those powders! I have never thought to use the powders as a frame on a die cut like that. That's a tip I will be sure to use! Beautiful altered tag with so many lovely elements! I wish my garden looked like that! Hugs!
ReplyDelete