
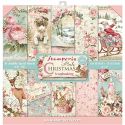
Stamperia Christmas Collections are in stock at The Funkie Junkie Boutique!
Good morning and happy Saturday!! Maggi here to share a couple of cards suitable for mailing and a tag that will make your gift extra special. Stamperia has several gorgeous Christmas collections that look so vintage, you're going to love them! Some of Stamperia's collections are done in traditional colors, while others are more Victorian. You can find all of these collections at The Funkie Junkie Boutique.

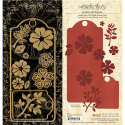
A Card with Stamperia's Pink Christmas
Pink Christmas is a beautiful vintage collection done in Victorian colors of teal, pinks and rose. The collection is made up of gorgeous images that are perfect for fussy cutting. Note: Ink all the papers if you wish. I used Distress Ink in Worn Lipstick and Iced Spruce.

Pink Christmas Card Tutorial -

Step 2: Adhere the cream flap to the backside of the candle image as shown in the 1st photo so that the circle folds over the candle image as shown in the 2nd photo below. Glue the roses image to the outside of the circle. (Not shown)

Step 3: Open the flap out and adhere the deer image on the inside as shown below.

Step 4: Cut a border strip from silver paper with the Mini Scalloped Impresslits Embossing Folder. Lightly ink with Stonewashed alcohol ink.

Step 5: Cut a green card base 9 1/2" x 6 3/8" and score at 4 3/4". Cut a teal floral layer 4 1/4" x 6". Adhere the border strip from Step 4 over the right edge of the blue floral layer as shown so that it's edge is just beneath the candle cut-apart layer. Then adhere the candle and circle assembly over the blue floral layer.

Step 6: Cut a 4 1/8" x 5 7/8" piece of design paper as shown below and adhere to the inside of the card.

That's it! This is such a pretty card that is flat and therefore suitable for mailing. If you don't plan to mail the card, you can add some flowers to the front of the card making it even more stunning!
Gift tag with Stamperia Pink Christmas

Pink Christmas Gift Tag Tutorial -
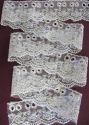
Step 1: We'll use a large ivory Graphic 45 tag as the base for this tag. Die-cut a pink floral tag using Graphic 45's large tag die from the Stamperia Pink Christmas 12 x 12 collection. Notice the blank space between the top and bottom of the pink die-cut. Well, I am really miserly with my papers so for this tag I used a scrap of paper that was shorter than the length of the tag. Since the center of the tag is going to be covered with other paper, that is ok! So, I just die-cut a short tag, cut 2" off the bottom and rounded the corners. Then I adhered the small piece to the bottom and the larger piece to the top. Cut a 3 3/4" piece of Venetian lace and adhere over the pink paper at the bottom. (Ink the edges of the papers for this tag as desired with Distress Ink in Tattered Rose and Iced Spruce.)

Step 2: Next cut a piece of teal paper as shown 3 3/4" x 3 1/2". If you have a border punch, punch the bottom as shown and adhere to the tag so that it just laps over the top of the lace.

Step 3: Next cut out the square "for you" cut-apart shown and the circular Merry Christmas cut-apart. I used scalloped dies to cut both the square and circle but it is not necessary to use a die. Trimming with scissors will look great too!

Step 4: Adhere a circle at the top left. Then position the square cut-apart over the circle and use foam dimensional tape to adhere over the circle. Use foam dimensional tape to pop up the 2nd circle and position as shown in the photo. Add the Merry Christmas circular cut-apart, using foam dimensional tape to pop it up.

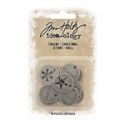
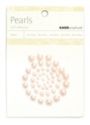
Step 5: Select 3 Tim Holtz Christmas Typed Tokens and dab with a white paint dabber, being sure to get white paint embedded in the lettering. Then wipe the paint from the surface so that just the words are white. Adhere at the bottom of the tag as shown below. Use tiny pearls to cover the holes.


Easel Gift Card Holder with Stamperia's Vintage Christmas
This last card is made with the Vintage Christmas collection which is done in more traditional Christmas colors and images. I love the holly sprigs, bells, and Christmas trees sprinkled throughout the collection.


Vintage Christmas Easel Card Tutorial -
Step 1: Cut a 8" x 12" piece of red cardstock. Score horizontally at 6" and vertically at 4".


Detail the berries on the holly sprigs with Stickles to add a sparkly element to the card. That's it, all finished! The front of the card forms a pretty easel allowing the recipient to display this unique card for all to see. Inside the card there's lots of room for a personal message and a gift card too.


Thanks so much for joining me for this long post!! I hope these tutorials give you some ideas for all your Christmas craft cards, tags and projects!

Supplies from The Funkie Junkie Boutique


Step 2: Cut out the upper left rectangle along the score lines as shown in the photo below. Keep the cut out rectangle as we'll use it in Step 4.

Step 3: Fold as shown below.

Step 4: The red rectangle pictured below is the piece we cut out in Step 2. Cut a 3 7/8" x 5 7/8" rectangle from green snowy paper, (top right). Locate the cut-apart shown and trim out. Cut a rectangle (I used a scalloped die) from the red with trees paper 2 3/4" x 4" and trim out the birds tag shown below.

Step 5: Score the red cardstock flap at 3" and fold up as shown in the photo and set aside. Layer and adhere the green snowy paper over the red cardstock. Next adhere the cut-apart with the bells over the green snowy paper. Use dimensional foam tape to adhere the next layer, the red with trees. Adhere the final layer, the birds tag. Now, adhere this assembly to the face of the folded piece by adhering the top 3" of the layered piece to the 3" face of the folded up piece. (See the 3rd photo in Step 6.)

Step 6: Cut a piece 3 3/4" x 5 3/4" and adhere underneath the flap. (This is the bottom right corner of the card if the cardstock is laid out flat.) Cut out the tag shown below and adhere about 1 1/4" from the bottom of the card and centered.


This is how the easel mechanism should look.

Step 7: Cut a piece 3 3/4" x 5 5/8" from the blue snowy paper and round the corners if you wish. Cut out the Christmas tree (round the corners if you wish) and the circular Greetings cut-aparts shown.

Step 8: Open the card such that the easel mechanism is on the left and the card opens in the traditional manner. Adhere the tree cut-apart to the right side and adhere the snowy paper to the left side. Put adhesive on the back of the circle cut-apart around the edges but leaving enough room at the top so that cash or a gift card can slide inside.


 |  |  |  |  |
 |  |  |  |  |
 |  |  |  |  |
 |  |  |  |  |
These are all so gorgeous Maggi! I thought they would be super tricky and complicated to make too but you've made it really easy to see how to make things which look so professional and elegant. Thank you for sharing xx
ReplyDeleteGreat cards, Maggi!
ReplyDeleteYou take these already beautiful papers to a whole other level—a big bonus is how useful and mailable the cards are. The tag is just beyond!
ReplyDeleteBeautiful! Lovely designs and gorgeous tag and cards!
ReplyDeleteThese projects are stunning...what a great set up papers with which to create. tfs
ReplyDeleteGorgeous designs. Thanks for sharing how they came together.
ReplyDeleteBeautiful cards and tag! Really like your tutorial on how they were made and the products you used. Thank you!
ReplyDelete