The Process
I'm using a large ivory Graphic 45 tag. I love the shape of these tags as they are just a bit wider than many tags of a similar size. I also love the fact that Graphic 45 has a die that makes a perfect die-cut to fit onto the tag. In this photo the tag is in the center and the front and back pieces are on either side. I'm using the gorgeous Bloom collection available at The Funkie Junkie Boutique. Lots of Graphic 45 products at the Funkie Junkie, do stop and check it out!
Step 1:
To begin, select your tag (you can make this whatever size you like) and cut a front and back for the tag. Set these aside for a moment and go to Step 2.
Step 2:
Select some lace that would look nice with your tag. I've used some Venise Lace. The Funkie Junkie Boutique has several laces that would work great for this application.
After gluing the lace to the sides of the tag, glue a piece of cardboard that is about the same thickness as the lace down the center. This keeps the tag level and prevents the tag from dipping inward. Now glue the front cover to the tag.
Cut a shape for the center of the tag. Circles and ovals usually work nicely. I've used a scalloped die-cut and popped it up with cardboard. I want my tags to have lots of dimension. Of course, you can use dimensional foam but I like to use cardboard when I'm popping up something as large as this circle. Be sure that whatever you use, does not peek out from the tags on the side as you want the back of the tag to have a completely finished look.
Step 3:
Fussy cut some flowers and tuck just the edge under the circle. Use dimensional foam to pop up the blooms and leaves. Use different heights when popping this up.
Step 4:
Now for one of my favorite techniques! I'm using a chipboard frame, if you don't have one, you can die-cut a frame or use a purchased frame like some of the Tim Holtz Baseboard Frames. Coat the frame with embossing ink and sprinkle with Emerald Creek's Allure Powder - Soft Fallen Snow. Heat and after it cools, randomly dab embossing ink on the chippy and sprinkle with Seth Apter's Baked Velvet - Dusk by Emerald Creek. I love the mottled effect. Adhere the chippy to the tag. Add a sentiment of your choice. I chose chipboard words that I embossed with detail embossing powder. (I didn't think the thick texture of the Allure powder would work well on the small letters.)
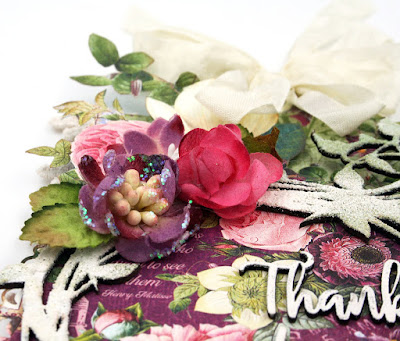
Here's a closeup where you can see the thick texture of the Soft Fallen Snow embossing powder.
Step 5:
Turn the tag over and adhere the back piece cut in step 1. Select a large horizontal ephemera card and fold in half. Chose one that has room to write a message. Most of the back sides of the ephemera cards make perfect card "insides". Then adhere a small ephemera card to the front of the larger folded card so that you have a pretty front to the card. Adhere the card to the back of the tag and now you have a card and tag all in one!
Step 6:
Chose a chipboard piece to go at the bottom of the tag as shown in the photo. Cut some design paper to cover the back of the chipboard piece so that it looks nice from both sides. Embellish with flowers and a pretty bow.
In this photo you can see the different levels created by popping up the layers.
More closeups
Emerald Creek Allure Powder - Soft Fallen Snow - out of stock
Try Seth Apter's Baked Texture by Emerald Creek - Blizzard for a similar look
Thanks so much for spending part of your day with me. Give yourself a break and take some time to craft!
xxo Maggi


Maggi, you make the most beautiful flower arrangements! I love this gorgeous tag featuring those lovely Graphic 45 papers and your altered chipboard frame! Thank you for your inspiration and a great step by step tutorial! Hugs!
ReplyDeleteFabulous! I love the colors, design and everything!
ReplyDeleteAwesome creation!
ReplyDeleteMaggi, this is pure eye candy! Love, love the layers and all your wonderful tips!
ReplyDeleteOh how beautiful Maggi! I love seeing how you combine the various elements so perfectly to create a real treat and always with that twist like the postcard on the reverse. Thank you for sharing xx
ReplyDeleteHi Maggi, Such a Beautiful Gorgeous tag. This Graphic 45 Bloom collection is Amazing. I love how you combined all the elements together.
ReplyDelete