
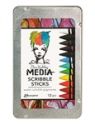
The Scribble Sticks are the shape of crayons you used as a kid but don't have any wax in them, which is the part I love the most. They react with water, are highly pigmented and can be used in a variety of ways. There are three sets and the colours are the same as the Dina Wakley paints.

For my first project, I made a tag.

I started with a 4" x 8" tag that I cut from mat board because I needed something that would stand up to wet media and didn't have any of the many options available from The Funkie Junkie Boutique that are perfect for this type of project.
Some chipboard honeycomb bits that my husband cut for me on the laser cutter were added next and then both sides of the tag were covered with White Gesso (Dina Wakley).

Next I dry brushed some Lime Acrylic Paint (Dina Wakley) over both sides of the tag. I used a Mini Mister (Tim Holtz) to spritz the front with water and let it run.

I used the Lime and Olive sticks to scribble on the tag in random areas (I added some Peacock but forgot to include it in the photo). To blend the colour I dipped a paint brush in water and went over the scribbles.

To add more colour, I dropped water in a few spots on the tag and dipped the Evergreen stick in the puddles until I got the amount of colour I wanted and then moved the tag around to let it run.
I continued to drip colour on the tag alternating it with bits of White Gesso rubbed on with my finger until I was happy with the background.

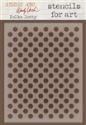
Some Magenta was scribbled through a Polka Dotty stencil (Wendy Vecchi) on the top right and bottom left corners and then leaving the stencil in place, I blended it with water. I found it bled a bit so while it was still wet, I gently patted it with some paper toweling and quite liked the result.
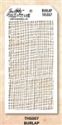
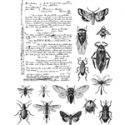
I added some additional stenciling with a Burlap Stencil (Tim Holtz) and Pink Peony Archival Ink (Wendy Vecchi). Next came some stamping with Orange Blossom Archival Ink (Wendy Vecchi) and a star in a circle stamp (Tim Holtz). I found these elements a bit dark so I knocked them back with some watered down White Gesso rubbed on with my finger and then I stamped some Text from the Entomology set (Tim Holtz) and Watering Can Archival Ink (Wendy Vecchi). Some splatters of white paint were also added.

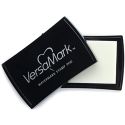
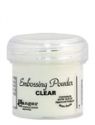
The medium flower from the Fancy Florals set (Dylusions) was stamped onto watercolour card stock with Versamark (Tsukineko) and heat embossed with clear embossing powder (Ranger). I coloured all three flowers (the third one was out of camera range) with the Magenta stick. This time I dipped my paint brush in water and then rubbed it against the bottom of the stick to pick up some colour before I applied it to the card stock. I went back as many times as needed to add some shading. I also made sure I coloured outside the lines so I could see where to fussy cut - any other time I would be making sure I didn't go outside the lines.
To make the topper, I dyed some seam binding with the Evergreen stick by dripping water about the size of a quarter onto my kraft mat and then dipping the end of the stick in it. Note: Because the end of the stick softens in the water be sure to set it down where the end can hang over the edge until it dries so you don't lose any pigment by letting it rub up against something.
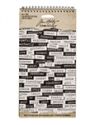
The sentiment words are stickers from the Big Chat collection (Tim Holtz) and they have been added to strips of card stock painted with the Evergreen stick. One flower was adhered with Scor Tape and the other two with dimensional foam dots.

For my second project, I made an art journal page.

I started creating the background by mixing the sticks in little puddles of water and then dripping them on the substrate using a pipette. To control the flow of the colour I used the end of the pipette to move it around rather than picking the sheet up because I didn't want long runs of colour.
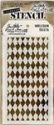
I added some stenciling with a Harlequin Stencil (Tim Holtz) and Deep Purple Archival Ink (Ranger) as well as the Dots and Stripes Borders Stencil (Wendy Vecchi) and Forget-Me-Not Archival Ink (Wendy Vecchi). Then I took a brayer and rolled a thin coat of White Gesso over the whole page.
I used the Elephant stick to add some Asemic writing and went over it with a barely damp paint brush.

I hand cut some hearts from watercolour card stock and painted them with the Magenta and Blackberry sticks using them on their own as well as mixed together. When they dried I added wiggly borders with a fine Pigma Micron pen (Sakura).
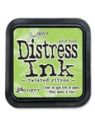
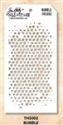
The next step was to stamp each heart with text from the Entomology set using Watering Can Archival Ink. That was followed by stenciling using the Checkmate Stencil (Wendy Vecchi) and Twisted Citron Distress Ink (Tim Holtz, the Dots and Stripes Borders Stencil (Wendy Vecchi) and Picked Raspberry DI and finally the Bubble Stencil (Tim Holtz) and Picket Fence DI.
I painted some punched flowers with the Cheddar stick and added spiral centres with a Purple Glaze Pen (Sakura). The hearts were adhered to the page using Scor Tape and the flowers were added with dimensional foam. Finally I added a sentiment of words from the Big Chat sticker collection mounted on top of card stock painted with the Evergreen stick.

Dina says that the Scribble Sticks can be used on top of her paints so I painted a little manilla tag from the office supplies store with some of her Lime Acrylic Paint and then added marks. I found that a barely damp paint brush was the best way to blend the marks but keep them distinct. If you have too much water the pigment moves too much.
I also tested the bright coloured sticks on Kraft card stock and found the colours stayed lovely and vibrant. I really should have tried to see what happens on black card stock.
I hope you will give these a try. I love them and my very artistic Granddaughter saw them and tried to talk me out of them because she thought they were fabulous - I prevailed and they are still in my craft stash and not in hers.
Supplies used with links to The Funkie Junkie Boutique for those used or suggested:
Dots and Stripes Border Stencil (Wendy Vecchi) - no longer available
Fancy Florals Stamp Set (Dylusions) - no longer available
Tags (Various)
 |  |  |  |  |  |
 |  |  |  |  |  |
 |  |  |  |  |  |
 |  |  |  |  |  |
 |  |

Love the effects you've achieved with the Scribble Sticks Cec and your journal spread and tag are gorgeous. I didn't realise that you could get a look of watercolouring quite so effectively with these - fantastic tutorial TFS xx
ReplyDeleteBeautiful pieces and great inspiration! I have been playing with my scribble sticks and this has given me all kinds of ideas!
ReplyDeleteYou have certainly given us lots of ideas to try with the Scribble sticks! These have been on my radar, but now they are getting added to my wish list! I especially love how beautifully the colors mingled on your first tag! Wonderful tutorial; thank you so much for the inspiration!
ReplyDeleteScribble sticks look like fun!! I especially like that first tag with it's bright colors and chipboard honeycomb!
ReplyDelete