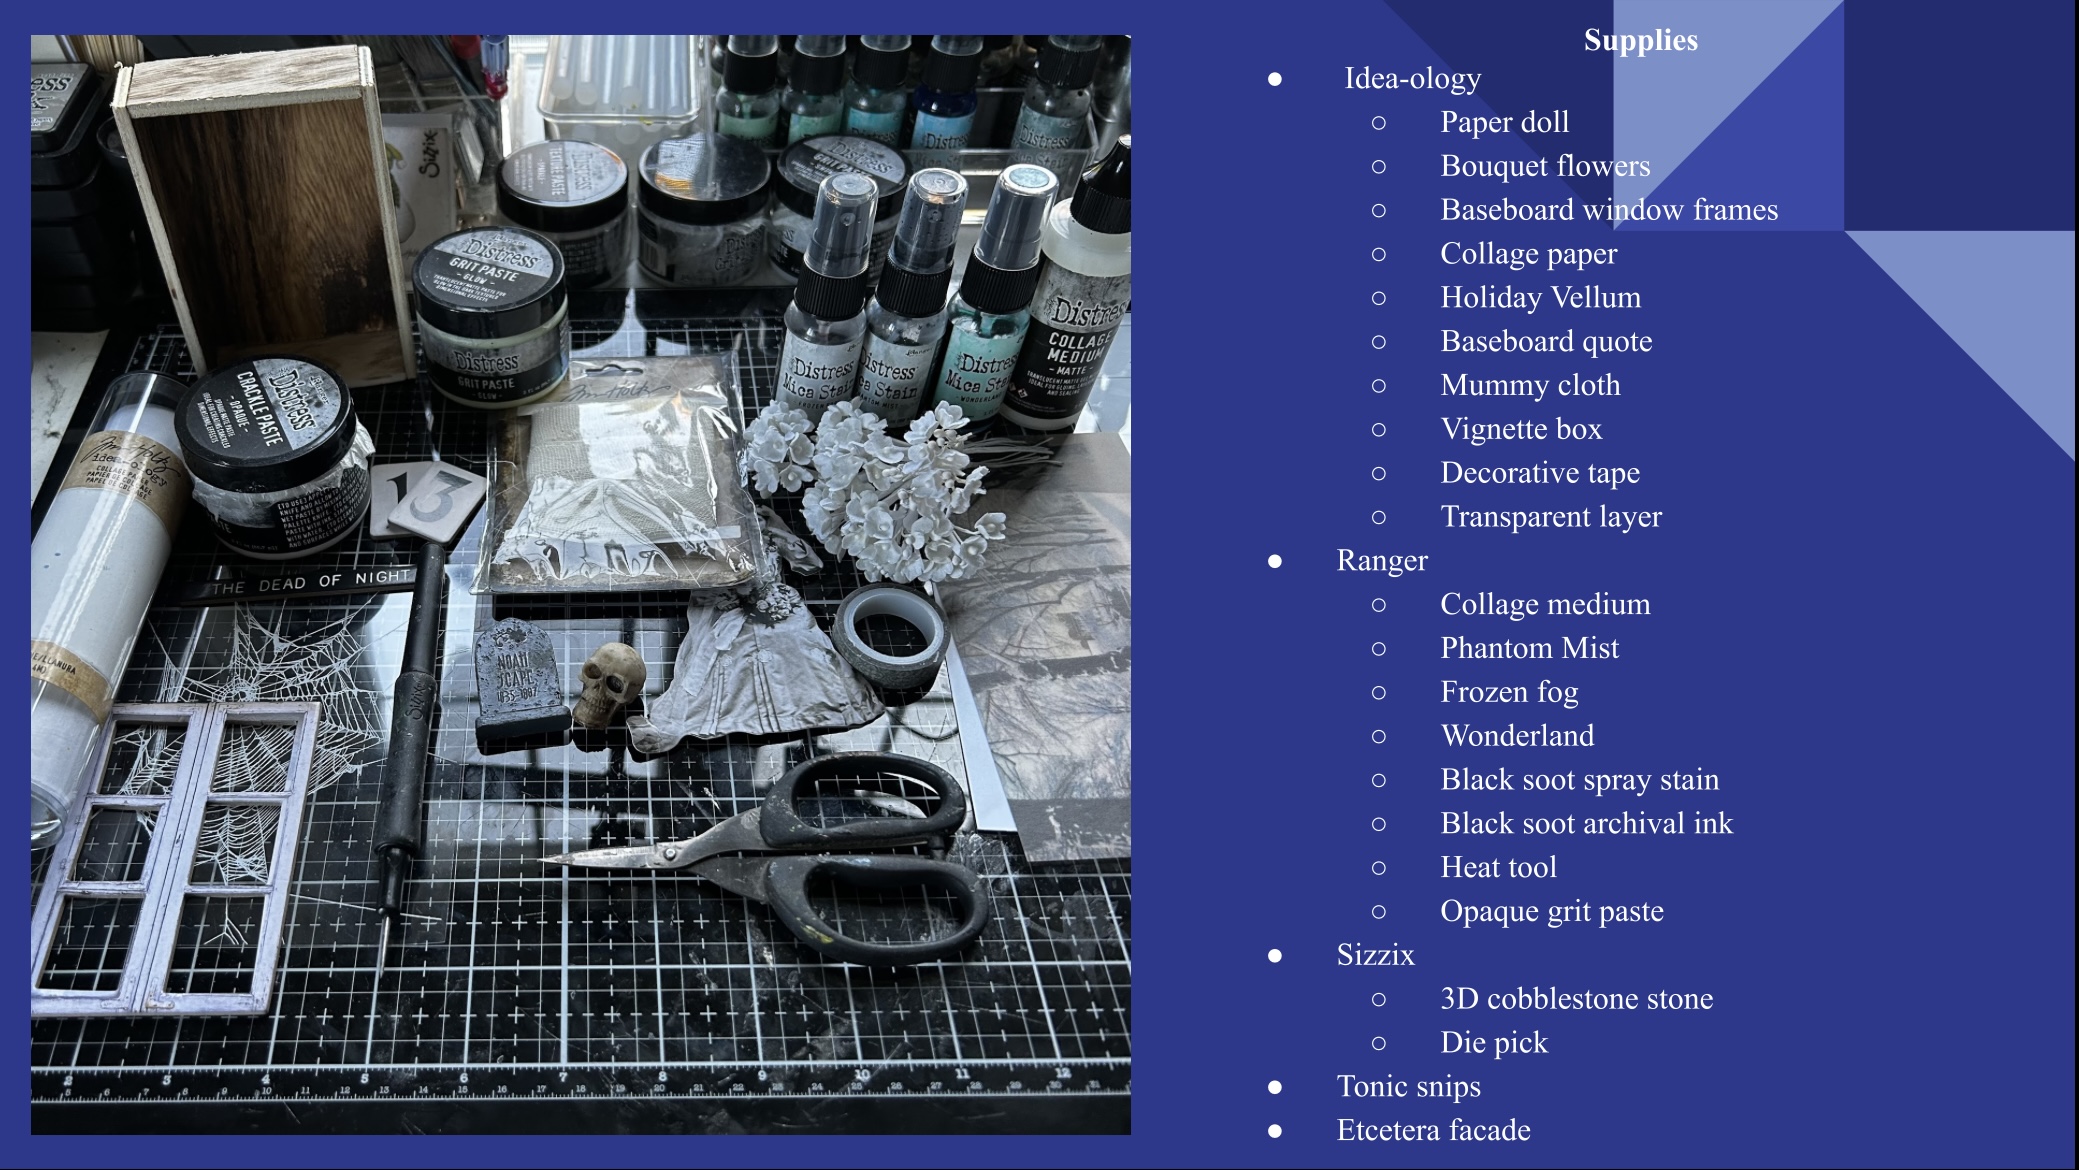
Today we are creating a Halloween night scene for this week’s TFJ Inspiration Ave blog theme “Make a Scene”. Here I want to feature lots of fun and spooky Idea-ology and Ranger products such as Distress Mica Spray Stains, Crackle Paste, and Paper Dolls.
If you would like to see the more in depth instruction click here.
Supplies used: Vignette Box, Idea-ology: Decorative Tape, Bouquet Flowers, Halloween Paper Doll, Baseboard Window Frame, Mummy Cloth and Collage Paper, Mica Spray Stain Frozen Fog, Phantom Mist, Collage Medium, Sizzix 3D Cobble Stone Texture Fade, Etcetera, Tonic Snips, Ranger Heat Tool, Black Heavy Stock, Black Soot Distress Spray Stain, Distress Glitter.
To start our Garden at Midnight vignette, I decided to begin with the main focal point which happens to be a Tim Holtz Idea-ology Paper Doll.
To start the alteration, I cut along the lines of her arm that attaches to the dress with some Tonic Snips. Then I snipped two triangular pieces by her waist. These snips are going to allow me to cinch a piece of velvet trim ribbon after we have created a fantastical dress for her.
To create the dress, I am altering some blank Collage Paper. I decided to use some Distress Mica Spray Stain Frozen Fog for the main color and a dash of Phantom Mist. I spritz the Collage Paper first with some water and then added the Mica Spray Stains. After, I dried the paper with the Ranger heat tool.
Then I sectioned the Collage Paper into three parts. Two of the pieces I fan folded to create the pleats of her dress. The third portion I glued directly over the existing dress to give us a foundation to work on. Next I glued one of the fan folded sections to the right hand side of the Paper Doll before mirroring it on the other.
To bring the dress together, I used a piece of velvet trim to hide some of the glue lines and placed the ribbon around the Paper Doll’s waist.
Now it’s time to add some more embellishments to the shimmering dress. Here I have colored some Idea-ology Bouquet flowers with Distress Mica Spray Stains. I used the colors Phantom Mist, Frozen Fog, and Wonderland. With the Distress Sprayer, I spritzed each of the bunches of flowers before adding the shimmering Mica Spray Stains. After I dried the bunches of flowers off with the Ranger heat tool.
Once the flowers were dry, I snipped all of them off the stems with the Tonic snips. To add some more visual interest to our bride, I glued some of the flowers into a bouquet for her to hold.
Next, we are going to be altering some Idea-ology Mummy Cloth with some Distress Mica Spray Stain Frozen Fog. First, I spritzed the cloth with some water and then added the spray stain. After I wiped up the extra spray stain with a cloth before drying it with the Ranger heat tool.
Once dry I then took the Sizzix die pick tool and shredded the Mummy Cloth to make it more tattered and torn.
Then I glued several pieces to the Paper Doll to create a tattered and torn vail. I also added in a few of the flowers from earlier to give the Paper Doll a headdress.
Next we are going to alter some windows for the Vignette Box. To start, I took a Baseboard Window Frame and I cut it in half with the Tonic scissors. Then I took a piece of the spiderweb acetate from the Halloween layer pack and glued the cut window frame to it. I then let this dry for about 15 minutes.
Once the window frames were dry, I then trimmed off the excess acetate with a pair of scissors. To make curtains, I took some of the remaining Mummy Cloth and glued it to the back of the Baseboard Window Frames.
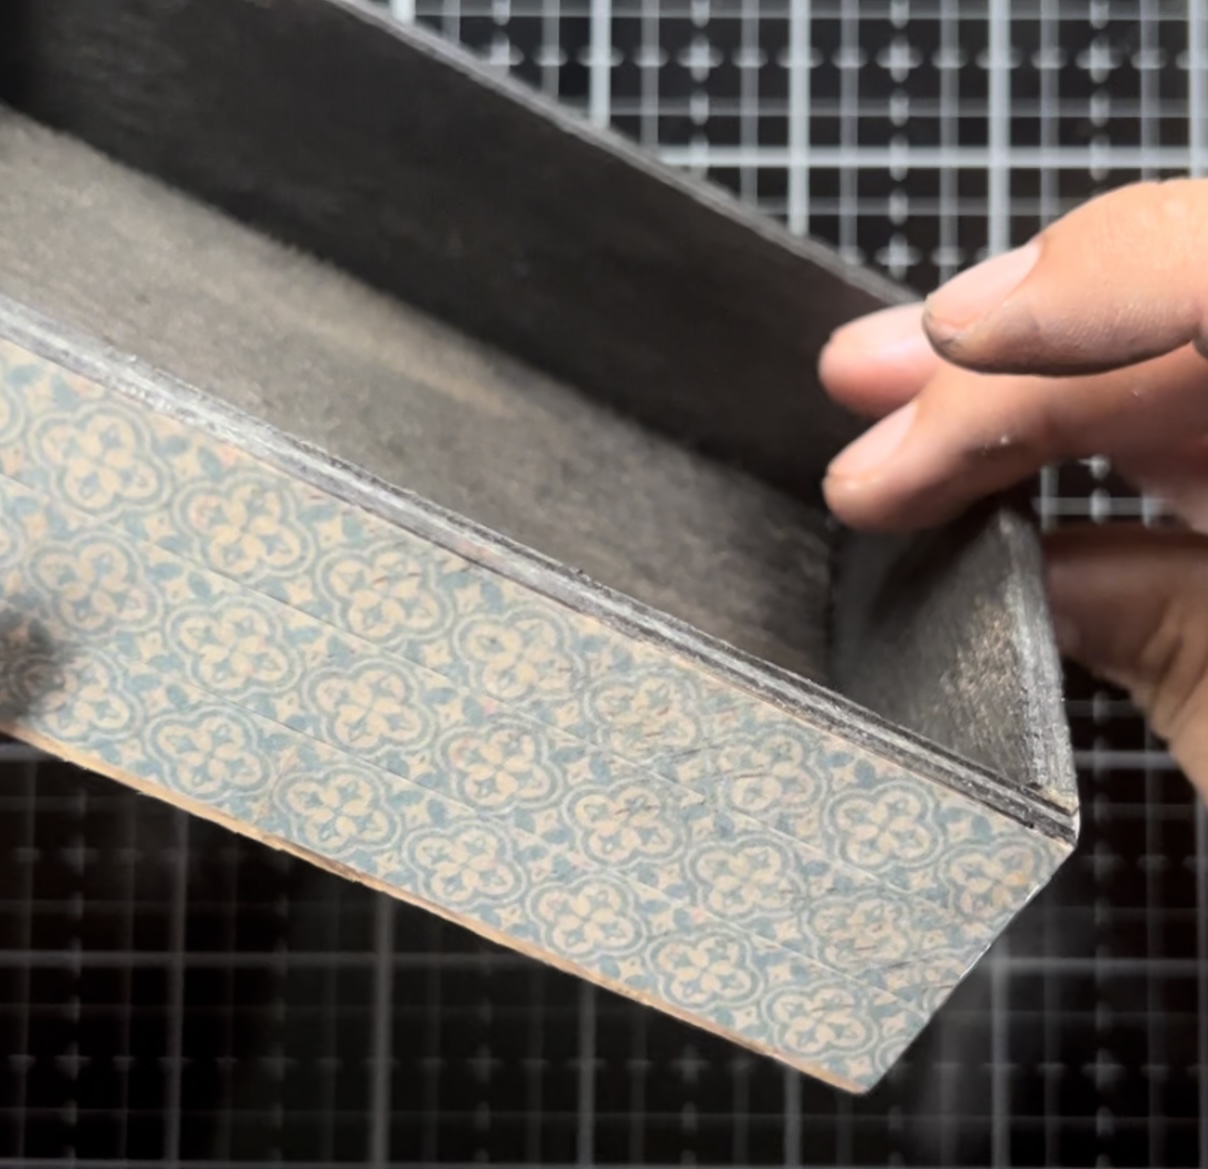
Now it is time to start altering the Vignette Box. To start I spritzed some Distress Black Soot Spray Stain onto the interior of the box. Then I dried it with the Ranger heat tool.
For the outside of the box I wrapped it with some Design Tape from Idea-ology.
For a background for the inside the box, I took an older background from the winter Idea-ology Vellum Scenes and mounted it on a piece of heavy stock paper. Then I added a touch of Opaque Grit Paste to the bottom to complete this snowy look. I absolutely love how this turned out. The background looks very cold and desolate. For the base I used an interior piece from the Etcerera Facades pack. Then I glued some cobblestone texture over the top. I used the Sizzix 3-D folder Cobblestones to get that really cool texture and I spritzed with Phantom Mist to add some color. After I hot glued the cobblestone onto the base of the vignette.
Next I hot glued the windows onto the vignette at an angle.
Now for some finishing touches. First, I placed our bride in the centre of the vignette and propped her up with a couple pieces of bent cardstock. Then I decorated the window frames and the stone walkway with more of the bouquet flowers. These I glued in place with lots of Collage Medium.
At the top of the vignette, I added a chip quote that says “the dead of night”, which seemed the perfect sentiment for our garden at midnight. While the glue was still wet from adding all of the flowers, I also dusted the entire vignette with a layer of distress glitter for some added sparkle.
Below are our finished results for Garden at Midnight.
Thank you so much for joining me here today for TFJB Inspiration Ave. Until next time, happy crafting!
Janna~ 💕🎨💕
I can also be found on :
Instagram: dunhamtreasuresofthesea_jannak
YouTube: The Crafty Corner with Janna
Supplies used:
Halloween Mica Spray Stains 6
Holiday Mica Spray Stains 5


No comments:
Post a Comment