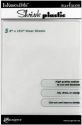
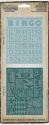
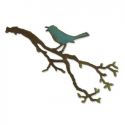
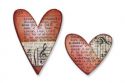
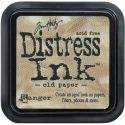
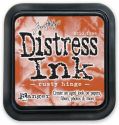
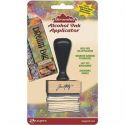
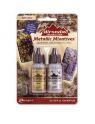
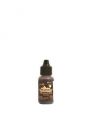
This week's Friday Focus discounted product is Ranger Shrink Plastic, but we also wanted to include several other products Terry is highlighting here in the 15% off discount. Check out Friday Focus at the Funkie Junkie Boutique. If by chance a Friday Focus item is sold out, please email Linda at thefunkiejunkie.blogspot.com for a raincheck coupon.
Terry here to welcome you to this week's Friday Focus and the product being showcased is "Shrink Plastic." To watch an item shrink and become a miniature of itself is absolutely amazing! The first time I played with shrink plastic, I was not happy with the results. The more you play with this amazing material, the more you will love its properties and results! Now here are a few of the items I shrunk for this week's Friday Focus and I hope this will inspire you to add a new layer of excitement to your creations!
Above are the after shrinking pictures, which each piece has been cut, colored and then shrunk. How cool is that? You can make charms, earrings, embellishments and just let your imagination go wild! I have shrunk bits and pieces, but never did it in an embossing folder. Love the end result! You can use all sorts of dies, punches and can stamp images and then cut with scissors.
This is the before picture and will give you an idea about the size difference! The embossing folder actually shrunk down to a 1 3/4" x 2 1/4 " piece.
 |
| Inked and Embossed |
For the Textured Fade, I used my paper cutter to cut the Shrink Plastic to size. Scissors are just fine! I then applied alcohol inks to one side and let it dry just a little, this was then placed in the folder for embossing. I made sure that the side of the embossed panel I would highlight, was not the alcohol inked side. Some inks are reactive with other inks, so I try to keep them separated. Plus if you clean up an area with unwanted ink, you would not want to remove the alcohol ink.
 |
| Closed pen is used to hold down folder |
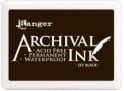
Once embossed, I highlighted the raised areas with black Archival ink. Placed this into my toaster oven preheated at 325 degrees, on the metal tray covered with a piece of brown paper grocery bag (cut to fit with a little corner lip for lifting) with a piece of parchment paper on that. Follow the instructions, but realize that all ovens and cuts can vary. I watch and while the piece is curling up, don't panic. Once it uncurls, it will begin to lay flat. After it lays flat, I give it another 15 or more seconds in the oven. Take it out, leaving it on the parchment paper, lay it on a flat surface and cover with another piece of parchment and then apply gentle pressure with a flat object to ensure it lays flat for a few seconds. I use my Big Shot adaptor plate. The little crown was my practice piece I cut from a scrap piece of shrink plastic to see how it would emboss. I always have a cotton applicator around and dip the point in rubbing alcohol to remove any excess ink that landed where I don't want it!
 |
| Dark |
 |
| Lightened |
Even after you bake the shrink plastic, if you think the alcohol inks are too dark, you can add some blending solution to an applicator and lift off color. That is another reason to keep your stamping or highlighting on the opposite side. You can see I lightened my piece after baking.
 |
| Top two just waiting for thread |
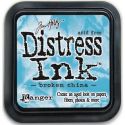
The heart and butterfly were cut from the mover and shapers die, colored with alcohol inks. I decided to make a few buttons, so punched some holes prior to baking. Used a circle punch for the round buttons, which were stamped. The blue button was lightly sanded with a fine sanding block and inked with Broken China.
The Bird and Branch - oh I do love this die, was colored with alcohol inks using a little paintbrush. On the backside, I added more color with my Sharpie markers. This is going on an upcoming challenge piece right here!
Things to know! Color will intensify when shrunk, so keep that in mind. Practice first! Some cuts are more detailed, so you may have to separate some of the pieces that may stick together. When I baked the little bird and branch, two of the branches and the birdie wanted to unite. I took a metal skewer and separated them and then placed them back into the oven for a few seconds. Took them out of the oven and then proceeded to flatten. Many pieces flatten just fine, but some need a little help, so I just do it. You can use a regular home oven or heat tool. When using the heat tool, I use that metal skewer to gently hold down the piece while heating, but it will leave a little mark. I also don't hold the gun too closely, but you will need to figure out what works best for you. Results will vary. Archival is waterproof and permanent, but I find that even after going through the baking process, it can smear, so I give a quick spray with Krylon Matt Sealer after baking. I also use Stazon ink, but actually like the coverage better with Archival.

Since I was at it with samples, I decided to do an entire new piece in brown inks for my Grandson's 21st birthday. The heart and key were inked with Espresso alcohol inks. More details are on
my blog if interested.
 |
| Die cut, alcohol ink and masking |
 |
| Background stamp, hearts in bottle |
Above are a few previous projects that I had made with Shrink Plastic. Give this amazing product a chance and you will find yourself creating all sorts of goodies. Hope you enjoyed this little Friday Focus and if you have any questions, just ask! Shrink Plastic along with some other goodies used in this week's Friday Focus are 15% off at
The Funkie Junkie Boutique, so stop over and have a visit. Oh and all sales over $75 through the month of April will have the shipping costs slip 50/50, so that is quite a deal!