Hi everyone. It's Buttons, back with a special extra edition of Friday Focus to celebrate a week of massive discounts on all individual Distress products over at The Funkie Junkie Boutique. In case you haven't heard, Linda has applied an extra 15% discount on top of the normal 20% off Ranger items at the Boutique.
Many of us follow Tim Holtz's tag projects each month and marvel at the way he weaves his magic with the Distress range. I took inspiration from his June tag and came up with my own extra twist. So here goes...
Begin by taking a piece of white cardstock (about A6 size) and emboss it with a folder of your choice.
Now squeeze out some Distress Paint onto your craft mat (in this case Picket Fence but I also use the Metallic Paints and other pale shades). Use a brayer to roll the paint across the raised areas of the card. You may need to roll in several directions to get an even coverage. Let this layer dry fully before adding more ink.
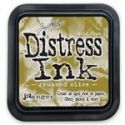
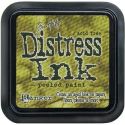
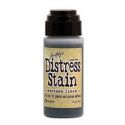
Now we are back to the Tim Holtz method - add some Distress Paint, Distress Ink and Distress Stain to your clean craft mat and spritz with a little water. Now drag your embossed card through it.
After the first swipe add a little water to the surface to allow the colours to bleed into each other, then dry. You can then re-drag your card through the remaining colour until the surface is completely covered, drying at each stage. The effect will become more mottled as you go.
When inking up this sample I found it necessary to go over some slightly patchy areas with a little extra ink. You will see that the ink/stain/paint reacts with the previously painted areas, adding extra pattern to the card. Even when you use paint over paint, the embossed areas still seem to resist. This is true when you use the Metallic paints as well as the paler colours.
At this point you can chop up/die cut your card to the size required. This is really useful for allowing you to choose the 'best' part of the card - don't discard the rest though. It can be die cut and have extra ink added to it especially as it already coordinates with your background piece. Now use Archival ink on a patterned background stamp of your choice and cover the main piece of card, then blend the edges with dark ink.
Tim has done a fabulous job of explaining how to paint your image with Distress Inks HERE, so I won't reinvent the wheel. I used another die on some watercolour paper and painted my pear with Distress Inks and Distress Stain with added water. They blend so beautifully. Remember to blend the edges with dark ink again once this is finished as it gives a great border to your focal point. Now you are ready to build your card up using your background, main image and any other elements you want.
Using the same Distress Paints/Inks/Stains means that your background piece and the picture coordinate beautifully together. Here are some close ups.
The flowers were created from the off cut of card having had some extra ink applied.
As this card is intended for a male member of the family it was good to add metal embellishments and some of Linda's fabulous rusted tin mesh which is very easy to cut as required.
Rather usefully I discovered that 'rusted' bees can be created by applying a layer of copper embossing powder to card, followed by a layer of Distress Walnut Stain embossing powder. It combines so well.
So that's it for today. I hope you feel inspired to grab your Distress products and create your own backgrounds. And don't forget, now is DEFINITELY the time to add to your collection with a shopping spree at The Funkie Junkie Boutique whilst your money can go so much further.
Take care of yourselves, hugs Jenny x










Love your stunning background Jenny, great step by step and the finished card is just beautiful!!
ReplyDeleteFabulous techniques Jenny.
ReplyDeletehugs Brenda xxx
The card is gorgeous and the techniques are fab, Jenny.
ReplyDeleteHave a wonderful week
Tthis card is very cool!! The techniques are fantastic!
ReplyDeleteThis is stunning Jenny, absolutely beautiful! A great step-by-step too, thank you. Chris xxx
ReplyDeleteFabulous! great step by step.
ReplyDeleteSuzi b xx
Wow, your embossed, painted, stained background is just incredible, Jenny! Thanks for sharing the process with us. Your card came out fantastic. That embossed stamped panel adds so much and I really love the way you put together all those wonderful embellishments. Love that Simple Sayings stamp set too - so useful!
ReplyDeleteThanks so much for doing this extra Friday Focus Part II. So much eye candy here for our readers!
Hugs,
Linda
Jenny...this is absolutely gorgeous! I love the techniques, the design and the finished piece! You are so talented!!! <3 Candy
ReplyDeleteAnother brilliant variation of this technique - really clever trick with the rusted bees!!
ReplyDeleteI LOVE your card! it's awesome!!
ReplyDeletea really gorgeous piece, fab colours and techniques, hugs trace x
ReplyDeleteOh Jenny, I am totally in love with this absolutely stunning card!! Love the way you did the background and the pear looks fabulous. Love the rusty bee too. A stunning piece of work done with your usual style. Hugs, Anne x
ReplyDeleteThat is one lovely card, Jenny. I can almost taste the juiciness of the pear.
ReplyDeleteAbsolutely gorgeous card... the watercolouring on the pear is so beautifully done, and the embossed panels work beautifully.
ReplyDeleteAlison x
Fantastic card and tutorial Jenny! I love the pear in particular - all so beautifully done! Nicola x
ReplyDeleteFabulous step x step Jenny, love the card and the colour combo is gorgeous ! Sue C x
ReplyDeleteAwesome card! So well put together - perfect! :)
ReplyDeleteHave a nice day!
This comment has been removed by the author.
ReplyDeleteI'm pretty new to dry embossing, but just need to tell you that adding color to the raised images with a brayer is ingenious! Can't wait to try it!
ReplyDelete