This week's Saturday Step by Step at
Frilly & Funky is about the fastest, easiest way of making a fun and polished mini album, that I know. If you've thought about making one, but hesitated because it all looked too complicated, this might be your answer~
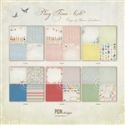
This wonderfully chunky little album uses a single collection of 'Play Time' papers from Pion. It was very quick to make because all the paper tags, cards, strips, etc. are from the same collection. The designs are split between those with typical 'boy' themes, 'girl' themes and lots of gender neutral papers and embellishments to pull it all together. This particular album has one side (all the pages facing in one direction) with a boy in mind and the opposite side is girly! Perfect for the parents of fraternal boy-girl twins or a family with a girl and a boy. Here's the 'how-to'...
I began with white, medium weight chipboard, cut to 4-1/2"x 6". Use a 'stub' corner cutter (I used a Crop-A-Dile) all around. There are 5 pages in this album, but there is more than sufficient paper to make two albums this size or a very chunky album! The next step is so simple and essential to getting an end result that you will be proud of...
The cut edges of each page need to be stained or painted white, since the edges of each page will show. The easiest, quickest way to achieve this is with distress stain. The picket fence color is a necessity for me and I've happily gone through a few bottles since it was first released... You just 'prime' the applicator by pressing it against a craft mat until the stain starts to flow and then an easy swipe along the cut edges, will give you a good finish...
Select 5 papers for the boy side of the album and 5 for the girl side. I arranged them in the order I planned on using them. The photo above, shows them in reverse order. In an assembly line fashion, cut each sheet into a 4"x 5" piece, paying attention to the direction you desire and which portion of the design you want to see...
Before you adhere these papers to the chipboard, remember to use the corner punch! I nearly forgot this little detail when making my album...
Repeat the paper selection for the other side, cut, punch corners and adhere, placing the desired top or first page on the last page of the first set. In other words, the boy side goes in the opposite direction to the girl side. Punch a hole a quarter of an inch in from the upper left corner of each page. I used a red, 2" notebook ring to assemble the pages and then began cutting out trims and embellishments from the add-on pages included in the Play Time collection. This is what was left after I finished!!..
Here's the line up on the girl's side...
There are sweet little butterflies and tickets...
little flags and tags, borders...
and the sweetest images...
and such creative design ideas!...
I added buttons and ribbons to this really delightful paper collection. As you've seen, I tied (double knotted) left over bits of ribbons around the notebook ring and in between the album pages. In case you want to see every finished page, the cover on the boy side is the first picture of the album at the top of this post. Here are the rest of the pages...
Oh yeah...the canceled postage stamp is also an image I added...
The little flags under the gingham bow are from the embellishment (or add-on) pages...
Stacking buttons make an interesting embellishment..these are navy and yellow...
These little images make me smile. They're whimsical and classic all at once. I just remembered that I wanted to tell you that the bands of paper that you can see on the left page above, are only attached at the ends. A photo or journaling card can be slipped into place and the idea can be used throughout if you desire.
Thanks so much for spending time with me~ I hope you have the opportunity to create something wonderful this weekend! And don't forget, there is a coupon for 10% discount at
The Funkie Junkie Boutique this week, good through July 7th. Use the code
10off at checkout to get your discount.
((Hugs))
Rebecca


This is such a great mini album Rebecca. So colourful and happy. It would look great with lots of family pictures and journalling inside. Thanks for the fantastic tutorial. Hugs, Jenny x
ReplyDeletewhat a great tutorial and fab idea...must give this a try! hugs trace x
ReplyDeleteWhat a great tutorial and a fabulous little album - those papers are so sweet. Just using my first ever Pion today as it happens!!
ReplyDeleteAlison x
this looks so much fun to make and the tutorial was first class, loving all the papers
ReplyDeleteRia
Adorable album Rebecca! I love those Pion papers. Thanks for the tip on edging the chipboard with stain!
ReplyDeleteI am so glad you used this collection in your adorable mini. I've never heard of this company, but am in love with this line of papers!
ReplyDelete