 |
| Double click any image for close up. |
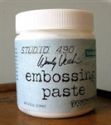
First I decided what part of the tag would have the translucent embossing paste applied. I like to apply it with a credit card rather than a palette knife, but whatever you choose to spread it with is up to you.
First lesson: do not spread the paste too thick - it takes FOREVER to dry and if it is too thick, it doesn't take the stamp well - the stamped impression won't be crisp, but rather blurred and smooshed.
Let the embossing paste dry for about an hour before you stamp into it. Confession: this is actually my third try - luckily the jumbo non-branded tags sold in the boutique are relatively inexpensive.
Once the embossing paste starts to firm up, you can stamp into it. On her blog, Wendy suggested misting the stamp to keep it from sticking to the paste. I chose to use black ink for my stamping. I inked the stamp and then inked it with Versamark so it wouldn't stick. I keep an old Versamark pad around to do that with because the pad turns black from the ink.
Because I used a small stamp, I had to stamp it repeatedly down the length of the tag. I didn't wash the stamp each time. Rather, I used a paper towel to clean off the tiny bits of paste that stuck to the stamp. Wendy suggests using an old toothbrush to clean out the embossing paste from the small crevices in the stamp. After finishing stamping, I gave the stamp a good cleaning with a toothbrush to make sure no embossing paste was left on the stamp.
Once the tag was thoroughly dried (I tried to hurry it up with my heat tool but that didn't work great), I painted it with Spiced Marmalade and Antique Bronze distress paint.
Now that I have my surface prepared, it's time to embellish. I started with Wendy's Three Flourishes stencil where I stenciled it in three sizes in areas where I had not applied the embossing paste. I inked the stencil with Jet Black archival ink with a cosmetic sponge.
I wipe my stencils clean after each use with a paper towel and stamp cleaning liquid, but most of the ink/stain stays on the stencil. The ink will come off if you scrub really hard, but I don't think that intense of cleaning is necessary. I just accept that they will be stained and clean off anything I think could contaminate a future project.
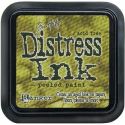
I stamped the rosettes onto white CS with Jet Black archival ink. This is one of the new Wend Vecchi background stamps (- it's on order but not in yet.) It made a wonderful pattern on the rosette. Then I sponged it with Peeled Paint and edged it with Frayed Burlap.
More Wendy stamping - this time on a tag cut from white card stock with an older Sizzix tag die. The tag was then sponged with Peeled Paint.
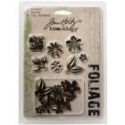
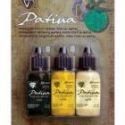
I wanted something to top off the tag and give a little pizazz. I settled on these metal Foliage pieces from Tim Holtz and altered them by painting them black with Onyx Vintaj Patina Paint. The Vintaj Patina Paint paint works great. I use it a lot for altering metal. And if you rinse your brush immediately, it rinses right out. Tiny green crystals finished it off.
That about wraps it up. I started to make something with an autumn feel to it, but it came out more Halloween-ish, so I decided to give it a tad more Halloween feel with a little spider stamp atop the smaller rosette, crawling toward the "be brave" sentiment - LOL, I HATE spiders and have to be brave around them!
Thanks again for stopping by and have a great weekend!
Hugs,
Linda


Great step by step project and thanks for the tips on using the stamps with texture paste.
ReplyDeleteHi Linda, thanks for the information. What a great tag!
ReplyDeleteLucy x
Wow, I really must try this, I love the idea and the end result came out wonderful. Thanks for taking us through your process and giving all the tips.
ReplyDeleteDefinitely want to give this a go when my paste arrives! Thanks for sharing this with us Linda. Hugs, Jenny x
ReplyDeleteThanks Linda! Need to crack open this jar from you and give it a go!
ReplyDeleteCool !
ReplyDeleteCorrie x
Fab step x step Linda ! Love the flourish stencil ! Sue C x
ReplyDeleteGreat step-by-step, thank you :o)
ReplyDeleteI lve the flourish stencil and cannot wait for my paste to arrive either , a great autumnal feel and I am with you on the spiders ! X hugs xtrace x
ReplyDeleteThanks Linda - lots of lovely 'educational' tips in this - super tag too, love the stamped into paste effect. Nicola x
ReplyDeleteI love this tag, Linda. Thanks for the details of stamping into the embossing paste. I wanted to try that technique and it's good to have some pointers. I know what you mean about spiders but he does look cute in the center of that rosette!
ReplyDeleteI like this tag and thank you for the tips and hints.
ReplyDelete