Today for the Step X Step I thought I would show you how I made the Goulish Halloween card I made for the current challenge.
I started by creating a background using Peeled Pain, Pumice Stone and Dusty Concord Distress Ink on some white card stock.
The next step was to use a stencil with some Black Soot Distress Ink in just one corner.
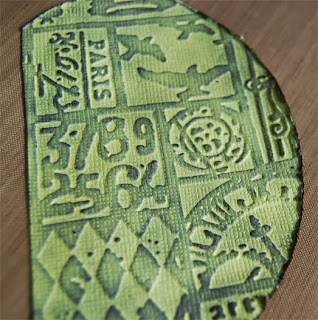
I then cut an oval from some Tim Holtz card stock and chopped one edge off before I ran it through a texture fade.
I used some Black Soot Distress Ink to highlight the raised areas and then rubbed some purple Jacquard Lustre Paste over everything (sorry forgot to take a photo after this step).
I then pounced some of the Black Soot and Peeled Paint Distress Ink on my craft sheet and spritzed it with water.
Some rayone seam binding and some netting were smooshed (very technical term) into the ink to dye them.
The netting was added to some Prima flowers. Normally I would have made the flowers from the Crinoline that Linda carried in the The Funkie Junkie Boutique but I was leaving on another trip and running out of time.
A copper metallic corner was transformed with a coat of black craft paint.
A little of the purple along with some green Jacquard Lustre Paste was added to the corner.
I took some old poison labels and added Peeled Paint and Dusty Concord Distress Ink to them.
Finally I grabbed some black card stock for a card blank and started to glue everything down. The goulish little boy was added to the part oval and then I cut out some little spiders to which I added black glitter, placed a purple button in the centre of the flower with a floss bow and added some little purple buttons on top of the dyed seam binding down the side. I also added the crow, which has some Gel pen highlighting on his feathers.
I hope you like the finished product.
Hugs!
Cec
These products used in the creation of this card can be found at The Funkie Junkie Boutique:


What a great step by step Cec. Jenny x
ReplyDeleteLove your step by step :)
ReplyDeleteVon ♥
Love the spooky card and your step by step was excellent.
ReplyDeletePerfectly simple even for me, thank you. Fabulous finished card :D
ReplyDeleteThanks for the step by step, Cece! It's a great card. I love the embossed circle that you cut.
ReplyDeleteThanks for the visual for your fab project!
ReplyDeleteWonderful project, love the step by step tutorial.
ReplyDeleteCorrie x
Fabulous step x step Cec ! The embossed piece is gorgeous and love the stencilling ! Sue C x
ReplyDeleteGreat card but guess I'm to lazy to go through all those steps. But I'm sure many will as it turned out very nice. Good directions though. Edna
ReplyDeleteI absolutely LOVE this card, Cec. It is so absolutely cool. Great StepxStep too!
ReplyDeleteHugs,
Linda
creepy and gorgeous, with so many cool bits to it. xo
ReplyDelete