Hello and welcome, Zoe here. I am delighted to be your host for this Saturday Step by Step with Frilly and Funkie. I created some mini Halloween labels for the current “
It’s a Small, Small World” challenge using the incredible new Halloween stamps by Tim Holtz. Here’s how…
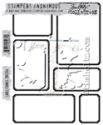
Step 1: Stamp 12 labels onto distress watercolor cardstock. Ink up the stamp with vintage photo distress archival ink and then "kiss" the stamp with black soot distress archival ink.
*The trick is to leave some portions of the label stamp untouched with the black soot ink so the vintage photo shows through for a worn look.
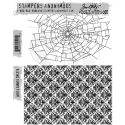
Step 2: Fussy cut the labels. Ink background stamps with a DIY distress ink pad and lightly mist with water and stamp onto the labels. Dry with a heat tool.
Step 3: Once dry, blend in antique linen and vintage photo and edge with walnut stain distress ink.
Step 4: Stamp ground espresso distress ink onto a non stick craft mat and squeeze a little water from a waterbrush and mix. Pick up the ink and tap the water brush to create splatter to the backgrounds. Dry with a heat tool.
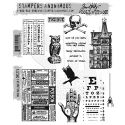
Step 5: Stamp images onto distress watercolor cardstock (smooth side) with black soot distress archival ink.
Step 6: Fussy cut the stamped images and blend in antique linen and vintage photo distress ink.
Step 7: Choose card layouts and stick into place with glossy accents and add any remnant rubs, stamps or embellishments.
Step 8: Set card toppers aside to dry and start work on the base.
Step 9: Follow steps 1-3 of this cool paint resist technique from
Tim Holtz.
Step 10: Once completely dry, blend in walnut stain distress ink. Really "go against the grain" to work the ink into the recessed portions on the woodgrain. Dry with a heat tool.
(for a darker woodgrain effect, rub the walnut stain ink pad directly on
the cardstock and dry with a heat tool)
*note: different base inks will affect the finished colour of the woodgrain.
(for a more weathered look, lightly damp a piece of kitchen paper and
gently rub over the surface to lift the walnut stain ink from the
portions of the card the paint resists. Work in small sections so as not
to get water into the recessed sections)
Step 11: Using matte multi medium to adhere 4 pieces of cardstock to a piece of cardboard, (it can be a scrap piece as seen above as will be covered).
Step 12: Rub ground espresso distress stain to the edges directly from the bottle.
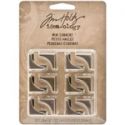
Step 13: Adhere the card toppers into place in rows of 3 and decorate with some idea-ology hardware.
Step 14: Attach a loop to the back of the cardboard if you wish to hang on the wall.
Step 15: Use leftover labels to make party invitations, dare cards or put your favourite Halloween recipes on the back and pass onto friends.
I hope you enjoyed the step by step. Don' forget to take a look at the current "
It's a Small, Small World" challenge and have a great weekend.
Zoe


Simply brilliant Zoe. I love how your imagination works! That Woodgrain is ACE and the custom pad a real treat for this xx
ReplyDeleteОчень здорово! спасибо!
ReplyDeleteLove this, thank you so much for the tutorial!
ReplyDeleteHmm, I didn't think I needed that labels stamp....! This is fabulous Zoe, a great tutorial and a fantastic result. Love this so much... xx
ReplyDeleteBrilliant! I love how you took the individual mini cards and framed them up into a beautiful Halloween Decor!
ReplyDeleteWOW what a great inspirational project, simply fabulous! Thank you very much for sharing the tutorial :))
ReplyDeleteI am so in awe of this project, the wood grain base is the perfect complement to those awesome cards. Super tutorial, definitely inspired to get busy creating!
ReplyDeleteLove your little holiday decor work of Art Zoe :D TFS
ReplyDeleteFabulous inspiration, lots of hard work, fabulous techniques and amazing project x
ReplyDeleteAwesome piece Zoe!
ReplyDeleteEverything about these wee projects I love. You have such a great imagination. What goes on in my head never really seems to make it to paper. You seem to do this effortlessly. Thanks for sharing!!!
ReplyDeleteZoe these are fabulous! Sigh - now I want this stamp set!
ReplyDeleteOMG Zoe this is fascinating... cool stamp set (may have to add it to my wish list)... so much inspiration. You rocked those Creative Chemistry Class techniques ... I see them LOL
ReplyDeletestunning....that background, oh my!
ReplyDeleteFabulous - every part of your project is stunning!
ReplyDeleteSuch an amazing project Zoe! I love all the images and how fun to see the end result of your little cards! hugs :)
ReplyDeleteWOW! This is AMAZING!!! I love all the fun techniques~
ReplyDeleteSherrie K
Amazing! Thank you for the step by step!
ReplyDelete