


FAUX GRANITE TECHNIQUE:
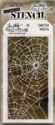
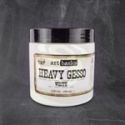
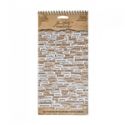
- use a dark sheet of paper, but not black. I have used Prima Salvage District. Choose a stencil and using some Prima Heavy Gesso, put down your pattern. I have used Tim Holtz Shattered.

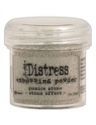
- while the Gesso is still wet, lightly apply Distress embossing powders Pumice Stone and Walnut Stain randomly around your pattern and allow the Gesso to dry before heating with heat gun.

- spritz on a little Distress ink spray Picket Fence and then spritz on a little water so the ink runs around making marble like pools. Toss a splatter or two if you like as well.

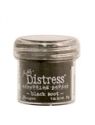
- lightly dab a little Black Soot Distress paint here and there to create some darker areas. Presto, your Faux Granite background is done and ready to decorate!

HALLOWEEN CARD ASSEMBLY:
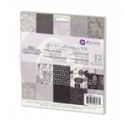
- using papers from the Prima - Salvage District and Graphic 45 - Precious Memories Patterns and Solids, I cut several panels and created white paper backings for each.

- a little Walnut Stain Distress ink applied to the edges and a distress tool to make the panels look old and worn. This creates a wonderful vintage look.

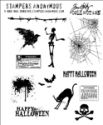
- cut out some ghosts and split them apart so you have three separate pieces. (turns out I didn't use the Prima doily die cut, but I have set it aside for my next project.) lol

- the stamped images are all from the Tim Holtz Mini Halloween stamp set. They were sent to me by the talented Sara Emily of sarascloset, but I have included the link below for the stamp set which is available in Linda's shop.

- time to layer all the panels and the ghosts using some dimensional foam squares and Glossy Accents.

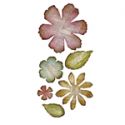
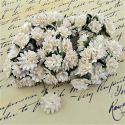
- using the Time Holtz Tattered Florals, I cut some flowers out of canvas sheets.

- glue on your stamped images and tuck your canvas flowers in between the layers.

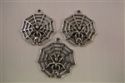
- I used some Prima Heavy Gesso to paint some wonderful Halloween charms white.

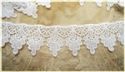
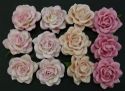
I have also added some flowers from Wild Orchid Crafts, a frayed ribbon flower from May Arts and some gorgeous lace, all available in Linda's shop. I splash of Picket Fence just for good measure!

- I added a sticker from the Tim Holtz Seasonal Chit Chit sticker book that says "open if you dare". I thought it was the perfect final touch for my Vintage Halloween card!


The Faux Granite technique I have shared with you today is the same technique I used on my Gothic Wedding card back in May. I hope you get a chance to try it out!


I hope you enjoyed my tutorial. Please feel free to let me know if you have any questions. There's still lots of time to enter our current challenge "A VERY VINTAGE HALLOWEEN", where Zoe is looking for you to create a vintage project with a Halloween theme! We'll be back first thing on Monday to announce the winners of our last challenge, so make sure to check in for that.
Thanks for stopping in!
Hugs, Pamellia :)
If you would like to try some of these wonderful products, they are available at The Funkie Junkie Boutique:
 |  |  |  |  |  |
 |  |  |  |  |  |
 |  |  |  |  |  |
 |  |  |  |  |  |
 |  |  |  |  |

Pamellia this is such a brilliant idea! That faux granite looks so lifelike and effective - must give it a go. I always love to see how your clever layering is achieved too. Thank you for sharing xx
ReplyDeleteWhat a fab step by step Pamellia and I love that faux granite technique...amazing creativity. Thanks so much for sharing x
ReplyDeletelove your faux granite technique Pamellia x what a wonderful Halloween project you have created here with amazing layers .....love the way you have integrated the florals with the Halloween theme. TFS and best wishes
ReplyDeleteannie xx
I love the faux granite technique, such a great idea and it looks cool on both of these projects! Your Halloween card looks just wonderful, flowers and Halloween, - who would have thought, but of course you can make it work! xxx
ReplyDeleteSo amazing! It's shabbylicious meets SPOOK-tacular! Wonderful techniques here, Pamellia! Thanks so much for the step by step! xo
ReplyDeleteA fantastic tutorial Pamellia, I must try out that faux granite, it looks wonderful! I love the fact that you took Halloween but added a touch of the feminine - it works SO well! Thanks so much for sharing your techniques! xx
ReplyDeleteYour Faux Granite seems true, Pamellia! Thanks so much for the tutorial!! Great Halloween card, love all theae layers and the sweet touch of lace and flowers!
ReplyDeleteThis is absolutely stunning, Pamellia!! Your tutorial is fabulous...I've bookmarked it so I can try the faux granite technique!! I love all of the details you added to this!! It's truly is spectacular...er spook-tacular!! Love it!!
ReplyDeleteLisa
A Mermaid's Crafts
Thank you Pamellia for the fabulous step by step and granite technique tutorial. I will add it to my To Do list xx
ReplyDeleteLove this technique Pamellia and it looks fabulous on both cards. Pinning this for future reference. Thank you for sharing!! xx
ReplyDeleteFantastic tutorial! This is a gorgeous spooky card all in one!
ReplyDeleteFabulous card! Thanks for the tutorial!
ReplyDeleteI love your Halloween card Pamellia! The faux granite looks AMAZING!!! The layers are all fantastic and love all the cut out pieces you worked into this awesome design! The inked edges look great and love all the fun extra's which you do such a fantastic job with!! Thanks for taking the time to do the tutorial..it is great!
ReplyDeleteSherrie K
Hehhehe - those ghosts make me smile every time Pamellia!! Darling yet Spooky in a good way too - this card is just great. Your layering talents are just always incredible. Thanks bunches for the SUPER Saturday Step by Step. j.
ReplyDeleteThis is a fascinating technique and you have explained it so very well, thank you.
ReplyDeleteDionne xx
Terrific details and make from you Pamellia. Thank-you for sharing your secrets. Nicola x
ReplyDelete