

Hello and welcome, Zoe here and I'm delighted to be hosting this special Sidekick Sunday step by step. I just received my sidekick and I'm already in love with it. As someone who constantly works on a tiny corner of my desk and is guilty of being lazy when it comes to getting my big die cutter out for a small job, it's a game changer!

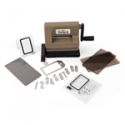
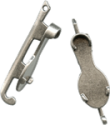
This is what comes with your sidekick machine:
A. A set of clear cling stamps
B. Thinlits tag and numbers dies
C. 2x cutting plates
D. Embossing folder
E. Embossing plate
I made some Christmas gift tags ready for Christmas. Here's how...

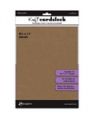
Step 1: Trim a piece of kraft cardstock 2"x 7 inches and fold in half. Place the tag die so the bottom cutting edge overlaps the cardstock and won't cut. Secure in place with tape.
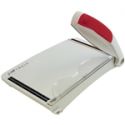
Step 2: To secure the sidekick to your surface, push the handle to the left of the machine back (as pictured). Place the die face down onto a cutting plate, place the other cutting plate on top and roll through the machine using the handle on the right.
Step 3: The thinlit tag die cuts through both layers of the kraft cardstock easily and with one pass through the machine.

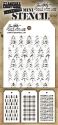
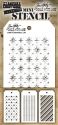
Step 4: Secure the tag to your work surface with tape, place a stencil over the top and secure with tape. Blend fired brick distress ink through the stencil with a mini blending tool.
Step 5: Blend walnut stain distress ink into the edges.

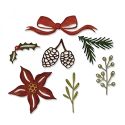
Step 6: Die cut classic kraft cardstock with the festive greens dies.
Step 7: Cut the fern die twice more in a different shade of green.
Step 8: Gently sand with a sanding grip and blend in vintage photo distress ink.

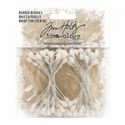
Step 9: Sand the ribbons with a sanding grip.
Step 10: Blend in vintage photo distress ink.
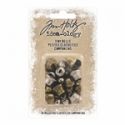
Step 11: Sand the small ribbon center.
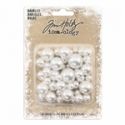
Step 12: Add a dot of distress collage medium and add the ribbon center.

Step 13: Shape the greenery over a finger, adhere just the top of the greenery with distress collage medium.
Step 14: Build up the greenery, adding one piece at a time.

Step 15: Once the greenery is stuck down, mount the ribbon over the top.

Step 16: Cut a piece of sticky back canvas with the tag die and mount over the front of a tag card. Repeat earlier steps 4 and 5.
Create your own gift tags using different surfaces, stencils, colours, embellishments and dies.


I hope you have enjoyed the step by step and I look forward to being back on the funkie side of the design team in the new year.
Have a great holiday season and a great week ahead.
Zoe x
 |  |  |  |  |
 |  |  |  |  |
 |  |  |  |  |
 |  |  |  |  |
 |  |  |  |  |

Absolutely stunning Zoe. You are always a great source of inspiration.
ReplyDeleteGreat tutorial Zoe! TFS and the tags are delightful :)
ReplyDeleteOh Zoe I'm in love with these tags! Each one would totally transform a simple parcel into a special gift and you've shown so many options for making them all look different. Thank you so much for sharing your ideas and that all important insight into using the Sidekick as someone who's looking forward to hers arriving :) xx
ReplyDeleteGorgeous tags Zoe, adore the little details and the Kraft and red. Tracy x
ReplyDeletethese little tags are pure joy. it could be an empty box the packaging is the gift. ❤️
ReplyDeleteLove these tags!! I do wish I had the stencils used. I don't have too many. Really like the pine cone and ribbon dies, like all the ones in that set. I really must get on board! Thanks for sharing this amazing project.
ReplyDeleteZoe, your tags are FABULOUS! (Another die I feel I MUST have!) Like Vickie said, the tags are the gift! Thank you for a great tutorial on the Sidekick! Hugs!
ReplyDeleteLove these! TFS Zoe!
ReplyDeleteThese are adorable Zoe.... thank you for the inspiration !
ReplyDeleteGorgeous! Awesome inspiration. I wish the Thinlits weren't Out of Stock!
ReplyDeleteSorry about that, Barb! The Funkie Junkie Boutique is having a huge Christmas/Winter item sale right now - 35% off list so all these products are flying out the door.
DeleteOh my, Zoe, these are adorable! So cute and fun. Awesone tutorial on the Sidekick too. Can't wait to get our supply at The Funkie Junkie Boutique. They should be arriving tomorrow and we still have a few left at the bargain price of $37.49!
ReplyDeleteDarling tags! Just beautiful!
ReplyDeleteZoe, you little tags are beautiful, it is lovely to see them close up, the stencilling looks amazing and I am in love with the little pinecones - something else that I think I 'need'!! Anne x
ReplyDeletehii
ReplyDeletenice information about the arts
movers and packers in agra
These are incredibly beautiful Zoe! I love the stenciled cloth tags and lovely greenery toppers! Hugs, Autumn
ReplyDelete