Happy Saturday! Autumn with you today for a little Saturday Step by Step project. Today I'm sharing a simple tutorial on transforming a burlap panel into a personalized Christmas gift, Tim Holtz style!
I needed to make four of these gifts. I wanted each element in my collage to be substantial and decided to make my own chipboard embellishments. Sadly, I didn't pick up any Tim Holtz ephemera in time, so I resorted to printing my own images. Now, you can use this technique with his ephemera, paper stash images, or your own laser ink printed images/personal photos. Use Glue N' Seal or matte Mod Podge and coat your chipboard base to adhere the cutouts. I used the back of a watercolor paper pad for this. Apply an additional coat over the image to seal.
Allow the sealer to air dry. Use scissors to cut out each tile (they will be thick), then sand the edges in a very rough manner. This makes the tiles resemble old box tops.
See those jagged edges! :)
I mounted my tiles in a grid onto my prepared burlap canvas. I followed Tim's tutorial HERE for the snowy edge. Basically, scrape on Grit Paste around the edge of the canvas then apply Clear Rock Candy Distress Glitter to the wet paste.
My photo tiles were the only ones which I applied Vintage Photo Distress Oxide to the edges. I sponged one side at a time, then wiped with a damp cloth. The ink resists the Mod Podge, but soaks into the distressed chipboard. My treasured photo is of us girls trying on silly Christmas hats at last year's party. <3
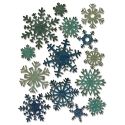
To embellish my square panels I made dimensional snowflakes from the Paper Snowflakes dies. I sponged the edges of the two sizes with Weathered Wood DI and Vintage Photo DOX, then embossed with Stampendous Shabby White Embossing Enamel.
I mounted the snowflake atop a ribbon wrap then added some floss and a bell to further accent.
I cut the word "joy" three times from a strip of Metallic Kraft Core and layered it over the ribbon.
For my 5x7 rectangular panels, I chose a different configuration.
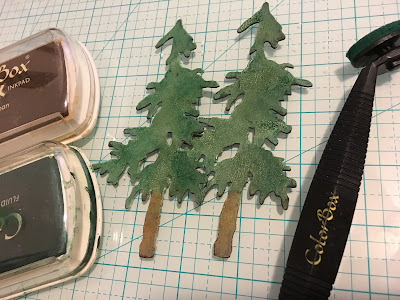
I scraped crackle paste onto my trees (similar to the above photo).
When these were dry I sponged pigment ink onto them and heat set between application. After three coats, they were dark enough to suit me.
I snipped off the brad prongs from the Jingle Bell Brads, then glued with a loopy twine bow to the base of the trees.
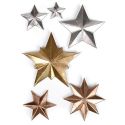
I cut the fancy star from the Dimensional Stars die from Metallic Kraft Core and sanded heavily. The trick to assembling these stars is to use your bone folder and burnish each fold well. A bit of wet adhesive and layers of foam inside helps maintain the shape.
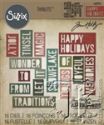
I glued the letters "joy" from the inside of my die cut sentiments I made for the first panels onto the photos on my rectangular canvases. I liked how this helped carry the metallic accent through the design. I hope you've enjoyed these tips and tricks and are inspired to create a personalized panel of your own for your loved ones. What images and embellishments will you choose?
Find these and more at the Funkie Junkie Boutique:







Love, love, love this Autumn! very inspirational! They will be treasured gifts for years to come! TYFS!
ReplyDeleteGreat tutorial for a fabulous gift idea, Autumn.
ReplyDeleteAlison x
Creative, unique and fun x
ReplyDeleteBeautiful! I love how you framed the photo with all the goodies! Ephemera, burlap, snow oh my! Wonderful!
ReplyDeleteGreat and stunning gifts for your girlfriends, Autumn! I love that photo, and I'm sure these will be treasured as a tribute to that Christmas party and to your friendship! Great tutorial; your projects are filled with fabulous techniques! Merry Christmas!
ReplyDeleteWow Autumn, they are such wonderful canvases and I enjoyed seeing how you brought them together... such treasured gifts for your friends. Thanks for a great tutorial too! Anne xx
ReplyDeleteSuch a great idea, and so beautifully executed! As always, your attention to the details makes this really special. What a fun and thoughtful gift!
ReplyDeleteI've already told you how much I love these panels, right? Fabulous!
ReplyDeleteThis is absolutely wonderful!! Love all your lovely details and all the distressing!
ReplyDelete