Welcome to the weekend and to Frilly and Funkie's Saturday Step By Step! It's Sara Emily here, and today I'm featuring a technique using Distress paint and crayons and Ranger alcohol inks, along with Metallic Kraft Stock. Click on the photos to zoom in.
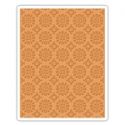
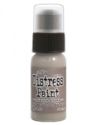
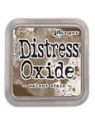
I cut silver Metallic Kraft Core to fit my embossing folder and embossed. I gave it a quick coat of Pumice Stone Distress paint. I'm not worrying too much that it's full coverage, as it's going to blend with the inks in the next step.
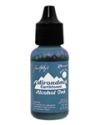
While the paint is still wet, I drop on drops of Denim alcohol ink and spritz with water to allow the inks to spread. I move the panel around to get the ink/paint to cover the panel to my liking and use my heat tool to dry. Not shown, I added more drops of alcohol ink, this time in Sailboat, again spritzing and blending, then drying with the heat tool. When that was dry and set, I scribbled with Picket Fence Distress crayon to hit the raised areas. Last, I sanded the edges, and rubbed Walnut Stain crayon around the edges, blending a little with my finger. I like to give it all a blast with my heat tool to allow the crayon to melt just a bit and to set the colors.
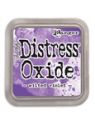
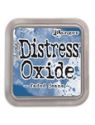
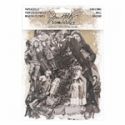
I inked Swirly Snowflakes stamps (I used the minis) with both faded Jeans and Wilted Violet Distress Oxides and gave them a spritz of water. I do this by spraying into the air and swooping my stamp through the mist; just enough to activate and blend the colors ever so slightly. After making the impression, I rub Walnut Stain oxide on my craft mat (Notice it's brand spankin' new! Thank you, Santa!) and spritz with water. I dip my stamped images into the puddle, dry and fussy cut. Investing in the Swirly Snowflake dies would be a wise decision. Last, I blended the edges with more Walnut Stain DOX. I finally got the bright idea to trace around the stamp face down over the stamped image and cut on that line. I ended up not using the one shown in the photo. I backed my snowflakes with chipboard for dimension and to make them sturdy.
As a small child, I had dreams of being one of those pretty figure skaters I would see on the Winter Olympics, and I took every opportunity to be on the ice when our ponds and lakes would freeze over. I literally skated all day until it would get dark. When I moved south in my 30's I took up inline skating as a substitute.
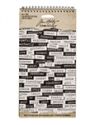
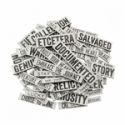
I couldn't find a Quote Chip that said what I wanted to say about my paper doll ice skater, so I made my own. I used a Big Chat sticker, and cut a Quote Chip down to size. The easiest and neatest way to do this is to use your X-Acto blade to make a cut front and back, and then use your scissors to complete the cut. I sanded it a bit and used Matte Medium to adhere the sticker. When dry, I blended with Frayed Burlap ink and scribbled Walnut Stain crayon around the edges and heated to melt.
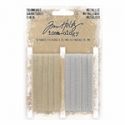
A length of Metallic Trimmings stands in as the frozen pond. I colored it with more Frayed Burlap ink. Please ignore the fact I glued it crooked! I'm surprised my boy isn't sliding right off the edge of the card! I smudged the boy with crayon, and adhered him with foam adhesive tape. (So he doesn't slide off.) The Star Adornments were left over from a previous project--they were a glittery gold, covered with Distress Glitter Dust, but I wanted a mercury glass look. I dropped on silver mixative alcohol ink, followed with a drop of Mushroom alcohol ink.
I layered my panel over some old Core'dinations card stock and a few panels of hand colored/designed papers. Look for a tutorial on these very simple techniques in the future, but for now, this post is plenty long.
Here are three more versions using these same products. Linda sells so many paints, alcohol inks and embossing folders in
The Funkie Junkie Boutique that the possibilities are limitless! What combinations will you come up with?
This is the first one I made, using an old Tim Holtz Snowflurries Texture Fade. To get this look, I started with Picket Fence paint in place of the Pumice Stone. After dropping on the alcohol ink, I sponged on more Picket Fence. I rubbed with Hickory Smoke crayon and wiped with my finger. I sponged on more Picket Fence, blending the crayon more still.
I embossed this busy one a second time, but didn't line it up properly in the folder. But I was pleased with it nonetheless, and may use it for a background on a future project or even to die cut something. I applied Walnut Stain crayon after the second embossing.
This one's my favorite, but I couldn't do it justice with a photo. I used a paintbrush dipped in rubbing alcohol to spread the alcohol ink over wet paint. When dry, I rubbed on Hickory Smoke crayon and wiped with a dripping wet finger and dried again. I splattered with watered down white chalky paint and chalky paint mixed with alcohol ink.
Here's another look at my completed icy card.
I hope you're inspired to get out your paints and inks or shop for some new colors and make some metallic backgrounds. In the meantime, there's still a few days to get your projects linked up for our '
Three is Not a Crowd' challenge. I can't wait to see what you'll make!
Hugs!
Sara Emily


WOWZERS Sara Emily! So many clever tips and techniques for creating beautiful snowy Distress backgrounds! I love how you've layered together the stamped snowflakes and coloured Paper Doll with those delicious backgrounds for a real wintery feel. Thank you so much for sharing xx
ReplyDeleteGreat step by step Sara xx Love the details, especially the background and it is so nice to hear how your love of skating inspired you xx
ReplyDeleteHappy weekend
Annie xx
This is gorgeous! Love it and all the beautiful details and techniques you shared!
ReplyDeleteAwesome card, Sara Emily, and amazing techniques. You have such wonderful ideas!
ReplyDeleteWOWZERS! This is AWESOME! Thanks for all the details in the construction!
ReplyDeleteSo enjoyed reading this post and learnt so much so thank you for the inspiration. Absolutely amazing project, so creative and love all the techniques. I had no idea you could mix so many paints/alcohol inks etc together and achieve such a fabulous effect....Thank you x
ReplyDeleteThe background is just gorgeous Sara, I loved seeing how you created it in your fantastic tutorial - what a wonderful result too! Thank you for sharing your techniques! xx
ReplyDeleteSara Emily, this is wonderfully vintage and your post is just loaded with wonderful tips and techniques! Thank you so much for taking the time to photograph all the various steps. Your explanation is so clear and easy to follow. And the project is gorgeous!
ReplyDeleteHi Sara Emily, I love your post. You always find such detail in your work. Love the snowflakes and that background! Happy New Year x
ReplyDeleteAt the moment I can only say "WOW!" Thanks for showing this Sara Emily!! Chrisx
ReplyDeleteSara,
ReplyDeleteThis card is spectacular. I just love the backgrounds as they are my nemesis. Anytime I read about how to do something like this I am very grateful. It's a well written tutorial and very helpful. And then the result is so beautiful.
I also enjoyed reading about your history as a skater. That makes the card even more fun. Thank you.
Very inspiring step by step Sara Emily! I have never thought to spritz alcohol ink with water, going to play around with this technique. Gorgeous project and definitely OOAK! xo
ReplyDeleteOh my, Sara, everything you created here is so scrumptious I could eat it! Amazing! xoxoxo
ReplyDeleteJaw. On. The. Floor. Girl, this is the coolest thing ever! I adore your background work and the idea of making a chippie from the sticker. You always take your projects a step further than I would think to and it really shows in the incredible layers of color and texture. I'm amazed by you! Hugs, Autumn
ReplyDeleteUtterly wonderful, Sara Emily - I'm blown away by this post full of inspiration... from the textured panels to the beautifully inked snowflakes - just fantastic.
ReplyDeleteAlison x