I'd like to say I have a video tutorial for you, but my skills are lacking in the technology department, so grab a snack and get comfy, because true to form, I have a nice long post for you today! Remember, click on any photo to zoom in.
2. Apply gold crackle paint in varying thicknesses. Allow to dry.
4. Once the powder has cooled, I blasted it in one spot to reheat the molten powder, and sprinkled with Ancient Amber very lightly, and quickly reheated to just melt. I repeated this in several areas.
5. Admire how beautiful the deep blue looks with the varied gold tones. I can see this luscious powder used over and over again on projects as we get into the summer months, especially on sea themed projects.
7. To give it a shabby appearance and to better blend with the gorgeous Prima Lavender papers, I sponged on some chalky paint randomly.
Here's how I did it:
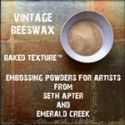
2. I swiped on Ranger Emboss It Dabber and covered my panel completely with Vintage Beeswax. I repeated this three times, and while the last layer was still wet I made my stamped impression. (You'll notice this is a different panel; the first one was too bold, so I just added more water to my puddles on my second try. The Vintage Beeswax will amplify the colors, so you want to go light for a real beeswax look. Also, it's important to cut your shape before applying the powder or it will crack. Mine has cracks, because I wanted them there. I think you could just remelt it if you crack it accidentally.
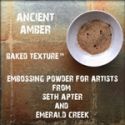
3. (Not shown) Heat gently at the top and sprinkle lightly with Ancient Amber. In the close up below, you can see the lovely shimmer it gives.
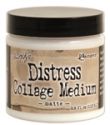
4. Coat the panel with matte collage medium to take down the shine for an authentic encaustic look. I think I added my rub on after this layer dried, which in hindsight would have best been done prior to adding the collage medium.
Here are some close ups of my frilly card. I have a list of links to the products I've used at the bottom of this post. Just click on the Thumblinky, and you will be magically transported to The Funkie Junkie Boutique where all products are discounted every day!
Just look at that beautiful texture!
2. (Not shown) I did some background stamping.
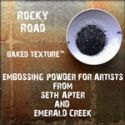
3. Using two different bricks stencils, I applied modeling paste. While it's still wet, I applied Chunky Rust powder, and a sprinkle of Rocky Road (just on the lower bricks). I let that dry and when dry heated to melt. Those fuzzy fibers everyone is so excited about melt right into the paste, which is exactly what I was hoping for. Who's ever heard of fuzzy bricks?
4. (Not shown) I ran a line of collage medium along the top of the lower bricks and sprinkled with Rocky Road. I wanted this to look like a half wall my chap was leaning on. I also added a bit where his feet would be for something for him to stand on.
Now for some embellishments:
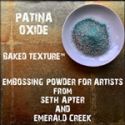
2. Heat to melt, and while still molten, sprinkle lightly with Patina Oxide.
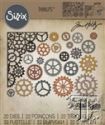
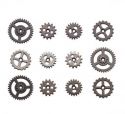
I find that Distress paint makes a great binding agent when applying powders to metal. I just dab on the paint, dry it partially and dip it into the powder, then heat to melt. For my Mini Gear, I used my Rocky Road/Chunky Rust mixture.
Here are some close ups of some of that yummy texture.
I used Tim's Speckles stencil with the Embossing Dabber and my mixture of Chunky Rust/Rocky Road around the edge of the back panel. Giving it a coat of collage matte medium makes it look more like real rusting wrought iron.
Die cut or other surface on which to make rust
Grit Paste (optional)
Black Soot and Cracked Pistachio (optional) Distress paint
Collage medium in matte
Emboss It Dabber or embossing ink
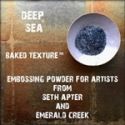
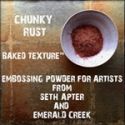
Baked Texture powders: Rocky Road, Chunky Rust and Patina Oxide
2. When dry, apply Black Soot Distress paint.
4. When cooled, cover with matte collage medium.
5. While this is still wet, dip into or sprinkle with Chunky Rust. Heat just until starting to melt -- you want to see those fibers!
7. Tap with the Emboss It Dabber and lightly sprinkle with Patina Oxide. Heat lightly as in previous step.
I think it looks pretty amazing on the card stock and die cuts, but check out this swivel clasp and Hinge Clip! I think I used the Emboss It Dabber on the chain link, and it worked well, but using the dabber on metal isn't always reliable. If you heat it too much or apply too much of the liquid, the powder will chip off. You will see how I used these embellishments on my March 7 post for Frilly and Funkie.
On this gold scroll, I applied two layers of Ancient Amber. Then I dabbed very lightly with black Soot paint. While wet, I covered with the powder and shook off the excess before heating a third time.
Here's Patina Oxide on black card stock heated lightly for even more great bubbly texture.
In the photo below you see that rusty wrought iron rust combination of Rocky Road, Chunky Rust and Patina Oxide over the black gesso die cut (On the right.). Love it!
Another Frilly and Funkie team member will be back next Saturday to share a new tutorial. In the meantime, there's still time to enter the current Frilly and Funkie challenge 'Dare to Resist'.
Happy Creating!
Sara Emily
The following products were used and are available for purchase at The Funkie Junkie Boutique:

















Oh WOW Sara Emily! Really enjoyed taking time to see how you mixed the powders with each other and other products to create beautiful colours and amazing textures on each of these wonderful cards. Thank you for sharing such an in depth Saturday Showcase guide to these fabulous embossing powders xx
ReplyDeleteLove how you have created varying tones and textures with the powders. Fabulous tutorial, Thanks. Nikki xx
ReplyDeleteWhat a fab post Sara Emily and personally I much prefer a step by step than videos...its a great reference and also easier to look at. Thanks so much for sharing this...your projects and details are fabulous . I won some of these lovely powders and hope to have some playtime soon xxx
ReplyDeleteLove this beautiful piece! I have struggled with the shiny finish and am now definitely going to try your advice for the cost of collage medium, thanks! These powders have so much potential and you have done a fabulous tutorial for some new things to try! xx
ReplyDeleteTwo fabulous and incredibly informative tutorials Sara and the cards are so beautiful! Diverse yes, but they are a testament to the work that Kim and Seth did to create the fantastic EPs in the first place! I love that the fuzzy bits disappear when used with the paste - definitely going to try that! I have so enjoyed this post! Hugs, Anne xx
ReplyDeleteAWESOME creations! I love all the texture and grunge of the "rust"!
ReplyDeleteWow, Sara! I love the two different looks you achieved with these amazing powders. They are on my wish list, and I can't wait to play with them. Your frilly card with the deep embossing/stamping technique is gorgeous. I haven't done that in ages, and you make me want to take it for a spin again soon. But those bricks! Wow! The texture on those is amazing. What a wonderful post! It had to have taken you forever to write this up. You really need to start sharing these incredible technique tutorials on Snapguide so you can reach a wider audience. Amazing work, my friend!
ReplyDeleteLove both cards, Sara Emily! The brick background looks fantastic.
ReplyDeleteThank you for your sweet comments! I had a lot of fun playing with Seth's powders, and I can't wait to see how our readers will be using them going forward! Hugs!
ReplyDeleteLovely tutorial Sara Emily! Your cards are gorgeous.
ReplyDeleteBoth cards are stunning!
ReplyDeleteThe brick & gears w this effect is super cool!
Gonna hafa try these powders out for myself- esp w the IdeaOlogy items...WOWZA!!!!
Oh Sara Emily! This is the most wonderful informative post and I'm tickled pink to sort of have a feeling of how your brain works as you craft. I can imagine you held up in the closet for hours working on these beauties! LOL! I adore the frilly card with the hints of grunge that melt my heart. That frame!!! And the bricks and other textures are out of this world. I can't wait to see how you used the final few elements. Baited breath, Autumn
ReplyDeleteWow! This is a brilliant tutorial Sara! So informative and I really enjoyed seeing all the different effects you can get with these amazing powders. The bricks look wonderful and the rust on the swivel clasp and hinge clip is amazing .. so realistic!! I have wanted these powders before but, after seeing this, they have now become a must have!!! Havew bookmarked this for future reference .. absolutely fabulous!! hugs x
ReplyDeleteSara, You sure are rocking out those embossing powders!! Such great makes each in their own unique ways, but both showcasing awesome textures!!
ReplyDeleteHugs,Jackie xx
Thank you Kate, Lyla, Autumn, Margaret and Jackie! You are really sweet, and you are going to LOVE these powders! Hugs!
ReplyDeleteI told you on your blog, Sara Emily, how much I loved your cards, but now after Pinning this tute, I must tell you what a great job you did here. And since Miss Jackie just commented and she's the reason I got my texture powders (Enabler! haha), I appreciated seeing how they can be used. Totally in love with how you used the Rocky Road to make the ground on the boy card. Genius!!! xoxoxo
ReplyDelete