


As mentioned in a previous Saturday Showcase, the dies that accompany the stamp sets are "framelits," not to be confused with "thinlits" dies (which are standalone dies). "Framelits" are named (quite literally) because they frame the stamp. So if you ever wonder if there are dies to match Tim's stamps, check and see if there is a framelits set. At the end of each project I have shown which framelits dies I used for reference.

#8 Tag

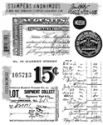
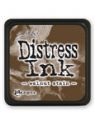
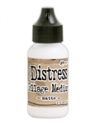
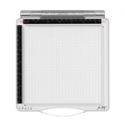
- To create the tickets, spritz frayed burlap distress spray onto the Tim Holtz glass media mat and drag a distress mixed media heavystock tag through it.
- Spritz with water and dry with a heat tool.
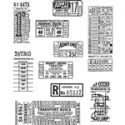
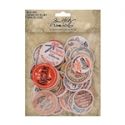
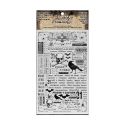
- From the Tim Holtz Ticket Booth stamp set (CMS337) stamp a ticket onto the heavystock tag using the Tim Holtz travel stamp platform.
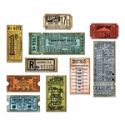
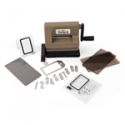
- Using the accompanying Ticket Booth framelits set, die cut the ticket. These will all fit into the Sizzix sidekick machine! BONUS!

Another BONUS is that the Ticket Booth framelits dies will also cut stamps from the Tim Holtz Odds and Ends stamp set (CMS100)! This was the first Tim Holtz stamp set that I ever bought.

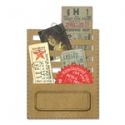
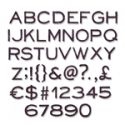
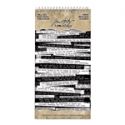
Using the stitched slots die is a fun way to create some tickets to store in your planner or travelers notebook. I stamped the die cut stitched slots with ticket booth stamps to create a background and adhered it to a tag with distress collage medium. I added "ticket" with die cuts from the alphanumeric thinlits die set and tucked the tickets in. Check out this cool video by Tim Holtz showing how to ink a die to create highlights where the crease detail is.

~

A5 Card

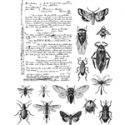
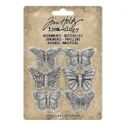
- Stamp a moth from the Tim Holtz Entomology stamp set (CMS328) in frayed burlap distress ink using the travel platform and leave the stamp in place on the platform. Squish distress ink onto the glass media mat.
- Pick up the distress ink with a water brush and paint the moth.
- Place the tag back onto the travel stamp platform, (this is why you leave the stamp in place) and stamp over the top with archival ink.
- Die cut the ticket with the ticket booth framelits die and add a little stamped detail onto one end with the ticket booth stamps. Drop water onto the moth using the water brush and let it wick before drying with a heat tool.

I love that you can use the ticket booth stamps in so many ways, mixing and matching the dies and using portions of the stamps.

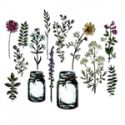
Speaking of mixing and matching, I used some of the leftover flower jar die cut stamps from my last Saturday Showcase. It's always worth making a few extra and so simple with the Tim Holtz Sizzix sidekick.

~

#8 Tag

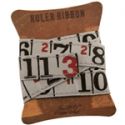
The ticket on this tag was a "happy accident!" I had stamped a ticket onto heavystock but it was too close to the edge to die cut with the framelits die I wanted to use. Waste not, want not, I layed over a smaller die from the same set and blended in ink. I noticed I had a perfect ticket inside a ticket so I pushed the inside ticket back in and loved it.

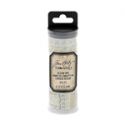
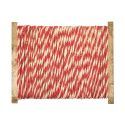
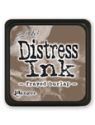
You can see it slightly more clearly here. I added walnut stain distress ink to the outer part to highlight the green ticket inside. I used the end of a ticket booth framelits die to give the bottom a ticket style edge. I also used up some Tim Holtz halloween remnant rubs. I love that parts of these can be used all year round. I also used some Tim Holtz holiday twine on the other tag. Covered with a little walnut stain distress ink gives it a more vintage and less candy cane look.

I hope you have enjoyed this Saturday showcase and take a look at the current Layers of Lace challenge. All the products I used are available from The Funkie Junkie Boutique.
I hope you have a great and creative weekend.
Zoe
 |  |  |  |  |
 |  |  |  |  |
 |  |  |  |  |
 |  |  |  |  |
 |  |  |  |  |
 |  |  |  |  |
 |  |  |  |  |
 |  |  |  |  |

LOVE, LOVE, LOVE these projects Zoe!!!!!! So excited to see how each of them came together xx
ReplyDeletethey are all fantastic, i’m completely in love with that last tag ~swoon~
ReplyDeletevicki
These are all exceptional. Magnificent. Superlatives fail me my friend. Love love loooove!!
ReplyDeleteThree fantastic pieces, Zoe, and the last one is the crowning glory. You've made those tickets fall into my basket!
ReplyDeleteAlison x
Wow! Thank you for sharing your creativity Zoe!
ReplyDeleteI love how you have mixed and matched everything and not wasted a bit!!! These are awesome!!! Great job girlie!!!
ReplyDeleteLove everything!
ReplyDeleteseriously fabulous Zoe...totally inspired over here!!
ReplyDeleteSeriously sensational work, Zoe. Thank you so much for sharing this wonderful inspiration with our visitors. You make me want to blow the dust off my craft table and get to work - that's quite a feat since I haven't been in there in 6 months!
ReplyDeleteThe examples are all very inspiring! Your designs are always perfect; the vintage-y look is flawless. Going to make time to use the dies and stamps! Thanks for the creativity nudge.
ReplyDeleteOh Zoe! These are all so incredible and make me remember why I love stamping! This post just made my day and filled my mind with possibility... Thanks for always upping the bar and sharing your inspiring work. Hugs, Autumn
ReplyDeleteA wonderful Saturday inspiration post, Zoe, enjoyed here in Wilmington on Wednesday morning! I especially love your happy accident ticket--always love that inlaid look. I have been duly enabled and have both sets waiting to be put to use! Hugs!
ReplyDelete