

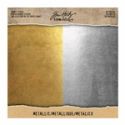
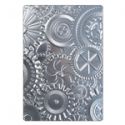
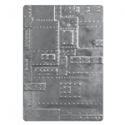
I love the looks that the ageing process can give surfaces and in particular those that occur when metal is exposed to the weather. Having put together an effective rusted effect on a Vignette Accent for a recent project I put together a 'how to', this time using the technique on some Tim Holtz Metallic Kraft Stock embossed with the 3D Texture Fades Embossing Folder 'Mechanics' (though it would work equally well with the 'Foundry' version). Here's the video;
Hopefully you now feel ready to start adding faux rust and verdigris to your metal (and non-metal!) surfaces. I've listed the products used below as a handy reference. Thanks for joining me here today. Have a great weekend and remember to get creative!
Jenny xxx
 |  |  |  |  |
 |  |  |  |  |
 |  |  |  |

What a fantastic tutorial! I could listen to you teaching all day, The steps are straightforward and very easy to follow and the results are gorgeous! I can’t even choose which one I like better. I will definitely be getting out my supplies and trying this! Thank you for sharing.
ReplyDeleteI agree with Ann, I could listen to you teach all day <3 Great tutorial, very informative. Adding the AI's, brilliant :)
ReplyDeleteGreat tutorial Jenny! I like how you used the different colors and then sanded to give such a rusted patina look!
ReplyDeleteLove the aged effect Jenny and TFS the process
ReplyDeleteHugs Annie x
Wonderful result - love both looks. I never thought the alcohol ink would move with water and that blending solution would be needed - always learn something new from you. Thanks! xx
ReplyDeleteGreat, straightforward tutorial; loving the results for backgrounds! Colors appear very realistic. Thanks for sharing.
ReplyDeleteI can't wait to get my hands on those texture fades so I can do this project.
ReplyDeleteWhat an awesome technique! I'm definitely going to give this a try. TFS Jenny!
ReplyDeleteFabulous tutorial...thanks so much for sharing! Your use of alcohol ink along with the distress paints is brilliant and works wonderfully, can't wait to try it!!😍
ReplyDeleteJJ Snelten
Brilliant tutorial! And thanks for the tips on drying-out paint...my Distress paint are showing that as well...
ReplyDeleteCan't wait to try it, wonderful tutorial!
ReplyDeleteBeautiful and informative as well. Thank you!
ReplyDeleteJenny, this is such a brilliant tutorial. Your rust and patina panels are just gorgeous, and you can bet, I will be trying this out! Also, thanks for being such a clear, concise and easy to follow instructor. I loved your video! xo
ReplyDeleteWhat a fabulous tutorial.So inspiring.Thank you so much!
ReplyDeleteJust what I've been looking for! Excellentwork. I have written it all down so I can folow what you did. Thank you so very much jenny.
ReplyDeleteYes same for me too,been looking for a video like this for ages and what a fab rusty look on both gold and silver so thanks for sharing this.
ReplyDelete