
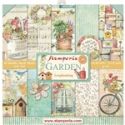
Spotlight on Stamperia's Garden Collection
Hello friends, Maggi here with the Saturday Showcase! The spotlight is shining on Stamperia's Garden collection today. These papers are colorful and filled with delightful garden images that just might entice you to do a little fussy cutting. I've created a garden journal that is simple to make, but oh so lovely, and, since it's the time of year for gift giving, this journal is perfect for the gardener's in your life!

Tutorial
I chose to use a 3 binder notebook that has a see through sleeve on the front, back and spine because it is practical. You can make really pretty covers that will stand up to constant use because of the cover protector. You can get notebooks in many different sizes and shapes and I chose to use a small notebook that holds 5.5" x 8.5" paper.
Inside the journal I created pockets, tags, and divider pages for organizing the gardener's tasks.


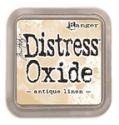
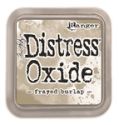
Ok, let's get busy! You can ink and/or distress your pages, that's up to you. I don't distress as much as I used to but I do love the effect. All my pages are inked with Distress Oxide Ink in Antique Linen and Frayed Burlap. Some of the papers are distressed using Tim Holtz's paper distresser.
Step 1: The Cover
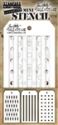
Here's how I did the cover. I started with a piece of cream card stock that I cut to fit inside the cover sleeve. I inked it with Distress Oxide Antique Linen and then stenciled on the dots using tan acrylic paint and a stenciling brush.

This collection includes some great cut-aparts and images that work for fussy cutting. I selected square and rectangular cut-aparts for my cover and adhered as shown below. I fussy cut the circle sentiment, the boots, and the "my garden" elements and adhered with dimensional foam to pop them up.

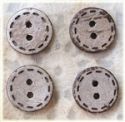
I finished off the cover with a few small flowers and 3 cute little buttons.

For the spine I simply cut a strip of design paper about 1 1/8" wide and then placed a narrow strip down the center, adhering with scor-tape. That's my choice of adhesive for jobs like this, you can certainly use whatever is your favorite adhesive.
I think the back cover is stunning, yet it's nothing more than a piece of design paper with fussy cut birds added. No need for fancy embellies, it's beautiful just like it is!

Step 2: Calendar
As a gardener, I'm always looking at the calendar, checking planting dates and such, so I printed a calendar (you can find lots of free printable calendars on the internet) and mounted it on a sheet of design paper. On the backside, I fussy cut the birdhouse and added a chipboard word that is heat embossed with Emerald Creek Rose Gold embossing powder. The backside is a great place for a gardener to make notes.


Step 3: Dividers
I cut tabbed dividers for the notebook on my Cameo but you can also buy them or cut your own. You could also cut rectangles and add tabs to them.
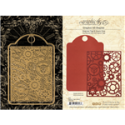
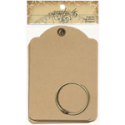
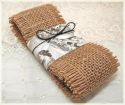
The collection includes a page that has 4 printed 6" x 6" cut-aparts. I've used one of those on this divider to create a pocket at the bottom. The pocket is popped up so that I can include a packet of seeds. I also made a pretty tag to slip in the pocket with an ivory Graphic 45 tag. Then I used Graphic 45's regular tag die to die-cut design paper to adhere to the tag, front and back. I like to finish off my tags with a pretty bow made from seam binding.

I really love the imagery in this collection and the colors, wow!! That teal and pink is just so spectacular! Here's the backside of the Planting Guide divider. I made a vertical pocket and slipped in little monthly cut-aparts that are part of this fun collection.
These pages are all fairly simple, to recreate, you just need to first cover your dividers with base design paper and then find the various elements that I've fussy cut and adhere.

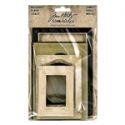
Tips: The cover of Stamperia papers often has little elements that you can cut out and this window came from the front cover.
Notice how the bottom left corner of the frame is cut away. I did this so that I could adhere the fussy cut flower with the button center to the base paper. This way the button is not over the frame and so it's less bulky.
The little black butterflies are Remnant Rubs.


The back of this divider also has a vertical pocket with more of the calendar cut-aparts.

I used two different pieces of design paper for the front of this divider. Then I fussy cut the bird, the flower pots, and the thyme element from design papers and adhered. The back of the divider is just a piece of design paper cut to fit along with two plant markers die-cut from another sheet of design paper.


I used two different pieces of design paper on this divider, and then adhered to herbs plant marker over the seam where the striped paper joins the multi-printed collage paper. I distressed the edges of the paper where the two pieces meet just to add to the shabby appearance. The paper is so pretty that it doesn't need a lot of embellishment, it pops just like it is!


I love Stamperia's collections because their papers are so colorful and they include many elements that are perfect for fussy cutting. Also their papers have the appearance of being collaged so that it is not necessary to add a lot to the page. You can easily create journals and mini albums that are not so bulky as the pages don't need a lot of embellishment to be pretty. I am a person who likes to throw "the kitchen sink" at every page, but I am able to control myself with these papers! 😃
Supplies from The Funkie Junkie Boutique
 |  |  |  |  |  |
 |  |  |  |  |  |
 |  |  |  |  |

Nicely done! Your post makes me want to purchase this paper pack :)
ReplyDeleteOh Maggi I've so enjoyed seeing what you've done with this gorgeous paper collection! You've made it feel so easy to bring together a folder that would be as wonderful to gaze upon as I'm sure it would be to use. Thank you for sharing how it came together xx
ReplyDeleteCharming! I love the nature that permeates the pages and you have really made this lovely paper shine!
ReplyDeleteThis is beautiful. I have these papers so will do something similar if you don't mind.
ReplyDeleteHow many dividers did you put in please