

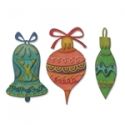
Going in search of inspiration I found this picture of vintage baubles that reminded me of some my Mum used to hang on our tree when I was younger. They were brightly coloured over a silver base with a retro design and glittered patterns. This got my head whirring with 'what if' ideas. Reaching for Tim's new 'Whimsy Decor' dies I made baubles with a similar style to them and used them to top some simple Christmas cards which can be seen below (click on each image for a closer look);

I took photos along the way when creating these to show you exactly how they came together.
The Tutorial
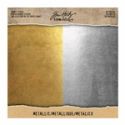
Start by sorting the various bauble pieces in the Whimsy Decor die set into piles using the packaging picture as a guide. Cut pieces of silver Metallic Kraft Stock large enough to cut all the pieces three times as shown below.

Beginning with the first bauble colour the surface of each of the pieces of Metallic Kraft Stock with Alcohol Inks using a standard felt applicator. In this case the colours I used were Stream, Lettuce and Shell Pink. With the deeper colours like Stream I found it only takes one layer to get a good coverage but with the lighter colours like Shell Pink I reapplied the ink a couple of times to get a deeper shade.

Repeat the process for the smallest of the baubles; I used an older colour, Raisin (Cranberry would be a perfect substitute) and Valencia and then left one piece un-inked.

Finally repeat the process for the last of the baubles; I used Meadow, Red Pepper and Butterscotch, but then decided that the Butterscotch one was too bright so reverted to using un-inked gold Metallic Kraft Stock instead.

Once the ink is dry die cut the baubles pieces from each of the pieces of coloured Metallic Kraft Stock and assemble them using Distress Collage Medium Matte. Apply more of the Distress Collage Medium to small areas on the finished baubles using the fine tip applicator and sprinkle with Distress Clear Rock Candy Glitter.

Once the glitter is dry gently sand back some of the edges and raised surfaces to make it look like the silvering has been revealed after years of being handled. Take care not to remove too much of the colour.

Now for the background; cut pieces of the same silver Metallic Kraft Stock to fit onto your choice of card blank (I used some of the new Wendy Vecchi Perfect Cardstock Landscape Cards). Use a spatula to smear a little white Dina Wakley Media Acrylic Paint onto the surface of each piece of Kraft Stock and set aside to dry.

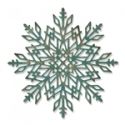
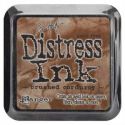
Cut several snowflakes from white card using Tim's new Flurry #2 die and ink the edges with a little Brushed Corduroy Distress Ink.

Glue the snowflakes onto the background card, trimming along the edges when glued in place. The Distress Collage Medium is great for adhering these snowflakes because as it dries it becomes clear and shrinks back so you don't see any excess.

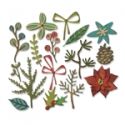
Cut some pine needles using brown and green Classic Kraft Stock and Tim's new Funky Festive die set. The branch elements need gluing in place over the needle pieces to give a two colour realistic look and make them more sturdy. As this die piece is so small I found it more convenient to use my Sidekick to cut the elements.

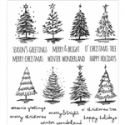
To finish the cards add the pine needles and baubles to the snowflake backgrounds, using a little dimensional tape to raise the baubles from the surface. I mounted mine onto some white card before adding them to the card blanks. I also added sentiments from the Scribbly Christmas stamp set. Here are those finished cards (click on the image for a closer look);

A list of products used can be found below.
 |  |  |  |  |
 |  |  |  |  |
 |  |  |  |  |
 |  |  |  |  |
 |  |  |

These are gorgeous Jenny, adore the retro feel. Tracy ❤️❤️😘
ReplyDeleteJenny, these are really fantastic!!!!
ReplyDeleteWow. The baubles are fabulous and the cards do them justice. Keepsakes for the recipients I would say.
ReplyDeleteHugs!
Cec
Love, Love, LOVE!
ReplyDeleteThese are so lovely Jenny. They look pretty labor intensive though. Thanks for sharing with us.
ReplyDeleteOh, Jenny! You have magically transported me back to my Grammy's parlour at Christmas time! She had these ornaments on her tree. As a kid, I was totally transfixed by the sparkle and intricate designs...and I'm equally transfixed by your beautiful interpretation of them. You have created a layered card that is easy to mail...and that is not easy to do. Love this post and these nostalgic cards. Thanks so much for sharing you process with us! xo
ReplyDeleteBeautiful!
ReplyDeleteThese are fabulous! So retro and hip! Beautiful background to showcase this funky and cool ornaments!
ReplyDelete