


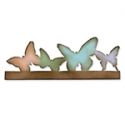
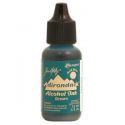
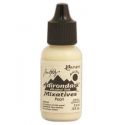
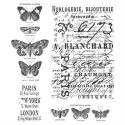
After the last layer was applied, it was a little harsh for what I wanted here so I pulled out my Pearl alcohol ink mixative and went over the entire piece dabbing the Pearl over it. Sorry forgot to snap a pic of that step. I loved the way it looked but for this piece it wasn't transparent enough. I had stamped a line of text on the butterflies and wanted that to show through so I applied some alcohol ink blending solution to my applicator and dabbed that over the layers. It removed just enough (but still left the coloring on) to let the text show through.

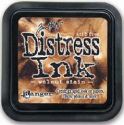
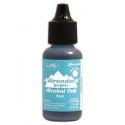
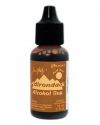
Pulling out a few different Tim Holtz stamp sets, I did some random stamping on the inside, added a sentiment which I heat embossed on and then sponged on Tumbled Glass distress ink, followed by inking the edges with Walnut Stain DI.

I added a bit of staining using Walnut Stain DI on my craft sheet, spritzed with a bit of water. I made a little puddle and then carefully lay my piece in a few droplets here and there and then dry with the heat tool.
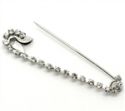
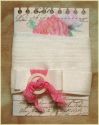
Rayon seam binding was colored with Tumbled Glass and a bit of Walnut Stain, scrunched up and dried to shabby it up and then tied in a triple bow. I finished it off the inside with a rhinestone safety pin.

The acrylic strip was added to the front with wonder tape. Once I had it affixed, I used my heat tool on the butterflies to warp them a bit which gave them a bit of dimension and texture. I added a strip of hand dyed Venise lace to cover the wonder tape and the piece was good to go.

Thanks so much for starting your weekend off with Frilly and Funkie. Wishing everyone a great weekend and to my American friends, happy Memorial Day!
 |  |  |  |  |
 |  |  |  |  |
 |  |  |  |  |
 |  |

oh, FUN! I was going to try the alcohol ink this weekend, but you have stepped it up a notch :). I just got my edge dies, so hmmmmm wheels are turning :)
ReplyDeleteLove this!! Adds that extra dimension and you had me at butterflies!
ReplyDeleteGorgeous card Linda, love the butterflies along the edge. Great technique of die cutting on the fold. Sue C x
ReplyDeleteReally love those butterflies! Fabulous tag with so much depth! You already gave me an idea! Hugs!
ReplyDeleteI was inspired when I saw Tammy's but you have taken it to another level entirely with your stunning tag Linda, it is gorgeous! Must give this a try.... Hope you have a lovely weekend too. Hugs, Anne x
ReplyDeleteWOW Gorgeous! It adds that extra touch of the WOW factor.
ReplyDeleteOMG this is fabulous Linda!!!! Love the way the Pearl Mixative has softened everything and the way the text shows through the butterflies. You'll have more wheels turning in crafty heads everywhere with this x
ReplyDeleteSo clever, and so beautiful! Those delicate butterfly wings are just a delight, and I love the whole folded edge to the tag - brilliant!
ReplyDeleteAlison x
I have already commented on "frilly and Funkie" but I can not help but do it here too! It 'a wonderful tag! BArbarayaya
ReplyDeleteSorry!!!!! I'm confused! I wanted to say that I have already commented on The funkie junkie! However, I say again: it is a fabulous tag! Barbarayaya
ReplyDeleteGORGEOUS. Just pinned it to 2 of my boards. TFS!
ReplyDelete...this tag is breathtaking, one of the best I've seen in a long while, I love it...Melxx :)
ReplyDeleteBeautiful make, - the effect of the alcohol inks on the butterflies looks fantastic!
ReplyDeleteThis is so beautiful Linda, I love the color you chose. Thanks for showing us the technique, I will def need to try this one out.
ReplyDeleteThis is Awesome! I can't wait to try it out.
ReplyDeleteThanks for your amazing inspiration Linda.
Your posts make my day!
Hugz
Moz
FANTASTIC LINDA!!!! I'm going to be playing with this! Super great tutorial! Thanks so much for the inspiration!
ReplyDeleteGorgeous!!!!
ReplyDeleteOh, Linda, I really, really love this idea!! What a fabulous step-by-step. Very inspiring!!
ReplyDeleteWonderful work.
ReplyDeleteWow. Gorgeous!
ReplyDelete