Here's how it was done...
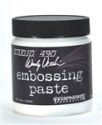
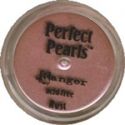
Working on a non-stick craft sheet and a blending spatula, I scooped out a heaping tablespoon of embossing paste. You can always use a baking spatula by the way ;-) The reddish powder sprinkled on top is Perfect Pearls in 'rust'. Blend it into the embossing paste by smearing it back and forth against the mat...
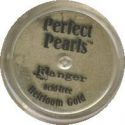
Then I sprinkled some Perfect Pearls in 'heirloom gold' and blended it in again. The gold adds an amazing, rich shimmer that doesn't photograph well, but is really beautiful...
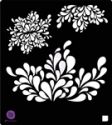
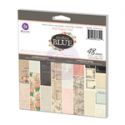
On a clean spot on the mat, tape a sheet of patterned paper down (from the new 'Something Blue' pad) and then tape the stencil, positioning it where you want the design. If you are using a portion of the design or a segment that is close to another open area, mask it off with tape...
After spreading a layer of the colored paste over the stencil, let it dry completely. Then using a small dry brush to pick up some more of the heirloom gold Perfect Pearls, and apply it over the stencil. I added more of the powder to the larger ends to create some shading and added some shadows to some of the shapes with rust powder. When you have added the Perfect Pearls to your satisfaction, I suggest a Swiffer duster to remove the extra powder from the paper. It's the best method I have found, to clean up this fine powder. For this project, I decided to trim around the outer edge of the design...
The gorgeous Prima border and the stencil embossed panel were added to the center of this gorgeous, satiny, soft metallic gold card stock. You can find different colours and designs of these beautiful borders at The Funkie Junkie Boutique.
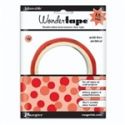
I thought it needed another layer of design and texture, so I cut the gold paper at the edge of the prima border, punched a border from card stock that coordinated with the patterned paper and adhered it with Wonder Tape, leaving enough length to extend behind and beyond the gold panel and wide enough to create a thin, pink border around the gold panel. Sprinkle some distress glitter over the punched edge to fill in the design's open spaces and then adhere it behind the first panel...
You can see the layers above...
A separate piece of gold paper was cut longer than the front panel, scored, folded, the short end punched and then adhered to the front. A simple white panel was added to the inside and a tiny leftover sprig of the Prima border was used in the corner. The sentiment was heat embossed onto the face of the card for an elegant appearance.
Thanks so much for visiting and having the staying power to make it through to the end! And don't forget those Prima products have that extra 15% discount applied at The Funkie Junkie Boutique through October 30th.
Sending you blessings and ((hugs)),





What a fantastic tutorial Rebecca! Love the whole mix of textures you've achieved and the stencilling looks so elegant with this card design. Jenny x
ReplyDeleteThanks Jenny~ This whole mixed medium movement is definitely having it's effect on me! ((hugs)), Rebecca
DeleteLove that stencil and your colors are beautiful! I'll bet the shimmer with the Perfect Pearls and the distress glitter is just gorgeous IRL! Love the way you put the glitter behind the die cut filigree panel!
ReplyDeleteHugs,
Linda
Thank you Linda~ I'm really loving stencils mixed with an old love of PP and distress glitter in now firmly in my 'Love' category!! ((hugs)), Rebecca
DeleteSo very beautiful my dear!!!
ReplyDeleteThank you Jill~ Hope you're having a great autumn! Hello to T too~ ((hugs)), Rebecca
DeleteAbsolutely gorgeous, Rebecca!! Your technique for blending the embossing paste with perfect pearls is inspired and I adore all of your luscious layering! You have the most ingenious ideas!!
ReplyDeleteHugs,
Nancy