


It actually worked even better because of the thickness it went on like a colored embossing paste.

I used a foam brush and painted on the paint over the stencil on my card stock. I was creating my step by steps and didn't realize until I finished that I had picked up the other stencil. I went back and did it again with the Valentine's stencil.

You can see how thick the paint is in this photo which gave a nice texture as well as a resist. Here is the finished product.

Next I used gray ink and stamped a fine script over the surface.

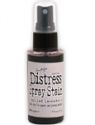
I decided to pair the golden tones with a soft lavender spray but was running out of my spray. It worked perfect for this as I wanted to pour it on and let it run over the surface by tilting the paper different directions. If you don't like the effect you can add more and you can spray it on.
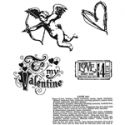
Next up was to add my hearts over the background.

I die cut hearts form a scrap of paper to use as my template for my hearts in the background. I pulled out my watercolor pencil and traced hearts on the background.

I used a waterbrush to soften the heart effect. The left side has been painted with water. I then added another layer of color with a gray watercolor pencil to add more shadows.

After the hearts were added to the background I moved onto my metallic hearts.

I started with a sheet of foil. I backed my foil with card stock by taping it to the back before I started to do all the steps. Adding the card stock makes it easier for the foil to hold the embossing effect. I embossed it with the typewriter letters. I then painted it with a coat of white acrylic paint.

I took the remaining lavender spray and painted it on over the dry surface of the white paint.

I cut a series of hearts from the painted foil and then smeared a layer of gold paint over the surface of each heart.

I showed you the effect of the foil with and without the gold paint.

Wishing you all an early Happy Valentine's Day!
Suzz
 |  |  |  |  |
 |  |  |  |  |
 |

So beautiful. .happy Valentine's day for tomorrow x
ReplyDeleteBrilliant Suzz, just brilliant. It was amazing to see how you built the layers on this and had some clever tips and tricks along the way. Good to know older paints have their uses and I adore those watercolor hearts. Love it!!! Jenny x
ReplyDeleteBeautiful Suzz, and I am so impressed with your used of the dried up Distress paint. I've thrown so many in the garbage and now I'm kicking myself. Love the metal hearts, a gorgeous piece of art all around! hugs :)
ReplyDeleteGreat tutorial, thank you so much for explaining all the techniques. Fabulous job and loving the idea about old dabbers...going to look for mine today! Thank you for the inspiration x
ReplyDeleteGorgeous. The colour palette is so effective. Love all the different techniques you used to create this beauty.
ReplyDeleteHugs!
Cec
Great textures and technique!
ReplyDeleteBeautiful.
ReplyDeleteJulie x
Great tutorial and fabulous journal page!
ReplyDeleteLove your step by step Suzz! What a great way to use up old paint, I will definitely put that one in the awesome tips bank. :)
ReplyDeleteThis is such a great step by step that you actually make me want to start an art journal. I love the gold embossing and the beautiful addition of the lavender spray. Just gorgeous!
ReplyDeleteYour page is fabulous, Suzz! Thanks for the great step by step. The coloring and embossing are beautiful!
ReplyDeleteHugs,
Nancy