
I love working with these creamy, dreamy paints! They have amazingly rich color and one coat coverage on so many surfaces. I couldn't stop at just one project. I have prepared three very different projects using paints from Prima's Metallique, Sparks and Impasto lines to give you an idea of just how versatile they are and how well they work with other products you might have on hand. Whether you're a card maker, a scrapbook, or mixed media artist or (if you're like me) you just love to try a variety of arts and crafts, you'll want to include at least a few of these paints in your stash. They're great for home decor projects as well.
Let's start with a grungy Halloween card.

I started with the background which was my inspiration springboard for the rest of the card. I painted 110# card stock with Sparks Raven's Eye and randomly blended over it with Ground Espresso Distress paint and Walnut Stain Distress Crayon using my finger. I embossed the painted card with an old Tim's Holtz Texture Fade. (Frilly and Funkie now carries Tim's Cobwebs embossing folder.) I sanded the raised portion back to the card and blended on some Walnut Stain Distress ink to further distress it.

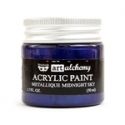
The skull is from Tim's Undertaker stamp set. For the hat, I painted black card with Metallique Midnight Sky , allowed to dry, (These paints dry very quickly.) and stamped the hat image with Archival Jet Black ink. I fussy cut it and dry brushed with Sparks Fairy Wings. The skull is inked in Walnut Stain DOX and stamped on a scrap of DOX mop up paper (Peeled Paint and Walnut Stain) I fussy cut it and mounted both the skull and hat on cardboard.

I made some 'slime' which is a mixture of soft gel medium, Mushroom alcohol ink and Fairy Wings. I smeared it on the skull and in the eye sockets and blasted it with my heat tool. This causes it to bubble nicely and looks perfectly disgusting.


I made a frame using a die cut given to me by my good friend and teammate, Autumn (SewPaperPaint). I traced around it and cut a second shape from black card. I painted the die cut with gesso and added stenciling with Snow White Impasto paint and crackle texture paste. The Impasto paint is so thick, it makes a real smooth raised image with the stencil. It's super easy to apply; you can squeeze out just the right amount onto your palette knife and spread over your stencil. Once dry, I sprayed with Black Marble Dylusions ink spray and water and blended the edges with Ground Espresso Distress ink. You get very interesting pooling of color with sprays and inks over the Impasto paint. I backed this with the black panel and added some Remnant Rubs.

I assembled the layers, adding a scrap of dyed cheesecloth from last year's Halloween decorations. The spider web panel was backed with a piece of lightweight black paper on which I smeared Crazing medium and distress crayons to highlight the texture. Doesn't it look like old charred paper? My simple sentiment is a portion of 'Ghostly Greetings', a Seasonal Small Talk sticker.
Next up: a mixed media canvas.


I've also used Prima's Impasto, Metallique and Sparks paints on my mixed media canvas. I began by adhering tissue paper with collage medium. Next, I added stenciling with Impasto paint and Stars and Dot Fade stencils. I also applied Impasto randomly on the canvas for more texture. I stenciled stars on tissue paper with crackle paste. When dry, I tore around the edges of the stars and adhered them to canvas with collage medium. An easy way to do this is to wet a paint brush with water and brush where you wish to tear the tissue.

I adhered star confetti with collage medium and dried. Then just spray with Dylusions London Blue ink spray and water to allow color to bleed and pool. Dry and dab black confetti stars with Metallique Light Patina paint. I did some heat embossing with script from Tim Holtz Urban Grunge set and white embossing powder. With my finger I applied Sparks Magical Pond and Mermaid Sparkle and Metallique Midnight Sky lightly to highlight the texture.

I love how these paints can make even paper look like metal! The two larger stars were cut from a manila file folder using Tim's Dimensional Stars die and embossed with embossing folders. I painted them with Midnight Sky and allowed to dry. You don't need to prep your surfaces with gesso to get this great one coat coverage! I highlighted the texture with Fairy Wings, then waffled and went over that with Mermaid Sparkle. The smaller star is one of Tim's Adornment Stars painted with Midnight Sky and highlighted just with Mermaid Sparkle. It's hard to tell that two of these are not real metal!

A Clippings Sticker given a smudge of more Mermaid Sparkle was adhered with collage medium to be sure it stuck to this textured surface. To finish, I gave the canvas a splatter of watered down white acrylic paint. A very easy project with lots of great texture accentuated by Prima's dazzling Sparks paints. I wished I owned every color!
How about a super simple card with lot's of sparkle?


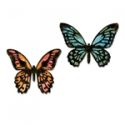
Talk about easy! The wooden butterfly from my stash was simply painted directly with Fairy Wings--again no prep work and great one-coat coverage! I had the crinoline butterfly left over from a previous project, and I just dabbed on a bit of Fairy Wings and Magical Pond paints and gave them a spritz of water. The crinoline is easy to shape as you dry it with your heat tool. I had the doily die cut in my stash. It didn't cut right because I needed to replace my plates, but I held onto it. I simply pressed it into my Versamark pad and heat embossed with white embossing powder. Finally I dipped it into a puddle of Broken China DOX and heat dried. What's left of the color bakes right in.

The simple background is made with Fossilized Amber, Broken China and Cracked Pistachio DOX and a splatter of watered down Fairy Wings. I love how the color separates when you add water, and then gives a halo effect when it dries on the paper.

Lastly, I chose an appropriate Clippings sticker, mounted it on chipboard. I edged it with Fairy Wings and adhered it. Very easy project that packs a lot of punch, thanks to these shimmery paints!
Since preparing this post, I've used some of these lovely paints on yet another mixed media layout which can be viewed on my blog. And next Wednesday, right here at Frilly and Funkie, I'll have another project using these paints.
Since preparing this post, I've used some of these lovely paints on yet another mixed media layout which can be viewed on my blog. And next Wednesday, right here at Frilly and Funkie, I'll have another project using these paints.
I hope you're inspired to give Prima's Art Alchemy paints a try. Remember the extra 15% discount will be applied through August 31 at The Funkie Junkie Boutique. Do check out the shop to see the huge supply of yummy colors Linda has in stock. Thank you for hanging in there for my crazy long post! Happy creating! Hugs! Sara Emily
Here are the products I've used which are available at The Funkie Junkie Boutique:
 |  |  |  |  |
 |  |  |  |  |
 |  |  |  |  |
 |  |  |  |  |
 |  |  |  |  |
 |  |  |  |  |
 |  |  |  |

Three fantastic projects showing the versatility of these yummy paints Sara Emily!!! Thank you for sharing xx
ReplyDeleteWOW! I read this post with great curiosity! You are a master at layering mediums and I so enjoyed reading about your discoveries and processes here. I am dying to get my hands on some of these paints and have a play! What fun! I love seeing the variety of options for their use. Great post my friend! Hugs, Autumn
ReplyDeleteWOW... Great post full of useful and eye catching techniques. I especially love "wet tearing" paper. The fuzzy edges are incredible, and even better if you happen to have fibrous paper (like rice paper or mulberry paper).
ReplyDeleteWow, these are all absolutely amazing!! The layers and textures of each one are spectacular!! You've showcased the paints perfectly, Sara Emily!! These are stunning!!
ReplyDeleteLisa
A Mermaid's Crafts
As always gorgeous projects Sara Emily. Some of the Prima paints had grabbed my eye and now you've shared your beautiful projects I now know I need some lol! Gorgeous layers of paint, you showcase them beautifully huni Karen x
ReplyDeleteYou have been busy Sara, each project is wonderful (I really love how you created the skull face), the canvas is so beautiful and the sparkly card is delightful. Great textures, great colours, fantastic designs - brilliant work!! xx
ReplyDeleteWow, Sara! You really showed the versatility and range of these paints with each amazing project. The "simple" project is my favorite with that subtle sparkle and botanical feel. Well done, my dear....you make me want to go fill my cart with paints!
ReplyDeleteGorgeous sparkly projects! Lovely use of the paints! From Spooky, mixed media goodness and soft and lovely card! Wonderful showcase of the versatility of the paints!
ReplyDeleteAwesome, Sara Emily! Love your tutorial for the amazing skeleton card - thank you for sharing!
ReplyDelete