Hi there! Suzz here to share a mini book created using old dictionary pages.
I was thrilled when Sara Emily challenged us with books. I love reading and love up-cycling damaged old books into a new piece of art to enjoy again.
I decided to create a mini journal with lots of stamping. I started with the idea of a house that opens up to show you inside. I decided to use Tim Holtz's tiny houses die and trim off the edges.
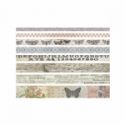
Here are my original pages die cut:
I cut down a the crease where you would normally fold the die to form the houses. I did this with multiple pages from the dictionary and from two pieces of chipboard.
After I trimmed off the excess sides from the die cut pattern I then punched four holes on the main house that was to be the back of my book. I then used that as my pattern to draw where the circles should be on my other pieces.
I covered my chipboard with pages from the dictionary. I kept two of the houses from the dictionary pages in the full house shape to attach to the front and back of my book. I cut all the other pieces in half along with one of my chipboard pieces for my cover of the book.
I used glue to attach my paper to the chipboard. I also cut cardstock houses for all my pages as I wanted the pages to be sturdier than just the dictionary pages. I attached them all with glue as I have found that using tape tends to show through in the stripes of tape behind the text paper. Glue can also do this if you don't give an even coat. I painted a light coat of white acrylic paint across all my pages to mute the text and allow me to stamp over the texty background. Let this dry before continuing on to the next step.
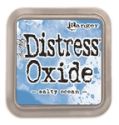
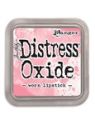
For each of my pages I used a different distress ink on the page. I first dragged the ink pad over the surface.
I then smeared it first with my finger to soften the ink over the entire surface. I then put brown dye ink onto my craft mat and used a sponge applicator to sponge the entire surface with brown dye ink. I then gave them all a lovely sprinkling of water and heat set the ink and water spots.
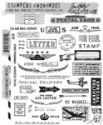
Then the fun began with stamping and layering images over the surface of the various pages.
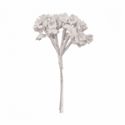
For my cover I decided to die cut a heart image and follow the same process of covering it with the text background and the inky process. I stamped the word love across the surface with black archival ink and hand drew hears and outlined with a black watercolor pencil. I made a tiny bouquet which was attached on the right side but overlaps the middle. This allows the page to still open but looks like it is attached in the middle.
I stamped the text along the top and bottom of the house. I pop dotted the hear so it could overlap my holes on the top but allow the book to be linked with jump rings.
As I continued to sponge the pages you can see I picked up some of the previous colors used in the other pages because my sponge picked up the distress oxide. I liked the blended colors and didn't mind the effect. Heat set the archival ink as it tends to stay wet on the painted.
I used white highlighter to help lighten up where the inky pages got darker and waterbrush to help blend my watercolor lines.
I also sponged archival ink over the stencils and cleaned off my stencils with the ink cleaner. I added a touch of watercolor pencil on top of the inky background. I also took the silver glittery design tape and dragged the black archival over the surface to give me a black shimmery stripe along the top.
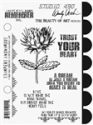
For my final page I just used the Wendy Vecchi stamp as my focal point. I framed the sentiment with a house and heart using black and pink watercolor pencils and a waterbrush. I splattered white paint and decided to add a moon along the top.
Next up was just layering on my pages with a jump ring in each hole. Lay them in order to make sure your matching pieces line up. :)
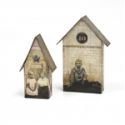
The finished album and how it looks opened page by page:
I didn't do it but you could continue your stamping on the reverse side to finish out your images on the main pages as well as coordinating the backside colors to match the center.
And the finale:
I hope you have enjoyed the mini house journal book and you are inspired to play along with us in the
Read and Good Books Lately Challenge! You have until Tuesday August 15th to join in the fun!
Suzz


Absolutely LOVE this Suzanne!!! The dictionary pages are the perfect base for all that beautiful pastel colouring and the wonderful stamping/embellishment. Each page feels like a new revelation. Thank you so much for sharing xx
ReplyDeleteThis is fabulous, Suzz! The combination of Die cuts, text, paint, ink and stamps is absolutely magical!!! What a wonderful idea! Thanks for the great tutorial!
ReplyDeleteWonderful. love it to bits. Happy crafty weekend, Angela xXx
ReplyDeleteFantasic idea that I fully intend to try! I love the shape of your book. It's so reminiscent of some religious icons that I am enamored with! I love your colors and layers. What a beautiful project!
ReplyDeleteHow awesome. Love the shape and all the great colours and stamping - each page is eye candy on its own.
ReplyDeleteHugs!
Cec
what an amazing book Suzanne x Wonderful details on each page.....Fabulous
ReplyDeleteTFS Annie
Really nice tutorial. Hoping to make my own now. :) Hoping it will turn out half and lovely as yours. Thanks for sharing.
ReplyDeleteWhat a clever and fabulous design, each page is a little treasure in itself and the cover looks fantastic too, beautifully stamped and utterly gorgeous with those lovely colours!
ReplyDeleteOh my goodness, what a great design! I love each page - each one is so wonderfully done.
ReplyDeleteI enjoyed seeing your mini journal very much, the shape is wonderful, the butterfly is superb and the heart on the front is such a lovely touch! x
ReplyDeleteThis is so clever and just wonderful! thank you so much for sharing your tutorial!! xx
ReplyDeleteThis is awesome!!! Thank you for the tutorial (as if I'll attempt it *LOL*)
ReplyDeleteHow cool is this??!!! Suzz, you really stepped out with your Step X Step! I love the idea of a little book in the shape of a house, and your artwork is amazing! Love this, and so happy you made it with my book challenge in mind! You're the best! Hugs!
ReplyDeleteSuzz, I had no idea how tiny this was in your teaser post the other day! What a GREAT idea to turn the house die into a book! I had thought of making little house pockets, but the book is AMAZING and genius! Each and every composition is gorgeous and perfectly done and the blend of various colors is beautiful! Love love this and have pinned! Hugs, Autumn
ReplyDelete