

Hello friends and welcome, Zoe here and I'm delighted to be hosting this Saturday step by step. I have been having so much fun with the new Tim Holtz seasonal line. With the current challenge "show us your stamps," and Halloween just a few weeks away, I thought I would make a Halloween card. Here's how...

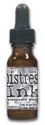
Step 1: Take a piece of distress watercolour cardstock, ink up the background stamp using a DIY distress ink pad, (mine is made up on weathered wood, iced spruce, bundled sage, frayed burlap and gathered twigs distress ink).


Step 3: Trim the background to 3.5 x 5.25 inches.

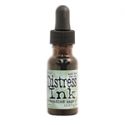
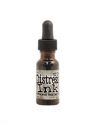
Step 4: Blend antique linen distress ink into the background and edge with walnut stain distress ink. Dry with a heat tool.

Step 5: Using a distress sprayer, spray large drops of water onto the background and dry with a heat tool.


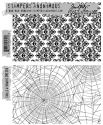
Step 7: Ink up the cobweb background stamp with hickory smoke distress archival ink from the Tim Holtz designer ink palette. Stamp over the top of the skulls damask background using the stamp platform for perfect placement.

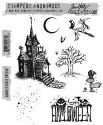
Step 8: Ink up the haunted mansion stamp with black soot distress archival ink, again using the Tim Holtz designer ink palette and stamp using the stamp platform.

Step 9: Continue inking and stamping until you have an image you're happy with.

Step 10: Working quickly, before the distress archival ink dries, cover the stamped image with clear embossing powder. Gently tap off excess and melt with a heat tool.

Step 11: Carefully paint the windows and lantern with fossilized amber distress paint using a water brush. I removed the water so I could use the brush dry and not dilute the paint.

Step 12: Layer the backgroundas follows:
Base Card 4.5 x 6.25 inches.
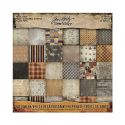
Halloween paper stash 4.25 x 6 inches edged with walnut stain distress ink.
Kraft Core Metallic 4 x 5.75 inches sanded and blended with walnut stain distress ink.
Kraft Core Nostalgic 3.75 x 5.5 inches sanded and blended with walnut stain distress ink.

Step 13: Stitch around the edge of the card, add a word sticker and attach to the background with idea-ology fasteners.
I hope you have enjoyed the step by step. Be sure to pop over and take a look at the current Show Us Your Stamps challenge.
Have a great weekend.
Zoe
 |  |  |  |  |
 |  |  |  |  |
 |  |  |  |  |
 |  |  |  |  |
 |  |  |  |  |

I love all the layers of stamping you have used to create the amazing card! It is truly wonderful Zoe!
ReplyDeleteThank you so much Ann, I'm glad you liked it. :)
DeleteStamping at its finest! I love how that layered background has come together to create the perfect home for the Haunted House. Thank you for sharing so many clever ideas xx
ReplyDeleteThanks my lovely. Your haunted house card is still my favourite. :) x
DeleteWow, I love this! Great tutorial Zoe. TFS!
ReplyDeleteThanks for taking time to leave a comment Deb, glad you liked it. :)
DeleteJenny is right - this is the perfect background for the spooky house. I love all the layers.
ReplyDeleteThanks so much Lucy. :)
DeleteLove it!
ReplyDeleteMarilyn
Thanks Marilyn. :)
DeleteOh wow Zoe, a fantastic tutorial and what a fabulously spooky result! x
ReplyDeleteThanks so much Anne. xx
DeleteGreat step by step Zoe and the end result looks amazing!
ReplyDeleteThanks so much Astrid.
DeleteLove at first sight!
ReplyDeleteThanks Cathy. :)
DeleteZoe, I'm so pleased you came by to prepare this fabulous, spooky, layered Halloween card and your great tutorial! Your stamping and design is exceptional, and now I must have that misti tool, and those awesome Halloween stamps! Great use of your colors and papers, too, so perfectly spooky and worn! Oohh! I'm just squealing with delight over your amazing Halloween make! Hugs!
ReplyDeleteThanks so much Sara. I used the Tim Holtz Stamp Platform by Tonic. It's a fantastic price and has changed the way I stamp, I highly recommend getting one. Hugs!
DeleteVery cool haunted house! Happy to have you back creating with us again! Gorgeous layers of grungy spooky delight!
ReplyDeleteThanks Suzanne, I have missed you all. x
DeleteWow, this Gothic beauty is so inspiring! Thanks for the wonderful tutorial!
ReplyDeleteThanks so much Kathy. x
DeleteSo wonderful to have you back with us, Zoe! And what a perfect comeback it is. That multi layered background is just amazing. You have totally inspired me to rush to my craft room and play! Thank you for this wonderful tutorial for our visitors.
ReplyDeleteHugs,
Linda