Welcome to this week's Saturday Showcase where we share techniques and tips using products available at
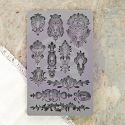
The Funkie Junkie Boutique. It's Sara Emily here today, and I'm sharing these cards using Prima Marketing's IOD Vintage Art Decor Moulds, flowers and papers and Distress paints to create a faux carved slate background.
For these three cards I was inspired by
a design by wonderfully talented
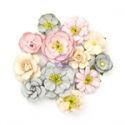
Margaret Mifsud. I wanted to try out my new Prima Cherry Blossom papers and Lavender flowers. In keeping with the current challenge theme, I kept things neutral. I'm leaving the sentiment off for now. I think these can be used for just about any occasion from birthday to sympathy, so I'll have these ready in my stash.
I accidentally stumbled (happy accident) on this faux finish when I was attempting to make
faux antique zinc based on Heather Tracy's
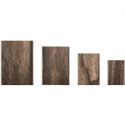
video. I wanted to achieve this finish on a flat wood surface for a recent challenge theme. I chose to use modeling paste as my base over the wood, and the added texture and 'veining' gave it more of a look of stone rather than metal. My process steps are outlined below. I've included photos taken when making
this project with a few photos taken while making my featured cards, because they show the process better.
I used this same technique, following the same steps applied to greeting cards. In place of the Vignette panel, I used Heavystock paper. This paper is very heavy and can take a good deal of moisture without warping.
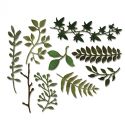
I tucked in some gauze to soften the hard stone and added ivy cut with Tim's Garden Greens. This one was already colored with green left over from another project. I added crackle paint and Vintage Photo ink. I dyed the gauze behind the flower with Victorian Velvet Distress stain.
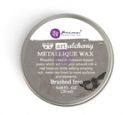
On this one, I added some simple, but versatile Little Birdie blossoms from Linda's shop, sadly no longer available. After crackling the ivy, I added a bit of Prima's Metallique wax in Brushed Iron.
I love a product that can keep on working, and for me Prima molds fit the bill! The are extremely versatile and can be used for home decor, craft projects or even cooking and baking! They can be used with so many many types of media- air dry clay, polymer clay, earthen clay, hot glue, even chocolate (food safe rated). I bet you can think of even more applications. They have amazing detail and are so easy to use--because they are silicone, the casting practically de-moulds itself.
Now onto the tutorial!
Faux Carved Slate Tutorial
1. Apply molding paste in random thicknesses on the largest Vignette panel with palette knife. I didn't want this too neat, because I want some texture to capture some of the paint in a later step. Allow to dry.
2. Fill moulds with paper clay and remove casting while still damp. I do not prep my moulds with any release agent, as they release just fine on their own.
3. Cut strips from one of the castings for the top and bottom of panel.
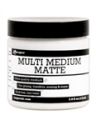
4. While the clay is still pliable, I applied Multi Medium Matte liberally to the backs of the castings and pressed them onto the prepared dry panel. I allowed some glue to seep out of the seams. This will make the applique look carved rather than glued on when finished. Apply gentle weight if necessary. to get good adhesion. Let dry thoroughly.
5.Coat everything with black gesso and dry.
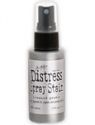
6. Spray with Brushed Pewter Distress Spray Stain. While wet, spray with rubbing alcohol until you see the color blend and move around. (This is really cool!) Allow to dry thoroughly.
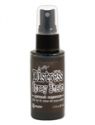
7. Mix grey chalk paint with watered down Ground Espresso Distress Spray stain. Pounce on panel, and dab with dry cloth to remove some of the paint. You're looking for an organic look, so no harsh lines. Some of the Brushed Pewter will show through. This is the desired effect, since there are minerals in rocks.
8. Mix Black Soot Distress Paint with watered down stain and apply as you did with the grey paint mixture. Dry. While it's not pretty, I slipped in this photo to give you an idea of how the colors are layering. The top half has the black mixture added, while the bottom has only the grey. No veining yet. I only did part of the panel, because I knew it would be partially covered with design paper. In my collage above, I forgot to take actual process photos, so the staged shots with paints in them are when the panel was completed.
9. Water down Picket Fence Distress paint and apply with a paint brush to create 'veining'. Pat with clean cloth to blend. In some places, I apply just a bit of the paint, and spritz lightly with water to get it to bleed into the crevasses created by the molding paste. I follow up quickly with my heat gun to halt the spread of the paint. This gives it a more natural look.
I hope you enjoyed today's tutorial and will give it a try! Our current challenge
Neutral Point of View is open until Tuesday, May 8, and this technique would fit in perfectly with the theme. Be sure to stop back next Saturday when another Design Team member will be sharing more tips and techniques.
Happy Crafting!
Sara Emily
Here are the links to products used, which are available at
The Funkie Junkie Boutique:


I was so excited to see how you created this look of Faux Slate Sara Emily! LOVE the tutorial and these fabulous cards. Thank you for sharing xx
ReplyDeleteWow!! The faux slate look you created is totally awesome Sara. What an amazing technique and a fabulous step by step. Another one to be bookmarked. Your work is so inspirational and I am humbled and so honoured that I have returned even just a tiny bit of that inspiration. Thank you for the lovely shout out I really appreciate it. Your cards are totally gorgeous and thank you also for sharing the process. xx
ReplyDeleteThanks for sharing this technique Sara Emily, it is definitely something I would like to try! Your cards are gorgeous, the prima paper and flower are such a gorgeous complement to the slate. xx
ReplyDeleteIt really is hard to believe that it is NOT real slate Sara, what an amazing technique, your cards are fabulous!! xx
ReplyDeleteOh my gosh, what an amazing technique!! The slate looks so real!! Your cards are stunning, Sara Emily!! And your tutorial is perfect!! Thank you for sharing your technique!!
ReplyDeleteOh my word! You are a technique genius. I love this look...so old and just like stone. Marvelous tutorial and such a cool technique I can barely contain myself!
ReplyDeleteWOW awesome cards and awesome technique!
ReplyDeleteAbsolutely wonderful!
ReplyDeleteSandy xx
Beautiful and wonderful techniques! The texture and richness of the faux slate is awesome!
ReplyDeleteThank you, everyone! I'm happy you enjoyed the tutorial! Let me know if you make something inspired by it! Hugs!
ReplyDeleteSE, you are a mixed media genius and I just wish I could sit with you and watch you come up with this stuff! This is such an amazing and creative technique and I can't wait to see it used again in the future. Thanks so much for the detailed explanation. You're the best! Hugs, Autumn
ReplyDeletewhat a great look of slate you created - you make it look so easy! Thanks for showing how! Julia xx
ReplyDeleteThanks for sharing all the details of your faux slate - it's a brilliant technique.
ReplyDeleteAlison x
Thanks for the step by step! A fabulous technique!
ReplyDelete