
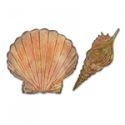
Welcome to this week's Saturday Showcase where we share techniques and tips using products available at The Funkie Junkie Boutique. It's Sara Emily here today, and I'm sharing some tips on how to decorate Sizzix Bigz Die w/Texture Fades - Seashells by Tim Holtz using Ranger Distress products. Hopefully I can provide a bit of inspiration for our current challenge, Surf's Up.


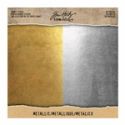
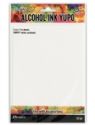
For each of these shells, I used the new Seashells Bigz die by Tim Holtz and the Texture Fade which is included. I used various papers including Distress Heavystock, Distress Watercolor Cardstock, Idea-ology Metallic Kraft Stock, Alcohol Ink Yupo Paper in white, and scraps from my stash. For most of my samples, I applied gesso to the shells before adding any products. I did not use gesso with Yupo or Metallic card, and I didn't use it for the blue shell that I used Distress ink alone to color. Most of my shells are shaped, and I did this by first spritzing the back with water, shaping and then drying with a heat tool.
Here are the steps along with a photo collage for each set of shells pictured above, with the exception of the 'brass' and yellow shells. Things were not going well with the brass colored shell, so I thought I was going to trash it and I just forgot on the yellow one.. I will try to recreate my steps. Remember, you can click on any image to zoom in.

Brass shell:
1. Using metallic Kraft stock, die cut shell. Sponge with Ground Espresso Distress paint. Allow to mostly dry.
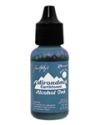
2. Apply drop of Denim alcohol ink. Spritz with water and dry with heat tool.
3. Apply drop of Teakwood alcohol ink. Spritz with water and dry with heat tool.
4. Sponge with Picket Fence Distress paint. Dry slightly with heat tool.
5. Wipe with clean cloth.
Metallic Blue shell:

1.Cut shell from silver Metallic kraft card and emboss.
2. Sponge on Picket Fence Distress paint. Drip a few drops of Denim alcohol ink and spritz with water. Heat dry.
3. Blend edges with Frayed Burlap ink.

Yellow shell:
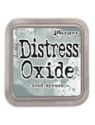
1. Apply Fossilized Amber Distress Oxide to gessoed shell. Do this by the 'dip and dry' method--apply oxides to mat and spritz with water. Dip your card into puddle, then dry with a heat tool. Repeat until satisfied with results.
2. Using a brush apply Worn Lipstick Oxide.
3. Blend edges with Frayed Burlap ink.
Blue shell:

1. Blend cardstock shell (no gesso) with Faded Jeans Distress ink.
2. Spritz with water and let dry or dry with heat tool.
3. Apply touches of Tattered Rose and Worn Lipstick Distress Oxide.
4. Blend with Faded Jeans and Black Soot Distress ink.
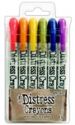
5. Scribble raised areas with Faded Jeans Distress Crayon.


1. Outline with Walnut Stain Distress Marker.
2. Blend with water pen.
3. I included a photo of the embossing process, because I wanted to mention I sometime used design tape to hold the shell in place if I was concerned about getting a perfectly aligned impression. It's also worth mentioning to be sure you are coloring the 'right side'. This is particularly important in some upcoming shells. You want to be sure you are embossing, not debossing the colored side of your shell. In some cases, I purposely debossed, for a different outcome.
4. Blend edges with Ground Espresso Distress ink.
5. Apply touches of Worn Lipstick Distress Oxide.
***My Favorites!***


1. Color (gessoed) shell with Tattered Rose and Worn Lipstick Distress Oxide using the dip and dry method.
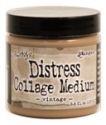
2. Apply Distress Vintage Collage Medium with a palette knife.
3. While wet, sprinkle with Distress Glitter Dust.
4. Dry with heat tool, from a distance at first to avoid a glitter dust facial.
5. When the collage medium is dry and bubbly, apply Frayed Burlap Oxide using the dip and dry method.
6. Apply more Worn Lipstick Distress Oxide using a wet brush.
7. While the shell is still damp bend into shape.


1. Apply Tattered Rose and Worn Lipstick Distress Oxide to heavily gessoed shell using blending foam, then by dip and dry.
2. Apply Frayed Burlap Oxide by dip and dry.
3. Blend edges with Frayed Burlap ink.
4. Apply additional Worn Lipstick Oxide with brush to 'inside' of shell.
***My Second Favorites!***


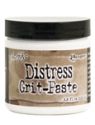
1. Apply Distress Grit Paste to shells with a palette knife and allow to dry.
2. Apply Bundled Sage and Iced Spruce Oxides to the shells using dip and dry.
3. Do the same with Frayed Burlap Oxide.
4. Shape shells using a ball stylus on the Horse Conch and by pinching bottom of the scallop shell.
5. Add Worn Lipstick Oxide on inside of Conch using a brush.
6. Blend edges with Frayed Burlap ink.


1. Apply alcohol inks in Sailboat Blue and Mushroom to Yupo paper. I dribbled drops and spritzed with rubbing alcohol. I used a heat tool to move the color around. It looked like a hot mess.
2. Die cut shells and emboss.
3. Scribble with Picket Fence Distress crayon and heat set. Be careful with the heat, because Yupo acts like Shrinky Dinks when too intense heat is applied.
4. Blend edges with Ground Espresso ink.
I hope you enjoyed today's tips and will give one of them a try! Our current challenge, Surf's Up, is open through Tuesday, May 22nd, and these shells would fit in perfectly with the theme. Our Funkie girls will be posting their inspiration on Wednesday. Be sure to stop back next Saturday when another Design Team member will be sharing more tips and techniques.
Happy creating!
Sara Emily
These products were used and can be found at The Funkie Junkie Boutique, where the prices are always priced 20% off suggested retail:
 |  |  |  |  |
 |  |  |  |  |
 |  |  |  |  |
 |  |  |  |  |
 |  |  |  |  |
 |  |  |  |  |
 |

WOW, WOW, WOW Sara Emily!!!!!! You've transformed embossed die cuts into the real thing!!! Bookmarking this tutorial - amazing!!!! Thank you for sharing xx
ReplyDeleteSuch an impressive gathering of shells Sara Emily! Love all these different techniques, now there is no excuse for not entering the challenge! Thanks for sharing
ReplyDeleteWow Sara those are absolutely beautiful, so realistic. Thanks for sharing.
ReplyDeleteWow, these are incredible and so life-like. Thanks for the share.
ReplyDeleteOHMgoodness Sara, these are unbelievably stunningly gorgeous - you have made cardstock look like real shell. You have mesmerized me with your talent and wonderful ideas. Pinned and saved!!! xxx
ReplyDeleteOh my goodness, this is jaw-dropping! What a fabulous step out and amazing results. Thank you so much for sharing how you created these realistic looking shells. I don't think I could find anything more beautiful on the beach!
ReplyDeleteWow! Wow! Wow! These shells are spectacular Sara! You have turned ordinary cardstocks into the most realistic looking shells .. they are gorgeous!! What an amazing step by step! Thank you so much for sharing! Am bookmarking this for sure! hugs xx
ReplyDeleteSara, your shells blow me away! It amazes me how many steps there are to get such perfection, but the results are so worth the effort! (Also thanks for stopping by my blog and leaving the sweet comment. You noted that I was prolific. I can be... but my card designs are so very simple compared to yours. I have never made a distressed card and don't even own ANY Tim Holtz items. However, after becoming a follower of your blog, I think that might change. Your many cards and other items are so amazing!)
ReplyDeleteYour shells are amazing with the unusual ways of using oceanic colors and feels - breathtaking! Thank you for the fabulous tutorials, and for featuring each item individually so I could learn from you, yet again! Happy Mother's Day and best wishes for a fantastic week. Hugs, de
ReplyDeleteWhat an amazing technique, Sara Emily! These shells are positively gorgeous! I have a "thing" for the ocean and shells and all things beachy, and boy...you really spoke to that with the amazing techniques you used here. I don't know whether to thank you or scold you...because now I *have* to have these dies! LOL Seriously gorgeous, and so inspiring! Thank you!
ReplyDeleteHappy to enable, Kathy! And the good news is, it's only one die, and the embossing folder comes with it! What a crafty bargain! Thank you for your kind words! Hugs!
DeleteThank you, Jenny, Ann, Patricia, Cec, Anne, Linda, Margaret, Kathy, and Donna! It's wonderful feedback like this that inspires me! Sending you all a great big grateful hug!
ReplyDeleteSara Emily, this is simply genius! I just love the awesome, realistic effect you achieved and am totally wowed! Bravo my friend! Hugs, Autumn
ReplyDeleteNow, I REALLY want that die/emboss set!!
ReplyDeleteWhat else is there to say...
except perhaps:
WOWZA!!!!!
Oh Dang! I really, really, really need that die now Sara Emily! Love your beautiful shells xx
ReplyDeleteTerrific work with the shells, Sara Emily. The iridescence and the barnacled textures are amazing. I think my favourite is the fan shell which is your second favourite - just beautiful.
ReplyDeleteAlison x
Thank you. This tutorial is amazing.
ReplyDelete