Hello friends. It's Teri with TerisMailbox posting for The Funkie Junkie Boutique. Do you have wander lust like I do? After being restricted by Covid, I am ready to start traveling again and this tag was inspired by that! Today I present this fun British Tag created with all things Tim Holtz.
I love playing with Paper Dolls, die cuts and ephemera. Mix them together and you end up with a fun tag celebrating travel!
The video is located here: https://youtu.be/16nbVivVn9c
Create the Background
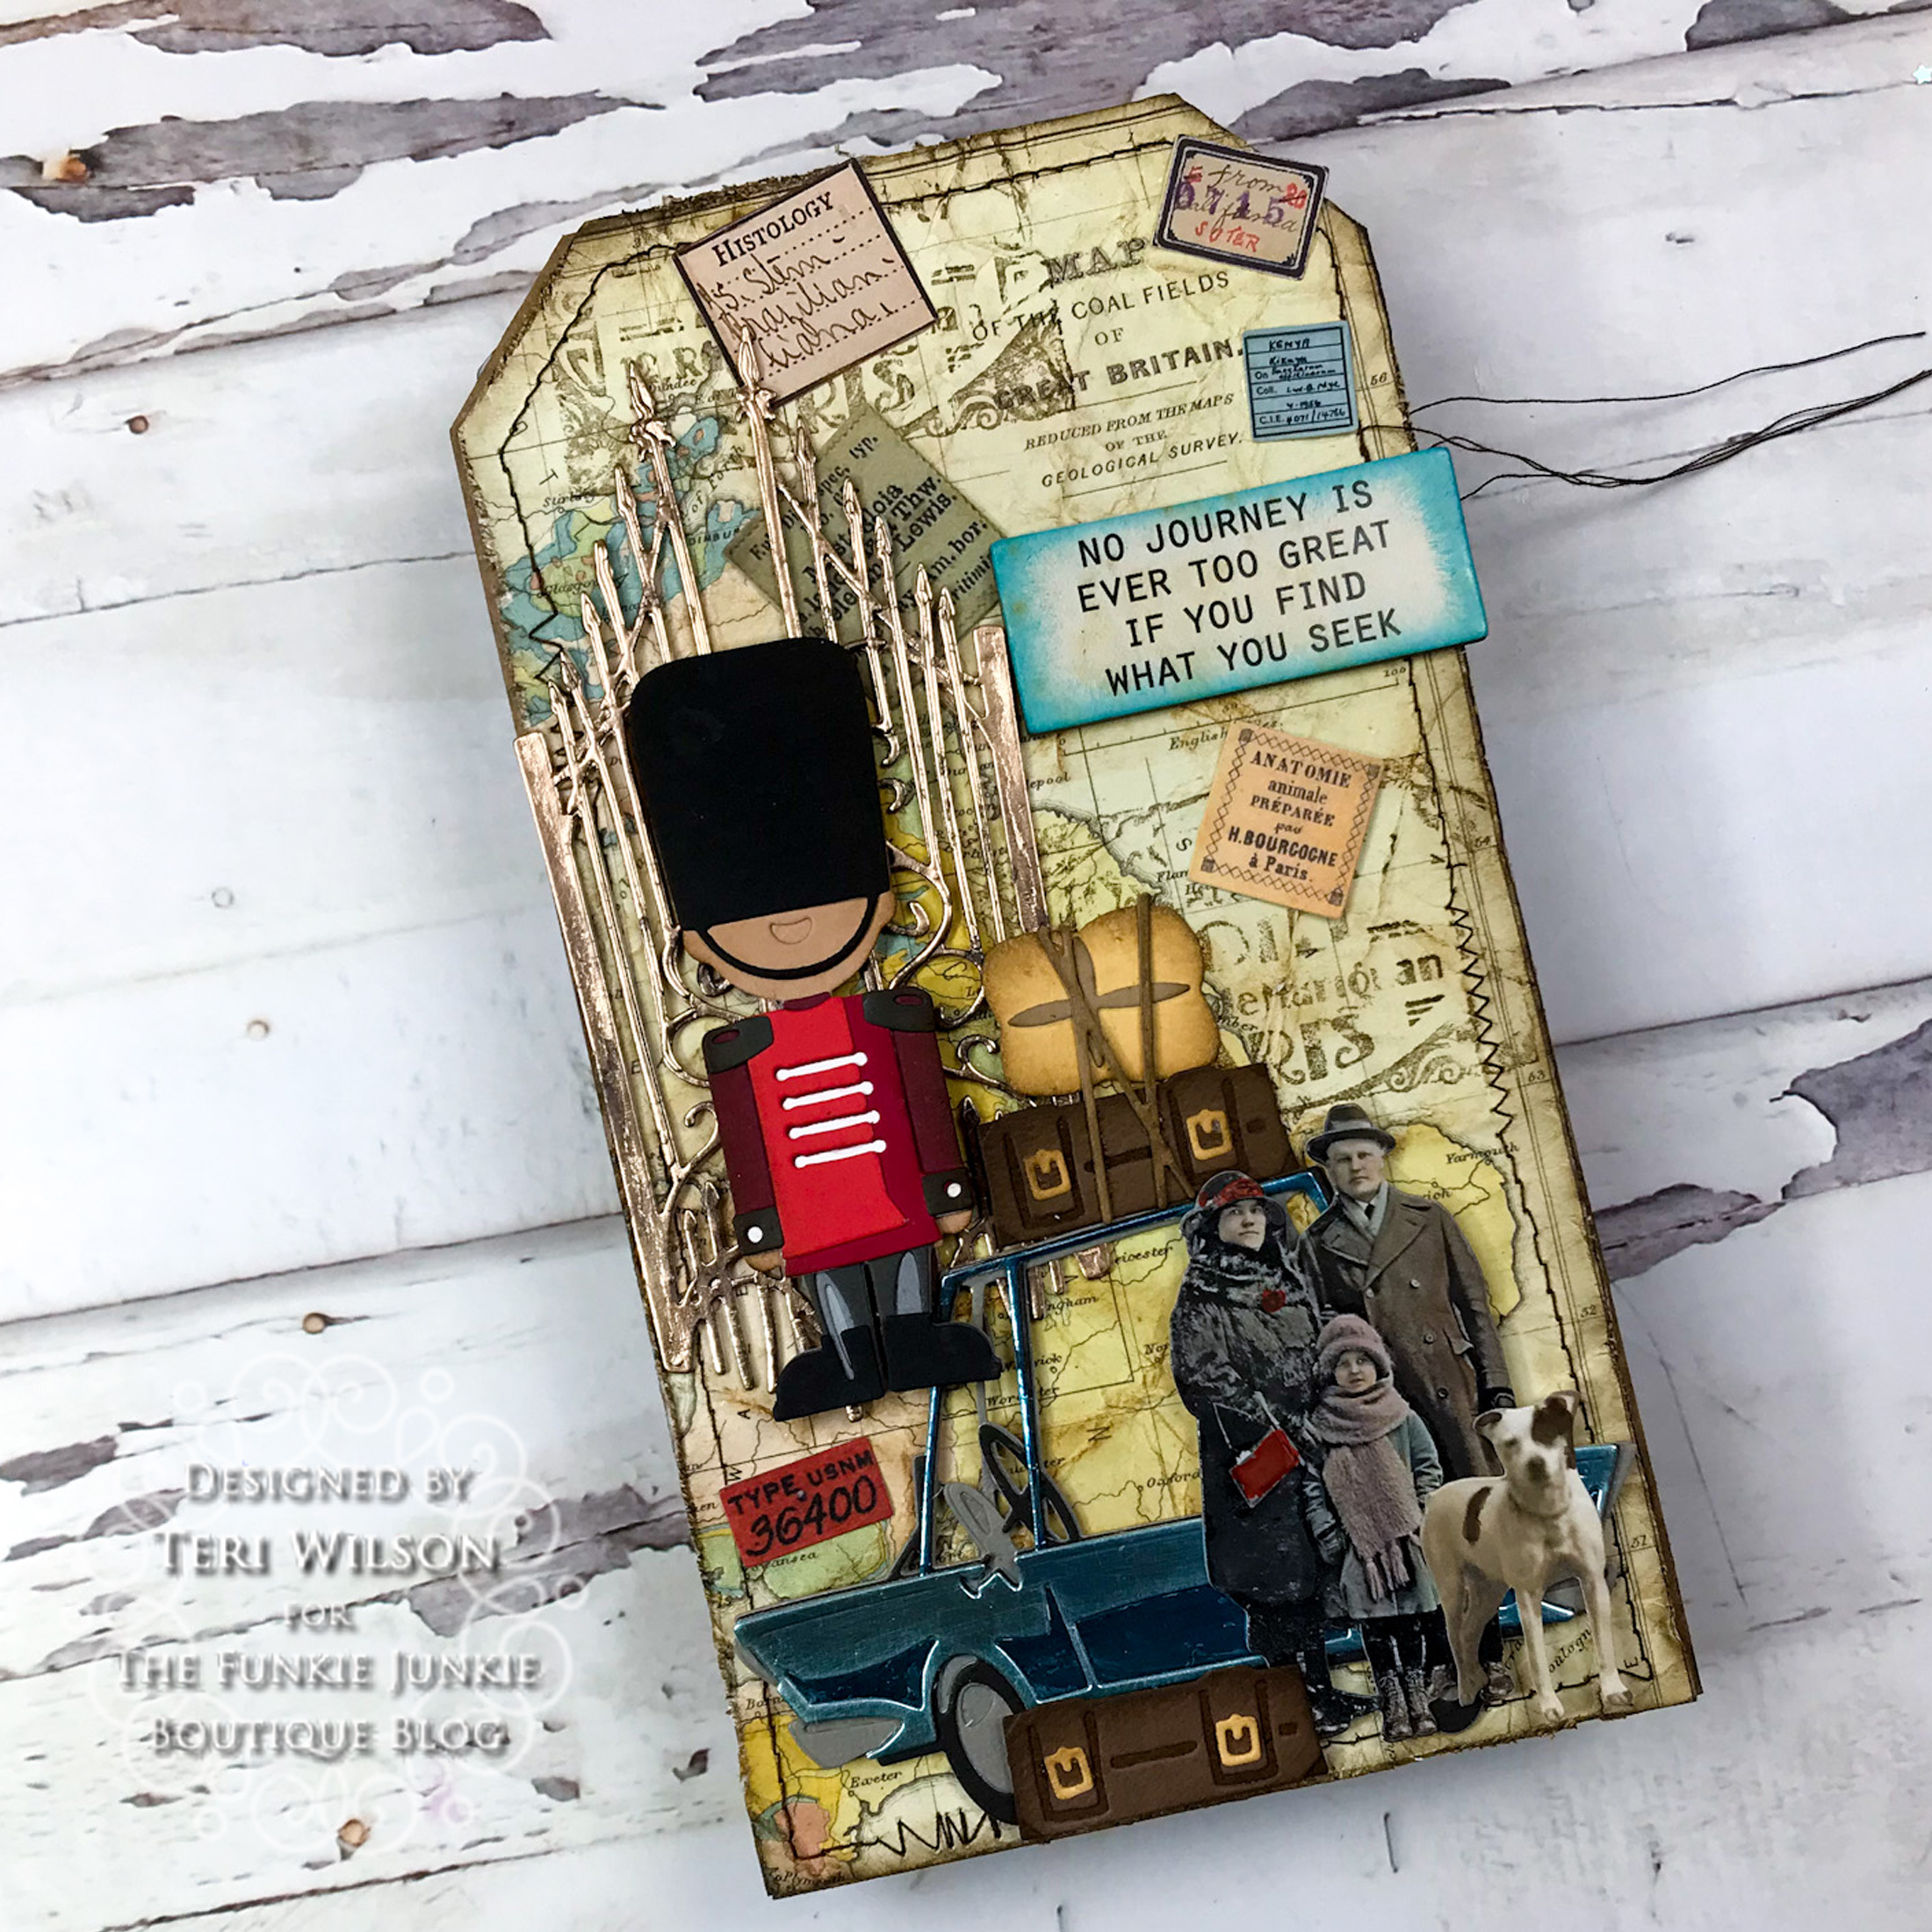
Start with a Mini Etcetera Tag. Trim the map from BackDrops 5 to fit the tag. Stitch the perimeter of the tag. and use the Paper Distresser to rough up the edges. Crumple the paper multiple times, unwrinkling, spritzing with water and wrinkling until you are happy with the look. Ink with Vintage Photo Distress Ink to highlight the wrinkles. Use Collage Medium to adhere the Backdrop to the tag. Turn over and add weight to the back of the tag. Once dry stamp with a couple of the Travel Labels CMS 108.
Color Your Paper doll Family
Using the family of your choice, color them using Watercolor Distress Pencils. These are amazing for coloring paper dolls. I heat dried in between colors as I tend to be a little loose with the water! Don't forget the pup as well. Set aside.
Die Cut the Car, Luggage, Gate and Harvey
I am a compartmental die cutter and when I have dies out, I tend to make multiples. I had a complete gate in my stash that only needed to be roughed up with steel wool for age. Luckily I had Harvey in his Palace Finery as well. The car and the luggage were the only die cuts I had to create.
The car has grey and black cardstock layers. The color itself comes from Metallic Confections. Cut the top two layers of the car body out and run steel wool over to lessen the shine. Use Faded Jeans Archival ink to darken layer number 2. Be sure to heat dry to prevent smearing.
Die cut the luggage pieces from different shades of tan and brown.
Assemble the car as well as the luggage. Ink the luggage edges with Vintage Photo Distress Ink.
Assemble the Tag
Glue the gates to the left side of the tag close to the top. with an opening for Harvey. Attach the car to the bottom of the tag. It has five layers of cardstock so pops off the tag nicely. Add foam to the back of the family in areas not held up by the car. The luggage goes on top with one piece on the ground. Add the pup in front of the family.
Add foam to pop Harvey up in front of the gates. Select random etcetera pieces from the Curator Ephemera pack and attach randomly to the tag.
Select a Chip Quote Lael from the Package and edge with your choice of Distress Ink. Attach to the tag and you are finished!
Thanks so much for stopping by today! I'd love to have you follow/subscribe on my social media sites Instagram, Facebook, Blogger and YouTube. Be well. Be creative!


No comments:
Post a Comment