
Happy Friday, everyone! It's Shelly here to share my Friday Focus project with you. Friday Focus is a time when we highlight a particular product from The Funkie Junkie Boutique. As an extra bonus, customers receive 15% off of the product for the next two weeks - nice! Today, we're exploring Sizzix dies and all the wonderful things you can do with them. This post is just the tip of the iceberg - Sizzix dies are incredibly versatile and I could seriously write a book about the different ways I like to create with them!

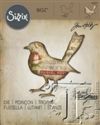
I love cooking shows like Top Chef and, when I was thinking about what I'd do, I remembered how chefs love to make one item in three different ways. I thought that was a great idea for a focus! I wanted to show how a steel rule die can cut many different materials, and also how it can look different depending on how you style it. Let's get started with our 'One Die, Three Ways', featuring the Bird Silhouette die from Sizzix!

First up, we have a steampunk-style tag. To create the base of the tag, I used Tim Holtz's Eroded Metal technique. When it was dry, I added black inking around the edges. You can find this technique in Tim's book - Compendium of Curiosities Volume 3.

Next, I covered a piece of Grungeboard with Ranger's Foil Tape and die cut the bird using the Sizzix Bird Silhouette die. After it was die cut, I embossed it with the Gears Texture Fade.

To grunge up the bird, I covered it with Black Soot Distress paint and wiped it off, leave some in the cracks.

I added Tissue Tape and Remnant Rubs, and tied the tag with a bit of Jute String.

I finished my steampunk bird with a winder, a Mini Gear eye, and a fitting sentiment. One tag down - perfect for all you grunge lovers!

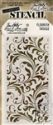
Next, we'll make a pretty, artsy tag. Begin by covering a piece of Grungeboard with Sticky Back Canvas. Die cut the bird. Using Tim Holtz's Flourish stencil apply Texture Paste to bird. Set aside to dry.

While the Texture Paste is drying, cover a manila tag with Tissue Wrap. Paint with Picket Fence Distress paint and let dry completely.

When the Texture Paste on the bird is completely dry, spritz a nonstick craft sheet with Tumbled Glass and Cracked Pistachio Distress Stain Sprays. Place the bird face down into the ink and drag through. You may have to spritz with more water and/or ink to get the color you want (sorry I don't have a pic of the actual bird in this step!). Set aside to dry, or dry with a heat tool.

To finish the background, I added some circles of paint made with the lid of the Distress Dabber (handy!), plus some strips of Tissue Tape.

Here's our pretty little bird tag all done! I added a ribbon made with seam binding and more of the same Distress Stain Spray colors, plus a Word Band. This one just might be my favorite!

And now for our final tag - which is definitely the easiest for those of you in a hurry. Begin by cutting the bird from burlap paper. Ink the edges with Gathered Twigs Distress Ink.

Next, cover a tag with paper from Tim's Menagerie Paper Stash. Add bits and piece of ephemera and Design Tape. Sand the edges and tie with a length of Jute String. Apply a sentiment from the Life Quotes Remnant Rubs to the bird and add a brad for an eye.

To embellish the tag, I added an idea-ology Pen Nib, Heirloom Roses, and tied the top with a ribbon, Loop Pin, and Philosophy Tag. I love the femininity of this one - so shabby!
I hope I've shown you a few different ways you can use your Sizzix dies today. There is no end to the variety of materials you can cut and ways you can embellish them - you could even mix and match the techniques shown above and come up with three (or) more totally unique tags!
Don't forget - for the next two weeks you'll save 15% on all Sizzix products at The Funkie Junkie Boutique. What a perfect time to build your stash!
 |  |  |  |  |
 |  |  |  |  |
 |  |  |  |  |
 |  |  |  |  |
 |  |  |  |  |
 |  |  |  |  |
 |  |  |  |  |
 |  |  |
WOW, Shelly!! I wouldn't have believed it if I didn't see it with my own eyes. You have worked wonders with the bird die, giving it three completely different but equally fabulous styles, from funky to folksy to frilly!! Your art and creativity is an inspiration!!
ReplyDeleteHugs,
Nancy
Can't decide which of these is my favourite!!! I love how you've treated each one to give us such different looks and now feel the need to run to my dies!!! Thank you so much for sharing. Jenny x
ReplyDeleteAwesome tags!
ReplyDeleteWOW! What a wonderful selection of techniques you have used on your beautiful tags. I love them all!
ReplyDeleteSo many wonderful techniques here Shelly. I love seeing so many ways to use the same die, great post! :)
ReplyDeleteFabulous. Your creativity was really cooking with these three different tags with the same bird for a focal point. Love them all and the techniques you have used to make them each unique in their own right.
ReplyDeleteHugs!
Cec
These are all awesome Shelly! I love all the variations.
ReplyDeleteWhat wonderful variations on your birds Shelly! great techniques and lovely tags! Julia xx
ReplyDeleteSo many amazing techniques. Can't wait to try a few of these. Love the addition of the remnant rubs to the eroded metal background. And that sticky back canvas bird is so beautiful. Love them all!!! -- Mary Elizabeth
ReplyDeleteThree beauties! Can't wait to get back home & play (and I AM enjoying my vacation!)
ReplyDeleteSally
Awesome tags Shelly! TFS!
ReplyDeleteEach one of these is superb Shelly, love the Pistachio one with the paste, it is stunning! xx
ReplyDeleteLovely tags...all with their own personality. Wonderful example of the versatility of one die.
ReplyDeleteThree super tags Shelly.
ReplyDeleteJulie x
Shelly these are just amazing and I love the techniques you have used xx
ReplyDeleteI love all of these tags, and the many techniques you used to create them!
ReplyDeleteLove the tags they are all my favourite thanks for sharing xxxxx
ReplyDeleteThree terrific tags - I'm so in love with that Silhouette Bird, and you've showcased him to perfection.
ReplyDeleteAlison x
Oh dear ... Your tags are awesome. !!!! Funny that you can achieve 3 such different tags...allthough almost similar. Thank you for sharing your lovely work ...
ReplyDeleteHugs from Monica..... Spain
What a great post~ loved the step out photos and the amazing finished products. And now I want that bird die! LOL
ReplyDeleteWonderful tutorial demonstrating the many ways to use the sizzix dies, a great reminder to look past the paper! Fabulous tags, thanks for sharing them.
ReplyDeleteThanks for sharing all this inspiration - stunning makes with such different looks. Nicola x
ReplyDeleteThanks for the inspiration! One more proof how versatile those dies are. I love each one of the tags :)
ReplyDeletehugs Irmgard
Delightful tags, love the idea of three, fantastic inspiration!
ReplyDelete