
Hiya, Georgie here, and for this Saturday Step x Step I'm sharing one way of doing a mixed media cluster on a card.

I know a lot of people starting out in mixed media feel a little nervous or unsure about how to proceed, or what order to do things in (there are many), so I thought I'd share one way in which I create a mixed media piece!

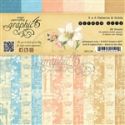
Take a sheet of either 6x6 or 8x8 paper (this is from Graphic 45's Gilded Lily collection) and stick to some board. This allows you to add mediums without risk of too much buckling.

Tear up some strips from the corresponding papers in the pack - I went with a pink theme.

Start to add a bit of interest with some stamps and embossing powder to build up a background.

See how this 'ties' the pieces together? :)

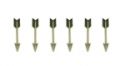
Add your elements you want to use, just arrange them in a layout which is appealing to you, but I find asymmetry is always good for mixed media. So your main cluster in one place, then something a little smaller in an opposite corner.

Paint over everything with a couple of coats of white gesso. This knocks everything back to give a blank canvas again, ready for some colour, although you could skip the colour, just lead with this, as it looks pretty on its own and add flowers.

I know people say start with light colours first and go darker but in this case when working with permanent paints I find it easier to work with darker and go lighter as this keeps the knocking back process going. Here I've used a darker red (Aged Mahogany Distress Paint) to shadow some areas.

Next using a lighter pink add it over some of the red and and to other higher areas. When it comes to these paints, I like to work from the lid, especially if I don't need much - saves wastage or avoids adding too much to your paint brush.

Here I went in with a soft blue to add a different colour.

Close up of finished 'paint job' :)

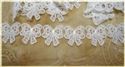
Next add further embellies, I went with flowers and some jute.

Create Super Easy Mini Flowers....
Mini Step by Step:
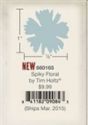
Using the new punch from Tim Holtz, think this was the medium flower, punch out three per flower, mist with water. Scrunch. Dry with heat gun. Sit them one in the other and voila, you have these... :) The same as what I do with the big tattered florals but on a smaller scale and perfect size for clusters or filling out a big cluster. Plus I made these three in less than ten mins!!
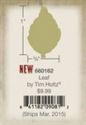
The leaves were cut using his medium Leaf Punch, quick and easy!!

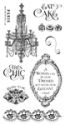
You could leave as it was above, looks perfect shabby but I wanted something more, so some light and heavy stamping was added. I love this stamp set from G45, Gilded Lily.

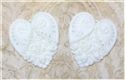
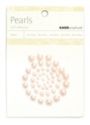
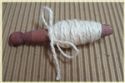
Lasly I added the little charm, adding some jute through the top and inked the edges lightly in black too. Once you're happy it just needs to be mounted on to a card and some pearls for a bit extra something-something! :)
So that's it from me today, hope you all have a lovely sparkly weekend.
Georgie xx
 |  |  |  |  |
 |  |  |  |  |
 |  |  |  |  |
 |  |  |  |  |
 |  |  |  |

WOW!!! Thank you so much for lifting the lid on how you put your mixed media bundles together. I love seeing how little touches of stamping can really make a difference and you've convinced me on the Tim Holtz punches with results like those flowers! LOVE it!!! Jenny x
ReplyDeleteBeautiful project! Thank you for the tips and how to, very helpful.
ReplyDeleteThis comment has been removed by the author.
ReplyDeleteThis comment has been removed by the author.
ReplyDeleteThanks for the step by step. Love your mixed media cluster. So many interesting pieces. I haven't tried the gesso over everything yet but like how it helps tie everything together and then you add color. I'll have to give it a try.
ReplyDeleteBeautiful feminine project and a super tutorial Georgie with a great step be step, love your stamping to finish with the Gilded Lily set....on my wish list.
ReplyDeleteJulie x
Gorgeous card Georgie!! I love the pink palette with the slight touches of aqua, so soft and dreamy! The mini flowers look amazing, I just added those punches to my wish list! Thanks for the great tutorial! hugs :)
ReplyDeleteBeautiful card! Thanks for sharing the process.
ReplyDeleteOh thank you Georgie! Some wonderful tips here on arrangement and construction. Love the strips of paper in the background and your cluster in the corner is stunning. The painting and stamping are marvelous.-- Mary Elizabeth
ReplyDeleteWhat a great step-by-step post on how and why this piece is so stunning! I learned quite a bit and can't wait to put that new knowledge into my own work of art. Thank you!
ReplyDeleteTotally in love with your background Georgie - and what a great tutorial too. This is just LOVELY. j.
ReplyDeleteGorgeous, wonderfully shabby chic and elegant.
ReplyDeleteA beautiful mixed media piece Gee, the colours are wonderful, I love the layout and I loved seeing how you pulled it all together. The flowers are gorgeous - another thing added to my wish list! Great tutorial too.. Anne xx
ReplyDeleteGeorgie this is fabulous and so wonderful! Thanks so much for the step by step. Love seeing how you make such gorgeousness! hugs,
ReplyDelete~kim
Fabulous card, Georgie! Love your dreamy soft colours and amazing flowers! Thank you so much for a great step by step! I am so inspired!
ReplyDeleteHugs! Branka xxx
A lovely step by step... it's always great to hear the thinking behind a piece, especially one this pretty.
ReplyDeleteAlison x
Fabulous mixed media card, Georgie! And you make it look so easy with your easy to follow tutorial. Those punches are at the top of my list now! Pretty colors and a wonderful composition on your card! Thank you for sharing your steps with us! Hugs!
ReplyDeleteSo very sweet of you to do this amazing step x step. What a wonderful way to learn how to create layered elements for a mixed media design. Thanks bunches Gee! You are awesome sauce! Hugz to you muffin! ~Niki
ReplyDeleteI'm a newbie to mixed media so I'm very thankful you posted this. I'm going to refer to it again, I'm sure!
ReplyDeleteBrilliant project Georgie and a super step by step with wonderful techniques!! Love the finished result and those flowers look fantastic!!
ReplyDeleteFabulous project Georgie! The delicate colours are beautiful. Sue C
ReplyDeleteWatching the transformation is just fascinating! Thank you, Georgie, for all the time and effort to photograph and blog the step-by-step process involved in the creation of this beautiful piece of art!! Enjoy your day! Hugs, Darnell
ReplyDeleteGeorgie, this is incredibly beautiful and I love that you showed us step by step how to achieve this look. Fantastic tutorial!
ReplyDeleteWonderful step-out! Thanks for sharing your thoughts along the way - very helpful! And love your result - really gorgeous! xx Lynn
ReplyDeleteGorgeous Georgie, thanks so much for walking us through your creative process!
ReplyDeleteA fabulous step by step Georgie and wonderful to see your mixed media process. I agree with you about the painting going from dark to light. The flowers are just wonderful and I love the whole effect you have created. Thank you for sharing x
ReplyDeleteAbsolutely gorgeous!!! This is beyond stunning and so cool to see your process. You're so talented!
ReplyDeleteYour mixed media piece is GORGEOUS, Georgie! I loved getting a close up look inside your techniques. The background is perfection and every single element is perfectly placed! You are amazing!!
ReplyDeleteHugs,
Nancy